Introducing the Shell
Overview
Teaching: 5 min
Exercises: 0 minQuestions
What is a command shell and why would I use one?
Objectives
Explain how the shell relates to the keyboard, the screen, the operating system, and users’ programs.
Explain when and why command-line interfaces should be used instead of graphical interfaces.
Background
Humans and computers commonly interact in many different ways, such as through a keyboard and mouse, touch screen interfaces, or using speech recognition systems. The most widely used way to interact with personal computers is called a graphical user interface (GUI). With a GUI, we give instructions by clicking a mouse and using menu-driven interactions.
While the visual aid of a GUI makes it intuitive to learn, this way of delivering instructions to a computer scales very poorly. Imagine the following task: for a literature search, you have to copy the third line of one thousand text files in one thousand different directories and paste it into a single file. Using a GUI, you would not only be clicking at your desk for several hours, but you could potentially also commit an error in the process of completing this repetitive task. This is where we take advantage of the Unix shell. The Unix shell is both a command-line interface (CLI) and a scripting language, allowing such repetitive tasks to be done automatically and fast. With the proper commands, the shell can repeat tasks with or without some modification as many times as we want. Using the shell, the task in the literature example can be accomplished in seconds.
The Shell
The shell is a program where users can type commands. With the shell, it’s possible to invoke complicated programs like climate modeling software or simple commands that create an empty directory with only one line of code. The most popular Unix shell is Bash (the Bourne Again SHell — so-called because it’s derived from a shell written by Stephen Bourne). Bash is the default shell on most modern implementations of Unix and in most packages that provide Unix-like tools for Windows.
Using the shell will take some effort and some time to learn. While a GUI presents you with choices to select, CLI choices are not automatically presented to you, so you must learn a few commands like new vocabulary in a language you’re studying. However, unlike a spoken language, a small number of “words” (i.e. commands) gets you a long way, and we’ll cover those essential few today.
The grammar of a shell allows you to combine existing tools into powerful pipelines and handle large volumes of data automatically. Sequences of commands can be written into a script, improving the reproducibility of workflows.
In addition, the command line is often the easiest way to interact with remote machines and supercomputers. Familiarity with the shell is near essential to run a variety of specialized tools and resources including high-performance computing systems. As clusters and cloud computing systems become more popular for scientific data crunching, being able to interact with the shell is becoming a necessary skill. We can build on the command-line skills covered here to tackle a wide range of scientific questions and computational challenges.
Let’s get started.
When the shell is first opened, you are presented with a prompt, indicating that the shell is waiting for input.
$
The shell typically uses $ as the prompt, but may use a different symbol.
In the examples for this lesson, we’ll show the prompt as $ .
Most importantly:
when typing commands, either from these lessons or from other sources,
do not type the prompt, only the commands that follow it.
Also note that after you type a command, you have to press the Enter key to execute it.
Changing your prompt
Your prompt may be super long (containing your username, computer name, etc.). To change your prompt type in:
$ export PS1= ">"This will last as long as the length of your shell session.
The prompt is followed by a text cursor, a character that indicates the position where your typing will appear. The cursor is usually a flashing or solid block, but it can also be an underscore or a pipe. You may have seen it in a text editor program, for example.
So let’s try our first command, ls which is short for listing.
This command will list the contents of the current directory:
$ ls
Desktop     Downloads   Movies      Pictures
Documents   Library     Music       Public
Command not found
If the shell can’t find a program whose name is the command you typed, it will print an error message such as:
$ ksks: command not foundThis might happen if the command was mis-typed or if the program corresponding to that command is not installed.
Exercise Pipeline: A Typical Problem
Throughout this workshop lesson, we will make progress on developing a programmatic pipeline on the files in “ex-files”. In the folder exercise files, there are 1520 text files.
The goal of the pipeline is to run all 1520 files through an imaginary program called goostats.sh.
If we run goostats.sh by hand using a GUI,
we’ll have to select and open a file 1520 times.
If goostats.sh takes 30 seconds to run each file, the whole process will take more than 12 hours.
With the shell, we can instead assign the computer this mundane task.
The next few lessons will explore the ways we can achieve this.
More specifically, how we can use a command shell to run the goostats.sh program,
using loops to automate the repetitive steps of entering file names,
so that the computer can work without consistent supervision.
Once we has put a processing pipeline together, we could use it again.
In order to achieve this task, we needs to know how to:
- navigate to a file/directory
- create a file/directory
- check the length of a file
- chain commands together
- retrieve a set of files
- iterate over files
- run a shell script containing our pipeline
Key Points
A shell is a program whose primary purpose is to read commands and run other programs.
This lesson uses Bash, the default shell in many implementations of Unix.
Programs can be run in Bash by entering commands at the command-line prompt.
The shell’s main advantages are its high action-to-keystroke ratio, its support for automating repetitive tasks, and its capacity to access networked machines.
The shell’s main disadvantages are its primarily textual nature and how cryptic its commands and operation can be.
Navigating Files and Directories
Overview
Teaching: 30 min
Exercises: 10 minQuestions
How can I move around on my computer?
How can I see what files and directories I have?
How can I specify the location of a file or directory on my computer?
Objectives
Explain the similarities and differences between a file and a directory.
Translate an absolute path into a relative path and vice versa.
Construct absolute and relative paths that identify specific files and directories.
Use options and arguments to change the behaviour of a shell command.
Demonstrate the use of tab completion and explain its advantages.
The part of the operating system responsible for managing files and directories is called the file system. It organizes our data into files, which hold information, and directories (also called ‘folders’), which hold files or other directories.
Several commands are frequently used to create, inspect, rename, and delete files and directories. To start exploring them, we’ll go to our open shell window.
First, let’s find out where we are by running a command called pwd
(which stands for ‘print working directory’). Directories are like places — at any time
while we are using the shell, we are in exactly one place called
our current working directory. Commands mostly read and write files in the
current working directory, i.e. ‘here’, so knowing where you are before running
a command is important. pwd shows you where you are:
$ pwd
/Users/scully
Here,
the computer’s response is /Users/scully,
which is Scully’s home directory:
Home Directory Variation
The home directory path will look different on different operating systems. On Linux, it may look like
/home/scully, and on Windows, it will be similar toC:\Documents and Settings\scullyorC:\Users\scully. (Note that it may look slightly different for different versions of Windows.) In future examples, we’ve used Mac output as the default - Linux and Windows output may differ slightly but should be generally similar.We will also assume that your
pwdcommand returns your user’s home directory. Ifpwdreturns something different, you may need to navigate there usingcdor some commands in this lesson will not work as written. See Exploring Other Directories for more details on thecdcommand.
To understand what a ‘home directory’ is, let’s have a look at how the file system as a whole is organized. For the sake of this example, we’ll be illustrating the filesystem on Scully’s computer. After this illustration, you’ll be learning commands to explore your own filesystem, which will be constructed in a similar way, but not be exactly identical.
On Scully’s computer, the filesystem looks like this:

At the top is the root directory
that holds everything else.
We refer to it using a slash character, /, on its own;
this character is the leading slash in /Users/scully.
Inside that directory are several other directories:
bin (which is where some built-in programs are stored),
data (for miscellaneous data files),
Users (where users’ personal directories are located),
tmp (for temporary files that don’t need to be stored long-term),
and so on.
We know that our current working directory /Users/scully is stored inside /Users
because /Users is the first part of its name.
Similarly,
we know that /Users is stored inside the root directory /
because its name begins with /.
Slashes
Notice that there are two meanings for the
/character. When it appears at the front of a file or directory name, it refers to the root directory. When it appears inside a path, it’s just a separator.
Underneath /Users,
we find one directory for each user with an account on scully’s machine,
her colleagues Mulder and Skinner.

The user Mulder’s files are stored in /Users/mulder,
user Skinner’s in /Users/skinner,
and Scully’s in /Users/scully. Because Scully is the user in our
examples here, therefore we get /Users/scully as our home directory.
Typically, when you open a new command prompt, you will be in
your home directory to start.
Now let’s learn the command that will let us see the contents of our
own filesystem. We can see what’s in our home directory by running ls:
$ ls
Applications Documents    Library      Music        Public
Desktop      Downloads    Movies       Pictures
(Again, your results may be slightly different depending on your operating system and how you have customized your filesystem.)
ls prints the names of the files and directories in the current directory.
We can make its output more comprehensible by using the -F option
which tells ls to classify the output
by adding a marker to file and directory names to indicate what they are:
- a trailing
/indicates that this is a directory @indicates a link*indicates an executable
Depending on your shell’s default settings, the shell might also use colors to indicate whether each entry is a file or directory.
$ ls -F
Applications/ Documents/    Library/      Music/        Public/
Desktop/      Downloads/    Movies/       Pictures/
Here, we can see that our home directory contains only sub-directories. Any names in our output that don’t have a classification symbol are plain old files.
Clearing your terminal
If your screen gets too cluttered, you can clear your terminal using the
clearcommand. You can still access previous commands using ↑ and ↓ to move line-by-line, or by scrolling in your terminal.
Getting help
ls has lots of other options. There are two common ways to find out how
to use a command and what options it accepts —
depending on your environment, you might find that only one of these ways works:
- We can pass a
--helpoption to the command (not available on macOS), such as:$ ls --help - We can read its manual with
man(not available in Git Bash), such as:$ man ls
We’ll describe both ways next.
The --help option
Most bash commands and programs that people have written to be
run from within bash, support a --help option that displays more
information on how to use the command or program.
$ ls --help
Usage: ls [OPTION]... [FILE]...
List information about the FILEs (the current directory by default).
Sort entries alphabetically if neither -cftuvSUX nor --sort is specified.

Mandatory arguments to long options are mandatory for short options, too.
  -a, --all                  do not ignore entries starting with .
  -A, --almost-all           do not list implied . and ..
      --author               with -l, print the author of each file
  -b, --escape               print C-style escapes for nongraphic characters
      --block-size=SIZE      scale sizes by SIZE before printing them; e.g.,
                               '--block-size=M' prints sizes in units of
                               1,048,576 bytes; see SIZE format below
  -B, --ignore-backups       do not list implied entries ending with ~
  -c                         with -lt: sort by, and show, ctime (time of last
                               modification of file status information);
                               with -l: show ctime and sort by name;
                               otherwise: sort by ctime, newest first
  -C                         list entries by columns
      --color[=WHEN]         colorize the output; WHEN can be 'always' (default
                               if omitted), 'auto', or 'never'; more info below
  -d, --directory            list directories themselves, not their contents
  -D, --dired                generate output designed for Emacs' dired mode
  -f                         do not sort, enable -aU, disable -ls --color
  -F, --classify             append indicator (one of */=>@|) to entries
...        ...        ...
Unsupported command-line options
If you try to use an option that is not supported,
lsand other commands will usually print an error message similar to:$ ls -jls: invalid option -- 'j' Try 'ls --help' for more information.
The man command
The other way to learn about ls is to type
$ man ls
This command will turn your terminal into a page with a description
of the ls command and its options.
To navigate through the man pages,
you may use ↑ and ↓ to move line-by-line,
or try B and Spacebar to skip up and down by a full page.
To search for a character or word in the man pages,
use / followed by the character or word you are searching for.
Sometimes a search will result in multiple hits.
If so, you can move between hits using N (for moving forward) and
Shift+N (for moving backward).
To quit the man pages, press Q.
Manual pages on the web
Of course, there is a third way to access help for commands: searching the internet via your web browser. When using internet search, including the phrase
unix man pagein your search query will help to find relevant results.GNU provides links to its manuals including the core GNU utilities, which covers many commands introduced within this lesson.
Exploring More
lsFlagsYou can also use two options at the same time. What does the command
lsdo when used with the-loption? What about if you use both the-land the-hoption?Some of its output is about properties that we do not cover in this lesson (such as file permissions and ownership), but the rest should be useful nevertheless.
Solution
The
-loption makeslsuse a long listing format, showing not only the file/directory names but also additional information, such as the file size and the time of its last modification. If you use both the-hoption and the-loption, this makes the file size ‘human readable’, i.e. displaying something like5.3Kinstead of5369.
Listing in Reverse Chronological Order
By default,
lslists the contents of a directory in alphabetical order by name. The commandls -tlists items by time of last change instead of alphabetically. The commandls -rlists the contents of a directory in reverse order. Which file is displayed last when you combine the-tand-roptions? Hint: You may need to use the-loption to see the last changed dates.Solution
The most recently changed file is listed last when using
-rt. This can be very useful for finding your most recent edits or checking to see if a new output file was written.
Exploring Other Directories
Below is a directory tree of the folder shell-lesson-data. As you follow along the lesson and maneuver in this folder, use the below image as a guide.

.zip Files
When you download files, the file may be in a compressed folder or a ZIP file. You can identify a compresed file with a
.zipextension. In order to access the file contents with the shell, you need up unzip the file first.
Not only can we use ls on the current working directory,
but we can use it to list the contents of a different directory.
Let’s take a look at our Desktop directory by running ls -F Desktop,
i.e.,
the command ls with the -F option and the argument Desktop.
The argument Desktop tells ls that
we want a listing of something other than our current working directory:
$ ls -F Desktop
shell-lesson-data/
Note that if a directory named Desktop does not exist in your current working directory,
this command will return an error. Typically, a Desktop directory exists in your
home directory, which we assume is the current working directory of your bash shell.
Your output should be a list of all the files and sub-directories in your
Desktop directory, including the shell-lesson-data directory you downloaded at
the setup for this lesson.
On many systems,
the command line Desktop directory is the same as your GUI Desktop.
Take a look at your Desktop to confirm that your output is accurate.
As you may now see, using a bash shell is strongly dependent on the idea that your files are organized in a hierarchical file system. Organizing things hierarchically in this way helps us keep track of our work: it’s possible to put hundreds of files in our home directory, just as it’s possible to pile hundreds of printed papers on our desk, but it’s a self-defeating strategy.
Now that we know the shell-lesson-data directory is located in our Desktop directory, we
can do two things.
First, we can look at its contents, using the same strategy as before, passing
a directory name to ls:
$ ls -F Desktop/shell-lesson-data
ex-data/ ex-files/
Second, we can actually change our location to a different directory, so we are no longer located in our home directory.
The command to change locations is cd followed by a
directory name to change our working directory.
cd stands for ‘change directory’,
which is a bit misleading:
the command doesn’t change the directory;
it changes the shell’s idea of what directory we are in.
The cd command is akin to double-clicking a folder in a graphical interface to get into a folder.
Let’s say we want to move to the data directory we saw above. We can
use the following series of commands to get there:
$ cd Desktop
$ cd shell-lesson-data
$ cd ex-data
These commands will move us from our home directory into our Desktop directory, then into
the shell-lesson-data directory, then into the ex-data directory.
You will notice that cd doesn’t print anything. This is normal.
Many shell commands will not output anything to the screen when successfully executed.
But if we run pwd after it, we can see that we are now
in /Users/scully/Desktop/shell-lesson-data/ex-data.
If we run ls -F without arguments now,
it lists the contents of /Users/scully/Desktop/shell-lesson-data/ex-data,
because that’s where we now are:
$ pwd
/Users/scully/Desktop/shell-lesson-data/ex-data
$ ls -F
csv/ generic/ numbers.txt protein/ text/
We now know how to go down the directory tree (i.e. how to go into a subdirectory), but how do we go up (i.e. how do we leave a directory and go into its parent directory)? We might try the following:
$ cd shell-lesson-data
-bash: cd: shell-lesson-data: No such file or directory
But we get an error! Why is this?
With our methods so far,
cd can only see sub-directories inside your current directory. There are
different ways to see directories above your current location; we’ll start
with the simplest.
There is a shortcut in the shell to move up one directory level that looks like this:
$ cd ..
.. is a special directory name meaning
“the directory containing this one”,
or more succinctly,
the parent of the current directory.
Sure enough,
if we run pwd after running cd .., we’re back in /Users/scully/Desktop/shell-lesson-data:
$ pwd
/Users/scully/Desktop/shell-lesson-data
The special directory .. doesn’t usually show up when we run ls. If we want
to display it, we can add the -a option to ls -F:
$ ls -F -a
./ ../ ex-data/ ex-files/
-a stands for ‘show all’;
it forces ls to show us file and directory names that begin with .,
such as .. (which, if we’re in /Users/scully, refers to the /Users directory).
As you can see,
it also displays another special directory that’s just called .,
which means ‘the current working directory’.
It may seem redundant to have a name for it,
but we’ll see some uses for it soon.
Note that in most command line tools, multiple options can be combined
with a single - and no spaces between the options: ls -F -a is
equivalent to ls -Fa.
Other Hidden Files
In addition to the hidden directories
..and., you may also see a file called.bash_profile. This file usually contains shell configuration settings. You may also see other files and directories beginning with.. These are usually files and directories that are used to configure different programs on your computer. The prefix.is used to prevent these configuration files from cluttering the terminal when a standardlscommand is used.
These three commands are the basic commands for navigating the filesystem on your computer:
pwd, ls, and cd. Let’s explore some variations on those commands. What happens
if you type cd on its own, without giving
a directory?
$ cd
How can you check what happened? pwd gives us the answer!
$ pwd
/Users/scully
It turns out that cd without an argument will return you to your home directory,
which is great if you’ve got lost in your own filesystem.
Let’s try returning to the ex-data directory from before. Last time, we used
three commands, but we can actually string together the list of directories
to move to ex-data in one step:
$ cd Desktop/shell-lesson-data/ex-data
Check that we’ve moved to the right place by running pwd and ls -F.
If we want to move up one level from the data directory, we could use cd ... But
there is another way to move to any directory, regardless of your
current location.
So far, when specifying directory names, or even a directory path (as above),
we have been using relative paths. When you use a relative path with a command
like ls or cd, it tries to find that location from where we are,
rather than from the root of the file system.
However, it is possible to specify the absolute path to a directory by
including its entire path from the root directory, which is indicated by a
leading slash. The leading / tells the computer to follow the path from
the root of the file system, so it always refers to exactly one directory,
no matter where we are when we run the command.
This allows us to move to our shell-lesson-data directory from anywhere on
the filesystem (including from inside ex-data). To find the absolute path
we’re looking for, we can use pwd and then extract the piece we need
to move to shell-lesson-data.
$ pwd
/Users/scully/Desktop/shell-lesson-data/ex-data
$ cd /Users/scully/Desktop/shell-lesson-data
Remember to replace the example name “Scully” with the one on your device. Run pwd and ls -F to ensure that we’re in the directory we expect.
Two More Shortcuts
The shell interprets a tilde (
~) character at the start of a path to mean “the current user’s home directory”. For example, if Scully’s home directory is/Users/scully, then~/datais equivalent to/Users/scully/data. This only works if it is the first character in the path:here/there/~/elsewhereis nothere/there/Users/scully/elsewhere.Another shortcut is the
-(dash) character.cdwill translate-into the previous directory I was in, which is faster than having to remember, then type, the full path. This is a very efficient way of moving back and forth between two directories – i.e. if you executecd -twice, you end up back in the starting directory.The difference between
cd ..andcd -is that the former brings you up, while the latter brings you back.
Try it! First navigate to
~/Desktop/shell-lesson-data(you should already be there).$ cd ~/Desktop/shell-lesson-dataThen
cdinto theex-data/textdirectory$ cd ls ex-data/textNow if you run
$ cd -you’ll see you’re back in
~/Desktop/shell-lesson-data. Runcd -again and you’re back in~/Desktop/shell-lesson-data/ex-data/text
Absolute vs Relative Paths
Starting from
/Users/xyz/data, which of the following commands could Xyz use to navigate to their home directory, which is/Users/xyz?
cd .cd /cd /home/xyzcd ../..cd ~cd homecd ~/data/..cdcd ..Solution
- No:
.stands for the current directory.- No:
/stands for the root directory.- No: Xyz’s home directory is
/Users/xyz.- No: this command goes up two levels, i.e. ends in
/Users.- Yes:
~stands for the user’s home directory, in this case/Users/xyz.- No: this command would navigate into a directory
homein the current directory if it exists.- Yes: unnecessarily complicated, but correct.
- Yes: shortcut to go back to the user’s home directory.
- Yes: goes up one level.
Relative Path Resolution
Using the filesystem diagram below, if
pwddisplays/Users/thing, what willls -F ../backupdisplay?
../backup: No such file or directory2012-12-01 2013-01-08 2013-01-272012-12-01/ 2013-01-08/ 2013-01-27/original/ pnas_final/ pnas_sub/
Solution
- No: there is a directory
backupin/Users.- No: this is the content of
Users/thing/backup, but with.., we asked for one level further up.- No: see previous explanation.
- Yes:
../backup/refers to/Users/backup/.

lsReading ComprehensionUsing the filesystem diagram below, if
pwddisplays/Users/backup, and-rtellslsto display things in reverse order, what command(s) will result in the following output:pnas_sub/ pnas_final/ original/
ls pwdls -r -Fls -r -F /Users/backupSolution
- No:
pwdis not the name of a directory.- Yes:
lswithout directory argument lists files and directories in the current directory.- Yes: uses the absolute path explicitly.
Try Exploring
Move around the computer, get used to moving in and out of directories, see how different file types appear in the Unix shell. Be sure to use the pwd and cd commands, and the different flags for the ls command you learned so far.
Move into the ‘shell-lesson-data’ directory that you downloaded to prepare for this workshop. How many files are there? How large is each one? When were they created?
If you run Windows, also try typing explorer
.to open Explorer for the current directory (the single dot means “current directory”). If you’re on a Mac, tryopen .and for Linux tryxdg-open .to open their graphical file manager.
If we ever get completely lost, the command cd without any arguments will bring us right back to the home directory, the place where we started.
General Syntax of a Shell Command
We have now encountered commands, options, and arguments, but it is perhaps useful to formalise some terminology.
Consider the command below as a general example of a command, which we will dissect into its component parts:
$ ls -F /

ls is the command, with an option -F and an
argument /.
We’ve already encountered options which
either start with a single dash (-) or two dashes (--),
and they change the behavior of a command.
Arguments tell the command what to operate on (e.g. files and directories).
Sometimes options and arguments are referred to as parameters.
A command can be called with more than one option and more than one argument, but a
command doesn’t always require an argument or an option.
You might sometimes see options being referred to as switches or flags, especially for options that take no argument. In this lesson we will stick with using the term option.
Each part is separated by spaces: if you omit the space
between ls and -F the shell will look for a command called ls-F, which
doesn’t exist. Also, capitalization can be important.
For example, ls -s will display the size of files and directories alongside the names,
while ls -S will sort the files and directories by size, as shown below:
$ cd ~/Desktop/shell-lesson-data
$ ls -s ex-data
total 1
0 csv/  0 generic/  1 numbers.txt  0 protein/  0 text/
$ ls -S ex-data
numbers.txt csv/ generic/ protein/ text/
Putting all that together, our command above gives us a listing
of files and directories in the root directory /.
An example of the output you might get from the above command is given below:
$ ls -F /
Applications/         System/
Library/              Users/
Network/              Volumes/
Using the
echocommandThe echo command simply prints out a text you specify. Try it out: echo “Hello World!”. You can combine both text and normal shell commands using echo, for example the pwd command you have learned earlier today. You do this by enclosing a shell command in $( and ), for instance $(pwd). Now, try out the following:
echo "Finally, it is nice and sunny on" $(date).Do you think the echo command is actually quite important in the shell environment? Why or why not?
Solution
The command is useful for writing automated shell scripts. For instance, you often need to output text to the screen, such as the current status of a script.
Exercise Pipeline: Organizing Files
Knowing this much about files and directories, we are ready to organize the files.
The directory called ex-files
which will contain the data files and data processing scripts.
Each file has a unique ten-character ID, such as ‘NENE01729A’.
Now in the current directory shell-lesson-data,
we can see what files we have using the command:
$ ls ex-files/
This command is a lot to type, but we can let the shell do most of the work through what is called tab completion. If we types:
$ ls ex-f
and then presses Tab (the tab key on her keyboard), the shell automatically completes the directory name for us:
$ ls ex-files/
Pressing Tab again does nothing, since there are multiple possibilities; pressing Tab twice brings up a list of all the files.
If we adds G and presses Tab again, the shell will append ‘goo’ since all files that start with ‘g’ share the first three characters ‘goo’.
$ ls ex-files/goo
To see all of those files, we can press Tab twice more.
ls ex-files/goo
goodiff.sh   goostats.sh
This is called tab completion, and we will see it in many other tools as we go on.
Key Points
The file system is responsible for managing information on the disk.
Information is stored in files, which are stored in directories (folders).
Directories can also store other directories, which then form a directory tree.
pwdprints the user’s current working directory.
ls [path]prints a listing of a specific file or directory;lson its own lists the current working directory.
cd [path]changes the current working directory.Most commands take options that begin with a single
-.Directory names in a path are separated with
/on Unix, but\on Windows.
/on its own is the root directory of the whole file system.An absolute path specifies a location from the root of the file system.
A relative path specifies a location starting from the current location.
.on its own means ‘the current directory’;..means ‘the directory above the current one’.
Working With Files and Directories
Overview
Teaching: 25 min
Exercises: 20 minQuestions
How can I create, copy, and delete files and directories?
How can I edit files?
Objectives
Create a directory hierarchy that matches a given diagram.
Create files in that hierarchy using an editor or by copying and renaming existing files.
Delete, copy and move specified files and/or directories.
Creating directories
We now know how to explore files and directories, but how do we create them in the first place?
In this episode we will learn about creating and moving files and directories,
using the ex-data/text directory as an example.
Step one: see where we are and what we already have
We should still be in the shell-lesson-data directory on the Desktop,
which we can check using:
$ pwd
/Users/scully/Desktop/shell-lesson-data
Next we’ll move to the ex-data/text directory and see what it contains:
$ cd ex-data/text/
$ ls -F
haiku.txt LittleWomen.txt
Create a directory
Let’s create a new directory called thesis using the command mkdir thesis
(which has no output):
$ mkdir thesis
As you might guess from its name,
mkdir means ‘make directory’.
Since thesis is a relative path
(i.e., does not have a leading slash, like /what/ever/thesis),
the new directory is created in the current working directory:
$ ls -F
haiku.txt LittleWomen.txt thesis/
Since we’ve just created the thesis directory, there’s nothing in it yet:
$ ls -F thesis
Note that mkdir is not limited to creating single directories one at a time.
The -p option allows mkdir to create a directory with nested subdirectories
in a single operation:
$ mkdir -p ../project/data ../project/results
The -R option to the ls command will list all nested subdirectories within a directory.
Let’s use ls -FR to recursively list the new directory hierarchy we just created in the
project directory:
$ ls -FR ../project
../project/:
data/  results/

../project/data:

../project/results:
Two ways of doing the same thing
Using the shell to create a directory is no different than using a file explorer. If you open the current directory using your operating system’s graphical file explorer, the
thesisdirectory will appear there too. While the shell and the file explorer are two different ways of interacting with the files, the files and directories themselves are the same.
Good names for files and directories
Complicated names of files and directories can make your life painful when working on the command line. Here we provide a few useful tips for the names of your files and directories.
Don’t use spaces.
Spaces can make a name more meaningful, but since spaces are used to separate arguments on the command line it is better to avoid them in names of files and directories. You can use
-or_instead (e.g.ex-files/rather thanex files/). To test this out, try typingmkdir ex filesand see what directory (or directories!) are made when you check withls -F.Don’t begin the name with
-(dash).Commands treat names starting with
-as options.Stick with letters, numbers,
.(period or ‘full stop’),-(dash) and_(underscore).Many other characters have special meanings on the command line. We will learn about some of these during this lesson. There are special characters that can cause your command to not work as expected and can even result in data loss.
If you need to refer to names of files or directories that have spaces or other special characters, you should surround the name in quotes (
"").
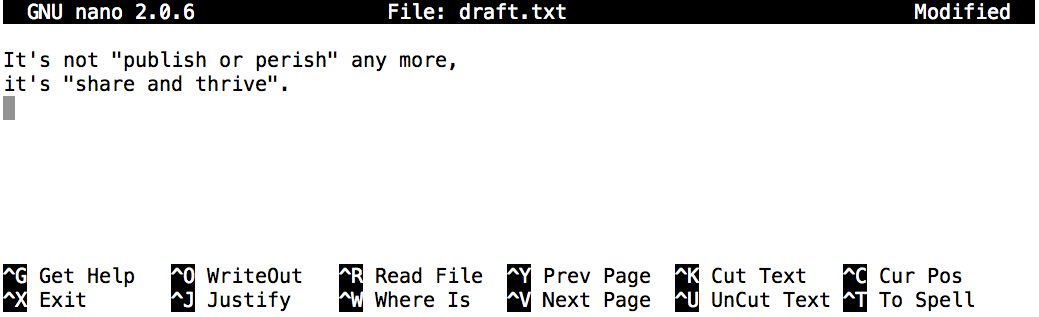
Create a text file
Let’s change our working directory to thesis using cd,
then run a text editor called Nano to create a file called draft.txt:
$ cd thesis
$ nano draft.txt
Which Editor?
When we say, ‘
nanois a text editor’ we really do mean ‘text’: it can only work with plain character data, not tables, images, or any other human-friendly media. We use it in examples because it is one of the least complex text editors. However, because of this trait, it may not be powerful enough or flexible enough for the work you need to do after this workshop. On Unix systems (such as Linux and macOS), many programmers use Emacs or Vim (both of which require more time to learn), or a graphical editor such as Gedit. On Windows, you may wish to use Notepad++. Windows also has a built-in editor callednotepadthat can be run from the command line in the same way asnanofor the purposes of this lesson.No matter what editor you use, you will need to know where it searches for and saves files. If you start it from the shell, it will (probably) use your current working directory as its default location. If you use your computer’s start menu, it may want to save files in your desktop or documents directory instead. You can change this by navigating to another directory the first time you ‘Save As…’
Let’s type in a few lines of text.
Once we’re happy with our text, we can press Ctrl+O
(press the Ctrl or Control key and, while
holding it down, press the O key) to write our data to disk
(we’ll be asked what file we want to save this to:
press Return to accept the suggested default of draft.txt).
Once our file is saved, we can use Ctrl+X to quit the editor and return to the shell.
Control, Ctrl, or ^ Key
The Control key is also called the ‘Ctrl’ key. There are various ways in which using the Control key may be described. For example, you may see an instruction to press the Control key and, while holding it down, press the X key, described as any of:
Control-XControl+XCtrl-XCtrl+X^XC-xIn nano, along the bottom of the screen you’ll see
^G Get Help ^O WriteOut. This means that you can useControl-Gto get help andControl-Oto save your file.
nano doesn’t leave any output on the screen after it exits,
but ls now shows that we have created a file called draft.txt:
$ ls
draft.txt
Creating Files a Different Way
We have seen how to create text files using the
nanoeditor. Now, try the following command:$ touch my_file.txt
What did the
touchcommand do? When you look at your current directory using the GUI file explorer, does the file show up?Use
ls -lto inspect the files. How large ismy_file.txt?When might you want to create a file this way?
Solution
The
touchcommand generates a new file calledmy_file.txtin your current directory. You can observe this newly generated file by typinglsat the command line prompt.my_file.txtcan also be viewed in your GUI file explorer.When you inspect the file with
ls -l, note that the size ofmy_file.txtis 0 bytes. In other words, it contains no data. If you openmy_file.txtusing your text editor it is blank.Some programs do not generate output files themselves, but instead require that empty files have already been generated. When the program is run, it searches for an existing file to populate with its output. The touch command allows you to efficiently generate a blank text file to be used by such programs.
We will not be needing my_file.txt, so please remove it with the following “remove” command:
rm thesis/my_file.txt
ls thesis
What’s In A Name?
You may have noticed that all of Scully’s files are named ‘something dot something’, and in this part of the lesson, we always used the extension
.txt. This is just a convention: we can call a filemythesisor almost anything else we want. However, most people use two-part names most of the time to help them (and their programs) tell different kinds of files apart. The second part of such a name is called the filename extension and indicates what type of data the file holds:.txtsignals a plain text file,.cfgis a configuration file full of parameters for some program or other,.pngis a PNG image, and so on.This is just a convention, albeit an important one. Files contain bytes: it’s up to us and our programs to interpret those bytes according to the rules for plain text files, PDF documents, configuration files, images, and so on.
Naming a PNG image of a whale as
whale.mp3doesn’t somehow magically turn it into a recording of whale song, though it might cause the operating system to try to open it with a music player when someone double-clicks it.
Moving files and directories
Returning to the shell-lesson-data/ex-data/text directory,
$ cd ~/Desktop/shell-lesson-data/ex-data/text
In our thesis directory we have a file draft.txt
which isn’t a particularly informative name,
so let’s change the file’s name using mv,
which is short for ‘move’:
$ mv thesis/draft.txt thesis/quotes.txt
The first argument tells mv what we’re ‘moving’,
while the second is where it’s to go.
In this case,
we’re moving thesis/draft.txt to thesis/quotes.txt,
which has the same effect as renaming the file.
Sure enough,
ls shows us that thesis now contains one file called quotes.txt:
$ ls thesis
quotes.txt
One must be careful when specifying the target file name, since mv will
silently overwrite any existing file with the same name, which could
lead to data loss. An additional option, mv -i (or mv --interactive),
can be used to make mv ask you for confirmation before overwriting.
Note that mv also works on directories.
Let’s move quotes.txt into the current working directory.
We use mv once again,
but this time we’ll use just the name of a directory as the second argument
to tell mv that we want to keep the filename
but put the file somewhere new.
(This is why the command is called ‘move’.)
In this case,
the directory name we use is the special directory name . that we mentioned earlier.
$ mv thesis/quotes.txt .
The effect is to move the file from the directory it was in to the current working directory.
ls now shows us that thesis is empty:
$ ls thesis
$
Alternatively, we can confirm the file quotes.txt is no longer present in the thesis directory
by explicitly trying to list it:
$ ls thesis/quotes.txt
ls: cannot access 'thesis/quotes.txt': No such file or directory
ls with a filename or directory as an argument only lists the requested file or directory.
If the file given as the argument doesn’t exist, the shell returns an error as we saw above.
We can use this to see that quotes.txt is now present in our current directory:
$ ls quotes.txt
quotes.txt
Moving Files to a new folder
After running the following commands, Jamie realizes that she put the files
sucrose.datandmaltose.datinto the wrong folder. The files should have been placed in therawfolder.$ ls -F analyzed/ raw/ $ ls -F analyzed fructose.dat glucose.dat maltose.dat sucrose.dat $ cd analyzedFill in the blanks to move these files to the
raw/folder (i.e. the one she forgot to put them in)$ mv sucrose.dat maltose.dat ____/____Solution
$ mv sucrose.dat maltose.dat ../rawRecall that
..refers to the parent directory (i.e. one above the current directory) and that.refers to the current directory.
Copying files and directories
The cp command works very much like mv,
except it copies a file instead of moving it.
We can check that it did the right thing using ls
with two paths as arguments — like most Unix commands,
ls can be given multiple paths at once:
$ cp quotes.txt thesis/quotations.txt
$ ls quotes.txt thesis/quotations.txt
quotes.txt thesis/quotations.txt
We can also copy a directory and all its contents by using the
recursive option -r,
e.g. to back up a directory:
$ cp -r thesis thesis_backup
We can check the result by listing the contents of both the thesis and thesis_backup directory:
$ ls thesis thesis_backup
thesis:
quotations.txt

thesis_backup:
quotations.txt
Renaming Files
Suppose that you created a plain-text file in your current directory to contain a list of the statistical tests you will need to do to analyze your data, and named it:
statstics.txtAfter creating and saving this file you realize you misspelled the filename! You want to correct the mistake, which of the following commands could you use to do so?
cp statstics.txt statistics.txtmv statstics.txt statistics.txtmv statstics.txt .cp statstics.txt .Solution
- No. While this would create a file with the correct name, the incorrectly named file still exists in the directory and would need to be deleted.
- Yes, this would work to rename the file.
- No, the period(.) indicates where to move the file, but does not provide a new file name; identical file names cannot be created.
- No, the period(.) indicates where to copy the file, but does not provide a new file name; identical file names cannot be created.
Moving and Copying
What is the output of the closing
lscommand in the sequence shown below?$ pwd/Users/jamie/data$ lsproteins.dat$ mkdir recombined $ mv proteins.dat recombined/ $ cp recombined/proteins.dat ../proteins-saved.dat $ ls
proteins-saved.dat recombinedrecombinedproteins.dat recombinedproteins-saved.datSolution
We start in the
/Users/jamie/datadirectory, and create a new folder calledrecombined. The second line moves (mv) the fileproteins.datto the new folder (recombined). The third line makes a copy of the file we just moved. The tricky part here is where the file was copied to. Recall that..means ‘go up a level’, so the copied file is now in/Users/jamie. Notice that..is interpreted with respect to the current working directory, not with respect to the location of the file being copied. So, the only thing that will show using ls (in/Users/jamie/data) is the recombined folder.
- No, see explanation above.
proteins-saved.datis located at/Users/jamie- Yes
- No, see explanation above.
proteins.datis located at/Users/jamie/data/recombined- No, see explanation above.
proteins-saved.datis located at/Users/jamie
Removing files and directories
Returning to the shell-lesson-data/ex-data/text directory,
let’s tidy up this directory by removing the quotes.txt file we created.
The Unix command we’ll use for this is rm (short for ‘remove’):
$ rm quotes.txt
We can confirm the file has gone using ls:
$ ls quotes.txt
ls: cannot access 'quotes.txt': No such file or directory
Deleting Is Forever
The Unix shell doesn’t have a trash bin that we can recover deleted files from (though most graphical interfaces to Unix do). Instead, when we delete files, they are unlinked from the file system so that their storage space on disk can be recycled. Tools for finding and recovering deleted files do exist, but there’s no guarantee they’ll work in any particular situation, since the computer may recycle the file’s disk space right away.
Using
rmSafelyWhat happens when we execute
rm -i thesis_backup/quotations.txt? Why would we want this protection when usingrm?Solution
rm: remove regular file 'thesis_backup/quotations.txt'? yThe
-ioption will prompt before (every) removal (use Y to confirm deletion or N to keep the file). The Unix shell doesn’t have a trash bin, so all the files removed will disappear forever. By using the-ioption, we have the chance to check that we are deleting only the files that we want to remove.
If we try to remove the thesis directory using rm thesis,
we get an error message:
$ rm thesis
rm: cannot remove `thesis': Is a directory
This happens because rm by default only works on files, not directories.
rm can remove a directory and all its contents if we use the
recursive option -r, and it will do so without any confirmation prompts:
$ rm -r thesis
Given that there is no way to retrieve files deleted using the shell,
rm -r should be used with great caution
(you might consider adding the interactive option rm -r -i).
Operations with multiple files and directories
Oftentimes one needs to copy or move several files at once. This can be done by providing a list of individual filenames, or specifying a naming pattern using wildcards.
Copy with Multiple Filenames
For this exercise, you can test the commands in the
shell-lesson-data/ex-datadirectory.In the example below, what does
cpdo when given several filenames and a directory name?$ mkdir backup $ cp generic/a-file.dat generic/b-file.dat backup/In the example below, what does
cpdo when given three or more file names?$ cd generic $ ls -Fa-file.dat b-file.dat c-file.dat$ cp a-file.dat b-file.dat c-file.datSolution
If given more than one file name followed by a directory name (i.e. the destination directory must be the last argument),
cpcopies the files to the named directory.If given three file names,
cpthrows an error such as the one below, because it is expecting a directory name as the last argument.cp: target 'c-file.dat' is not a directory
Using wildcards for accessing multiple files at once
Wildcards
*is a wildcard, which matches zero or more characters. Let’s consider theshell-lesson-data/ex-data/proteinsdirectory:*.pdbmatchesethane.pdb,propane.pdb, and every file that ends with ‘.pdb’. On the other hand,p*.pdbonly matchespentane.pdbandpropane.pdb, because the ‘p’ at the front only matches filenames that begin with the letter ‘p’.
?is also a wildcard, but it matches exactly one character. So?ethane.pdbwould matchmethane.pdbwhereas*ethane.pdbmatches bothethane.pdb, andmethane.pdb.Wildcards can be used in combination with each other e.g.
???ane.pdbmatches three characters followed byane.pdb, givingcubane.pdb ethane.pdb octane.pdb.When the shell sees a wildcard, it expands the wildcard to create a list of matching filenames before running the command that was asked for. As an exception, if a wildcard expression does not match any file, Bash will pass the expression as an argument to the command as it is. For example, typing
ls *.pdfin theproteinsdirectory (which contains only files with names ending with.pdb) results in an error message that there is no file calledwcandlssee the lists of file names matching these expressions, but not the wildcards themselves. It is the shell, not the other programs, that deals with expanding wildcards.
List filenames matching a pattern
When run in the
proteinsdirectory, whichlscommand(s) will produce this output?
ethane.pdb methane.pdb
ls *t*ane.pdbls *t?ne.*ls *t??ne.pdbls ethane.*Solution
The solution is
3.
1.shows all files whose names contain zero or more characters (*) followed by the lettert, then zero or more characters (*) followed byane.pdb. This givesethane.pdb methane.pdb octane.pdb pentane.pdb.
2.shows all files whose names start with zero or more characters (*) followed by the lettert, then a single character (?), thenne.followed by zero or more characters (*). This will give usoctane.pdbandpentane.pdbbut doesn’t match anything which ends inthane.pdb.
3.fixes the problems of option 2 by matching two characters (??) betweentandne. This is the solution.
4.only shows files starting withethane..
More on Wildcards
Sam has a directory containing calibration data, datasets, and descriptions of the datasets:
.
├── 2015-10-23-calibration.txt
├── 2015-10-23-dataset1.txt
├── 2015-10-23-dataset2.txt
├── 2015-10-23-dataset_overview.txt
├── 2015-10-26-calibration.txt
├── 2015-10-26-dataset1.txt
├── 2015-10-26-dataset2.txt
├── 2015-10-26-dataset_overview.txt
├── 2015-11-23-calibration.txt
├── 2015-11-23-dataset1.txt
├── 2015-11-23-dataset2.txt
├── 2015-11-23-dataset_overview.txt
├── backup
│   ├── calibration
│   └── datasets
└── send_to_bob
    ├── all_datasets_created_on_a_23rd
    └── all_november_files
Before heading off to another field trip, she wants to back up her data and send some datasets to her colleague Bob. Sam uses the following commands to get the job done:
$ cp *dataset* backup/datasets
$ cp ____calibration____ backup/calibration
$ cp 2015-____-____ send_to_bob/all_november_files/
$ cp ____ send_to_bob/all_datasets_created_on_a_23rd/
Help Sam by filling in the blanks.
The resulting directory structure should look like this
.
├── 2015-10-23-calibration.txt
├── 2015-10-23-dataset1.txt
├── 2015-10-23-dataset2.txt
├── 2015-10-23-dataset_overview.txt
├── 2015-10-26-calibration.txt
├── 2015-10-26-dataset1.txt
├── 2015-10-26-dataset2.txt
├── 2015-10-26-dataset_overview.txt
├── 2015-11-23-calibration.txt
├── 2015-11-23-dataset1.txt
├── 2015-11-23-dataset2.txt
├── 2015-11-23-dataset_overview.txt
├── backup
│   ├── calibration
│   │   ├── 2015-10-23-calibration.txt
│   │   ├── 2015-10-26-calibration.txt
│   │   └── 2015-11-23-calibration.txt
│   └── datasets
│       ├── 2015-10-23-dataset1.txt
│       ├── 2015-10-23-dataset2.txt
│       ├── 2015-10-23-dataset_overview.txt
│       ├── 2015-10-26-dataset1.txt
│       ├── 2015-10-26-dataset2.txt
│       ├── 2015-10-26-dataset_overview.txt
│       ├── 2015-11-23-dataset1.txt
│       ├── 2015-11-23-dataset2.txt
│       └── 2015-11-23-dataset_overview.txt
└── send_to_bob
    ├── all_datasets_created_on_a_23rd
    │   ├── 2015-10-23-dataset1.txt
    │   ├── 2015-10-23-dataset2.txt
    │   ├── 2015-10-23-dataset_overview.txt
    │   ├── 2015-11-23-dataset1.txt
    │   ├── 2015-11-23-dataset2.txt
    │   └── 2015-11-23-dataset_overview.txt
    └── all_november_files
        ├── 2015-11-23-calibration.txt
        ├── 2015-11-23-dataset1.txt
        ├── 2015-11-23-dataset2.txt
        └── 2015-11-23-dataset_overview.txt
Solution
$ cp *calibration.txt backup/calibration
$ cp 2015-11-* send_to_bob/all_november_files/
$ cp *-23-dataset* send_to_bob/all_datasets_created_on_a_23rd/
Organizing Directories and Files
Jamie is working on a project and she sees that her files aren’t very well organized:
$ ls -Fanalyzed/ fructose.dat raw/ sucrose.datThe
fructose.datandsucrose.datfiles contain output from her data analysis. What command(s) covered in this lesson does she need to run so that the commands below will produce the output shown?$ ls -Fanalyzed/ raw/$ ls analyzedfructose.dat sucrose.datSolution
mv *.dat analyzedJamie needs to move her files
fructose.datandsucrose.datto theanalyzeddirectory. The shell will expand *.dat to match all .dat files in the current directory. Themvcommand then moves the list of .dat files to the ‘analyzed’ directory.
Reproduce a folder structure
You’re starting a new experiment and would like to duplicate the directory structure from your previous experiment so you can add new data.
Assume that the previous experiment is in a folder called
2016-05-18, which contains adatafolder that in turn contains folders namedrawandprocessedthat contain data files. The goal is to copy the folder structure of the2016-05-18folder into a folder called2016-05-20so that your final directory structure looks like this:2016-05-20/ └── data ├── processed └── rawWhich of the following set of commands would achieve this objective? What would the other commands do?
$ mkdir 2016-05-20
$ mkdir 2016-05-20/data
$ mkdir 2016-05-20/data/processed
$ mkdir 2016-05-20/data/raw
$ mkdir 2016-05-20 $ cd 2016-05-20 $ mkdir data $ cd data $ mkdir raw processed$ mkdir 2016-05-20/data/raw $ mkdir 2016-05-20/data/processed$ mkdir -p 2016-05-20/data/raw $ mkdir -p 2016-05-20/data/processed$ mkdir 2016-05-20 $ cd 2016-05-20 $ mkdir data $ mkdir raw processedSolution
The first two sets of commands achieve this objective. The first set uses relative paths to create the top-level directory before the subdirectories.
The third set of commands will give an error because the default behavior of
mkdirwon’t create a subdirectory of a non-existent directory: the intermediate level folders must be created first.The fourth set of commands achieve this objective. Remember, the
-poption, followed by a path of one or more directories, will causemkdirto create any intermediate subdirectories as required.The final set of commands generates the ‘raw’ and ‘processed’ directories at the same level as the ‘data’ directory.
Key Points
cp [old] [new]copies a file.
mkdir [path]creates a new directory.
mv [old] [new]moves (renames) a file or directory.
rm [path]removes (deletes) a file.
*matches zero or more characters in a filename, so*.txtmatches all files ending in.txt.
?matches any single character in a filename, so?.txtmatchesa.txtbut notany.txt.Use of the Control key may be described in many ways, including
Ctrl-X,Control-X, and^X.The shell does not have a trash bin: once something is deleted, it’s really gone.
Most files’ names are
something.extension. The extension isn’t required, and doesn’t guarantee anything, but is normally used to indicate the type of data in the file.Depending on the type of work you do, you may need a more powerful text editor than Nano.
03a Break
Overview
Teaching: min
Exercises: minQuestions
Objectives
Key Points
Pipes and Filters
Overview
Teaching: 25 min
Exercises: 10 minQuestions
How can I combine existing commands to do new things?
Objectives
Redirect a command’s output to a file.
Construct command pipelines with two or more stages.
Explain what usually happens if a program or pipeline isn’t given any input to process.
Explain the advantage of linking commands with pipes and filters.
Now that we know a few basic commands,
we can finally look at the shell’s most powerful feature:
the ease with which it lets us combine existing programs in new ways.
We’ll start with the directory shell-lesson-data/ex-data/proteins
that contains six files describing some simple organic molecules.
The .pdb extension indicates that these files are in Protein Data Bank format,
a simple text format that specifies the type and position of each atom in the molecule.
$ ls protein
cubane.pdb    methane.pdb    pentane.pdb
ethane.pdb    octane.pdb     propane.pdb
Let’s go into that directory with cd and run an example command wc cubane.pdb:
$ cd protein
$ wc cubane.pdb
20 156 1158 cubane.pdb
wc is the ‘word count’ command:
it counts the number of lines, words, and characters in files (from left to right, in that order).
If we run the command wc *.pdb, the * in *.pdb matches zero or more characters,
so the shell turns *.pdb into a list of all .pdb files in the current directory:
$ wc *.pdb
  20  156  1158  cubane.pdb
  12  84   622   ethane.pdb
   9  57   422   methane.pdb
  30  246  1828  octane.pdb
  21  165  1226  pentane.pdb
  15  111  825   propane.pdb
 107  819  6081  total
Note that wc *.pdb also shows the total number of all lines in the last line of the output.
If we run wc -l instead of just wc,
the output shows only the number of lines per file:
$ wc -l *.pdb
  20  cubane.pdb
  12  ethane.pdb
   9  methane.pdb
  30  octane.pdb
  21  pentane.pdb
  15  propane.pdb
 107  total
The -m and -w options can also be used with the wc command, to show
only the number of characters or the number of words in the files.
Why Isn’t It Doing Anything?
What happens if a command is supposed to process a file, but we don’t give it a filename? For example, what if we type:
$ wc -lbut don’t type
*.pdb(or anything else) after the command? Since it doesn’t have any filenames,wcassumes it is supposed to process input given at the command prompt, so it just sits there and waits for us to give it some data interactively. From the outside, though, all we see is it sitting there: the command doesn’t appear to do anything.If you make this kind of mistake, you can escape out of this state by holding down the control key (Ctrl) and typing the letter C once and letting go of the Ctrl key. Ctrl+C
Capturing output from commands
Which of these files contains the fewest lines? It’s an easy question to answer when there are only six files, but what if there were 6000? Our first step toward a solution is to run the command:
$ wc -l *.pdb > lengths.txt
The greater than symbol, >, tells the shell to redirect the command’s output
to a file instead of printing it to the screen. (This is why there is no screen output:
everything that wc would have printed has gone into the
file lengths.txt instead.) The shell will create
the file if it doesn’t exist. If the file exists, it will be
silently overwritten, which may lead to data loss and thus requires
some caution.
ls lengths.txt confirms that the file exists:
$ ls lengths.txt
lengths.txt
We can now send the content of lengths.txt to the screen using cat lengths.txt.
The cat command gets its name from ‘concatenate’ i.e. join together,
and it prints the contents of files one after another.
There’s only one file in this case,
so cat just shows us what it contains:
$ cat lengths.txt
  20  cubane.pdb
  12  ethane.pdb
   9  methane.pdb
  30  octane.pdb
  21  pentane.pdb
  15  propane.pdb
 107  total
Output Page by Page
We’ll continue to use
catin this lesson, for convenience and consistency, but it has the disadvantage that it always dumps the whole file onto your screen. More useful in practice is the commandless, which you use withless lengths.txt. This displays a screenful of the file, and then stops. You can go forward one screenful by pressing the spacebar, or back one by pressingb. Pressqto quit.
Filtering output
Next we’ll use the sort command to sort the contents of the lengths.txt file.
But first we’ll use an exercise to learn a little about the sort command:
What Does
sort -nDo?The file
shell-lesson-data/ex-data/numbers.txtcontains the following lines:10 2 19 22 6If we run
sorton this file, the output is:10 19 2 22 6If we run
sort -non the same file, we get this instead:2 6 10 19 22Explain why
-nhas this effect.Solution
The
-noption specifies a numerical rather than an alphanumerical sort.
We will also use the -n option to specify that the sort is
numerical instead of alphanumerical.
This does not change the file;
instead, it sends the sorted result to the screen:
$ sort -n lengths.txt
  9  methane.pdb
 12  ethane.pdb
 15  propane.pdb
 20  cubane.pdb
 21  pentane.pdb
 30  octane.pdb
107  total
We can put the sorted list of lines in another temporary file called sorted-lengths.txt
by putting > sorted-lengths.txt after the command,
just as we used > lengths.txt to put the output of wc into lengths.txt.
Once we’ve done that,
we can run another command called head to get the first few lines in sorted-lengths.txt:
$ sort -n lengths.txt > sorted-lengths.txt
$ head -n 1 sorted-lengths.txt
9 methane.pdb
Using -n 1 with head tells it that
we only want the first line of the file;
-n 20 would get the first 20,
and so on.
Since sorted-lengths.txt contains the lengths of our files ordered from least to greatest,
the output of head must be the file with the fewest lines.
Redirecting to the same file
It’s a very bad idea to try redirecting the output of a command that operates on a file to the same file. For example:
$ sort -n lengths.txt > lengths.txtDoing something like this may give you incorrect results and/or delete the contents of
lengths.txt.
What Does
>>Mean?We have seen the use of
>, but there is a similar operator>>which works slightly differently. We’ll learn about the differences between these two operators by printing some strings. We can use theechocommand to print strings e.g.$ echo The echo command prints textThe echo command prints textNow test the commands below to reveal the difference between the two operators:
$ echo hello > testfile01.txtand:
$ echo hello >> testfile02.txtHint: Try executing each command twice in a row and then examining the output files.
Solution
In the first example with
>, the string ‘hello’ is written totestfile01.txt, but the file gets overwritten each time we run the command.We see from the second example that the
>>operator also writes ‘hello’ to a file (in this casetestfile02.txt), but appends the string to the file if it already exists (i.e. when we run it for the second time).
Appending Data
We have already met the
headcommand, which prints lines from the start of a file.tailis similar, but prints lines from the end of a file instead.Consider the file
shell-lesson-data/ex-data/csv/counts.csv. After these commands, select the answer that corresponds to the filecounts-subset.csv:$ head -n 3 counts.csv > counts-subset.csv $ tail -n 2 counts.csv >> counts-subset.csv
- The first three lines of
counts.csv- The last two lines of
counts.csv- The first three lines and the last two lines of
counts.csv- The second and third lines of
counts.csvSolution
Option 3 is correct. For option 1 to be correct we would only run the
headcommand. For option 2 to be correct we would only run thetailcommand. For option 4 to be correct we would have to pipe the output ofheadintotail -n 2by doinghead -n 3 counts.csv | tail -n 2 > counts-subset.csv
Passing output to another command
In our example of finding the file with the fewest lines,
we are using two intermediate files lengths.txt and sorted-lengths.txt to store output.
This is a confusing way to work because
even once you understand what wc, sort, and head do,
those intermediate files make it hard to follow what’s going on.
We can make it easier to understand by running sort and head together:
$ sort -n lengths.txt | head -n 1
9 methane.pdb
The vertical bar, |, between the two commands is called a pipe.
It tells the shell that we want to use
the output of the command on the left
as the input to the command on the right.
This has removed the need for the sorted-lengths.txt file.
Combining multiple commands
Nothing prevents us from chaining pipes consecutively.
We can for example send the output of wc directly to sort,
and then the resulting output to head.
This removes the need for any intermediate files.
We’ll start by using a pipe to send the output of wc to sort:
$ wc -l *.pdb | sort -n
   9 methane.pdb
  12 ethane.pdb
  15 propane.pdb
  20 cubane.pdb
  21 pentane.pdb
  30 octane.pdb
 107 total
We can then send that output through another pipe, to head, so that the full pipeline becomes:
$ wc -l *.pdb | sort -n | head -n 1
9 methane.pdb
This is exactly like a mathematician nesting functions like log(3x)
and saying ‘the log of three times x’.
In our case,
the calculation is ‘head of sort of line count of *.pdb’.
The redirection and pipes used in the last few commands are illustrated below:

Piping Commands Together
In our current directory, we want to find the 3 files which have the least number of lines. Which command listed below would work?
wc -l * > sort -n > head -n 3wc -l * | sort -n | head -n 1-3wc -l * | head -n 3 | sort -nwc -l * | sort -n | head -n 3Solution
Option 4 is the solution. The pipe character
|is used to connect the output from one command to the input of another.>is used to redirect standard output to a file. Try it in theshell-lesson-data/ex-data/proteinsdirectory!
Tools designed to work together
This idea of linking programs together is why Unix has been so successful.
Instead of creating enormous programs that try to do many different things,
Unix programmers focus on creating lots of simple tools that each do one job well,
and that work well with each other.
This programming model is called ‘pipes and filters’.
We’ve already seen pipes;
a filter is a program like wc or sort
that transforms a stream of input into a stream of output.
Almost all of the standard Unix tools can work this way:
unless told to do otherwise,
they read from standard input,
do something with what they’ve read,
and write to standard output.
The key is that any program that reads lines of text from standard input and writes lines of text to standard output can be combined with every other program that behaves this way as well. You can and should write your programs this way so that you and other people can put those programs into pipes to multiply their power.
Pipe Reading Comprehension
A file called
counts.csv(in theshell-lesson-data/ex-data/csvfolder) contains the following data:2012-11-05,deer,5 2012-11-05,rabbit,22 2012-11-05,raccoon,7 2012-11-06,rabbit,19 2012-11-06,deer,2 2012-11-06,fox,4 2012-11-07,rabbit,16 2012-11-07,bear,1What text passes through each of the pipes and the final redirect in the pipeline below? Note, the
sort -rcommand sorts in reverse order.$ cat counts.csv | head -n 5 | tail -n 3 | sort -r > final.txtHint: build the pipeline up one command at a time to test your understanding
Solution
The
headcommand extracts the first 5 lines fromcounts.csv. Then, the last 3 lines are extracted from the previous 5 by using thetailcommand. With thesort -rcommand those 3 lines are sorted in reverse order and finally, the output is redirected to a filefinal.txt. The content of this file can be checked by executingcat final.txt. The file should contain the following lines:2012-11-06,rabbit,19 2012-11-06,deer,2 2012-11-05,raccoon,7
Pipe Construction
For the file
counts.csvfrom the previous exercise, consider the following command:$ cut -d , -f 2 counts.csvThe
cutcommand is used to remove or ‘cut out’ certain sections of each line in the file, andcutexpects the lines to be separated into columns by a Tab character. A character used in this way is a called a delimiter. In the example above we use the-doption to specify the comma as our delimiter character. We have also used the-foption to specify that we want to extract the second field (column). This gives the following output:deer rabbit raccoon rabbit deer fox rabbit bearThe
uniqcommand filters out adjacent matching lines in a file. How could you extend this pipeline (usinguniqand another command) to find out what counts the file contains (without any duplicates in their names)?Solution
$ cut -d , -f 2 counts.csv | sort | uniq
Which Pipe?
The file
counts.csvcontains 8 lines of data formatted as follows:2012-11-05,deer,5 2012-11-05,rabbit,22 2012-11-05,raccoon,7 2012-11-06,rabbit,19 ...The
uniqcommand has a-coption which gives a count of the number of times a line occurs in its input. Assuming your current directory isshell-lesson-data/ex-data/csv, what command would you use to produce a table that shows the total count of each type of animal in the file?
sort counts.csv | uniq -csort -t, -k2,2 counts.csv | uniq -ccut -d, -f 2 counts.csv | uniq -ccut -d, -f 2 counts.csv | sort | uniq -ccut -d, -f 2 counts.csv | sort | uniq -c | wc -lSolution
Option 4. is the correct answer. If you have difficulty understanding why, try running the commands, or sub-sections of the pipelines (make sure you are in the
shell-lesson-data/ex-data/csvdirectory).
Exercise Pipeline: Checking Files
We have 17 files in the ex-files directory described earlier.
As a quick check, starting from the shell-lesson-data directory:
$ cd ex-files
$ wc -l *.txt
The output is 18 lines that look like this:
300 NENE01729A.txt
300 NENE01729B.txt
300 NENE01736A.txt
300 NENE01751A.txt
300 NENE01751B.txt
300 NENE01812A.txt
... ...
Now when we type this:
$ wc -l *.txt | sort -n | head -n 5
240 NENE02018B.txt
300 NENE01729A.txt
300 NENE01729B.txt
300 NENE01736A.txt
300 NENE01751A.txt
Whoops: one of the files is 60 lines shorter than the others. A data collection mistake is identified. We can check to see if any files have too much data:
$ wc -l *.txt | sort -n | tail -n 5
300 NENE02040B.txt
300 NENE02040Z.txt
300 NENE02043A.txt
300 NENE02043B.txt
5040 total
Those numbers look good — but what’s that ‘Z’ doing there in the third-to-last line? All of the samples should be marked ‘A’ or ‘B’; for this label convention, the files use ‘Z’ to indicate samples with missing information. To find others like it, we dp this:
$ ls *Z.txt
NENE01971Z.txt NENE02040Z.txt
For now, we must exclude those two files from analysis.
We can delete them using rm,
but there are actually some analyses we might do later where depth doesn’t matter,
so instead, we’ll have to be careful later on to select files using the wildcard expressions
NENE*A.txt NENE*B.txt.
Removing Unneeded Files
Suppose you want to delete your processed data files, and only keep your raw files and processing script to save storage. The raw files end in
.datand the processed files end in.txt. Which of the following would remove all the processed data files, and only the processed data files?
rm ?.txtrm *.txtrm * .txtrm *.*Solution
- This would remove
.txtfiles with one-character names- This is correct answer
- The shell would expand
*to match everything in the current directory, so the command would try to remove all matched files and an additional file called.txt- The shell would expand
*.*to match all files with any extension, so this command would delete all files
Key Points
wccounts lines, words, and characters in its inputs.
catdisplays the contents of its inputs.
sortsorts its inputs.
headdisplays the first 10 lines of its input.
taildisplays the last 10 lines of its input.
command > [file]redirects a command’s output to a file (overwriting any existing content).
command >> [file]appends a command’s output to a file.
[first] | [second]is a pipeline: the output of the first command is used as the input to the second.The best way to use the shell is to use pipes to combine simple single-purpose programs (filters).
Loops
Overview
Teaching: 30 min
Exercises: 10 minQuestions
How can I perform the same actions on many different files?
Objectives
Write a loop that applies one or more commands separately to each file in a set of files.
Trace the values taken on by a loop variable during execution of the loop.
Explain the difference between a variable’s name and its value.
Explain why spaces and some punctuation characters shouldn’t be used in file names.
Demonstrate how to see what commands have recently been executed.
Re-run recently executed commands without retyping them.
Loops are a programming construct which allow us to repeat a command or set of commands for each item in a list. As such they are key to productivity improvements through automation. Similar to wildcards and tab completion, using loops also reduces the amount of typing required (and hence reduces the number of typing mistakes).
Suppose we have several hundred data files named a-file.dat, b-file.dat, and
c-file.dat.
For this example, we’ll use the ex-data/generic directory which only has three
example files,
but the principles can be applied to many many more files at once.
The structure of these files is the same: contents with the file name and line number. Let’s look at the files:
$ head -n 5 a-file.dat b-file.dat c-file.dat
We would like to print out the second line of each file.
For each file, we would need to execute the command head -n 2 and pipe this to tail -n 1.
We’ll use a loop to solve this problem, but first let’s look at the general form of a loop:
for thing in list_of_things
do
operation_using $thing # Indentation within the loop is not required, but aids legibility
done
and we can apply this to our example like this:
$ for filename in a-file.dat b-file.dat c-file.dat
> do
> head -n 2 $filename | tail -n 1
> done
file a, line 2
file b, line 2
file c, line 2
Follow the Prompt
The shell prompt changes from
$to>and back again as we were typing in our loop. The second prompt,>, is different to remind us that we haven’t finished typing a complete command yet. A semicolon,;, can be used to separate two commands written on a single line.
When the shell sees the keyword for,
it knows to repeat a command (or group of commands) once for each item in a list.
Each time the loop runs (called an iteration), an item in the list is assigned in sequence to
the variable, and the commands inside the loop are executed, before moving on to
the next item in the list.
Inside the loop,
we call for the variable’s value by putting $ in front of it.
The $ tells the shell interpreter to treat
the variable as a variable name and substitute its value in its place,
rather than treat it as text or an external command.
In this example, the list is three filenames: a-file.dat, b-file.dat, and c-file.dat.
Each time the loop iterates, it will assign a file name to the variable filename
and run the head command.
The first time through the loop,
$filename is a-file.dat.
The interpreter runs the command head on a-file.dat
and pipes the first two lines to the tail command,
which then prints the second line of a-file.dat.
For the second iteration, $filename becomes
b-file.dat. This time, the shell runs head on b-file.dat
and pipes the first two lines to the tail command,
which then prints the second line of b-file.dat.
For the third iteration, $filename becomes
c-file.dat, so the shell runs the head command on that file,
and tail on the output of that.
Since the list was only three items, the shell exits the for loop.
Same Symbols, Different Meanings
Here we see
>being used as a shell prompt, whereas>is also used to redirect output. Similarly,$is used as a shell prompt, but, as we saw earlier, it is also used to ask the shell to get the value of a variable.If the shell prints
>or$then it expects you to type something, and the symbol is a prompt.If you type
>or$yourself, it is an instruction from you that the shell should redirect output or get the value of a variable.
When using variables it is also
possible to put the names into curly braces to clearly delimit the variable
name: $filename is equivalent to ${filename}, but is different from
${file}name. You may find this notation in other people’s programs.
We have called the variable in this loop filename
in order to make its purpose clearer to human readers.
The shell itself doesn’t care what the variable is called;
if we wrote this loop as:
$ for x in a-file.dat b-file.dat c-file.dat
> do
> head -n 2 $x | tail -n 1
> done
or:
$ for image in a-file.dat b-file.dat c-file.dat
> do
> head -n 2 $image | tail -n 1
> done
it would work exactly the same way.
Don’t do this.
Programs are only useful if people can understand them,
so meaningless names (like x) or misleading names (like image)
increase the odds that the program won’t do what its readers think it does.
In the above examples, the variables (thing, filename, x and image)
could have been given any other name, as long as it is meaningful to both the person
writing the code and the person reading it.
Note also that loops can be used for other things than filenames, like a list of numbers or a subset of data.
Write your own loop
How would you write a loop that echoes all 10 numbers from 0 to 9? This loop does not require using any files.
Solution
$ for loop_variable in 0 1 2 3 4 5 6 7 8 9 > do > echo $loop_variable > done0 1 2 3 4 5 6 7 8 9
Variables in Loops
This exercise refers to the
shell-lesson-data/ex-data/proteindirectory.ls *.pdbgives the following output:cubane.pdb ethane.pdb methane.pdb octane.pdb pentane.pdb propane.pdbWhat is the output of the following code?
$ for datafile in *.pdb > do > ls *.pdb > doneNow, what is the output of the following code?
$ for datafile in *.pdb > do > ls $datafile > doneWhy do these two loops give different outputs?
Solution
The first code block gives the same output on each iteration through the loop. Bash expands the wildcard
*.pdbwithin the loop body (as well as before the loop starts) to match all files ending in.pdband then lists them usingls. The expanded loop would look like this:$ for datafile in cubane.pdb ethane.pdb methane.pdb octane.pdb pentane.pdb propane.pdb > do > ls cubane.pdb ethane.pdb methane.pdb octane.pdb pentane.pdb propane.pdb > donecubane.pdb ethane.pdb methane.pdb octane.pdb pentane.pdb propane.pdb cubane.pdb ethane.pdb methane.pdb octane.pdb pentane.pdb propane.pdb cubane.pdb ethane.pdb methane.pdb octane.pdb pentane.pdb propane.pdb cubane.pdb ethane.pdb methane.pdb octane.pdb pentane.pdb propane.pdb cubane.pdb ethane.pdb methane.pdb octane.pdb pentane.pdb propane.pdb cubane.pdb ethane.pdb methane.pdb octane.pdb pentane.pdb propane.pdbThe second code block lists a different file on each loop iteration. The value of the
datafilevariable is evaluated using$datafile, and then listed usingls.cubane.pdb ethane.pdb methane.pdb octane.pdb pentane.pdb propane.pdb
Limiting Sets of Files
What would be the output of running the following loop in the
shell-lesson-data/ex-data/proteindirectory?$ for filename in c* > do > ls $filename > done
- No files are listed.
- All files are listed.
- Only
cubane.pdb,octane.pdbandpentane.pdbare listed.- Only
cubane.pdbis listed.Solution
4 is the correct answer.
*matches zero or more characters, so any file name starting with the letter c, followed by zero or more other characters will be matched.How would the output differ from using this command instead?
$ for filename in *c* > do > ls $filename > done
- The same files would be listed.
- All the files are listed this time.
- No files are listed this time.
- The files
cubane.pdbandoctane.pdbwill be listed.- Only the file
octane.pdbwill be listed.Solution
4 is the correct answer.
*matches zero or more characters, so a file name with zero or more characters before a letter c and zero or more characters after the letter c will be matched.
Saving to a File in a Loop - Part One
In the
shell-lesson-data/ex-data/proteindirectory, what is the effect of this loop?for alkanes in *.pdb do echo $alkanes cat $alkanes > alkanes.pdb done
- Prints
cubane.pdb,ethane.pdb,methane.pdb,octane.pdb,pentane.pdbandpropane.pdb, and the text frompropane.pdbwill be saved to a file calledalkanes.pdb.- Prints
cubane.pdb,ethane.pdb, andmethane.pdb, and the text from all three files would be concatenated and saved to a file calledalkanes.pdb.- Prints
cubane.pdb,ethane.pdb,methane.pdb,octane.pdb, andpentane.pdb, and the text frompropane.pdbwill be saved to a file calledalkanes.pdb.- None of the above.
Solution
- The text from each file in turn gets written to the
alkanes.pdbfile. However, the file gets overwritten on each loop iteration, so the final content ofalkanes.pdbis the text from thepropane.pdbfile.
Saving to a File in a Loop - Part Two
Also in the
shell-lesson-data/ex-data/proteindirectory, what would be the output of the following loop?for datafile in *.pdb do cat $datafile >> all.pdb done
- All of the text from
cubane.pdb,ethane.pdb,methane.pdb,octane.pdb, andpentane.pdbwould be concatenated and saved to a file calledall.pdb.- The text from
ethane.pdbwill be saved to a file calledall.pdb.- All of the text from
cubane.pdb,ethane.pdb,methane.pdb,octane.pdb,pentane.pdbandpropane.pdbwould be concatenated and saved to a file calledall.pdb.- All of the text from
cubane.pdb,ethane.pdb,methane.pdb,octane.pdb,pentane.pdbandpropane.pdbwould be printed to the screen and saved to a file calledall.pdb.Solution
3 is the correct answer.
>>appends to a file, rather than overwriting it with the redirected output from a command. Given the output from thecatcommand has been redirected, nothing is printed to the screen.
Let’s continue with our example in the shell-lesson-data/ex-data/generic directory.
Here’s a slightly more complicated loop:
$ for filename in *.dat
> do
> echo $filename
> head -n 25 $filename | tail -n 20
> done
The shell starts by expanding *.dat to create the list of files it will process.
The loop body
then executes two commands for each of those files.
The first command, echo, prints its command-line arguments to standard output.
For example:
$ echo hello there
prints:
hello there
In this case,
since the shell expands $filename to be the name of a file,
echo $filename prints the name of the file.
Note that we can’t write this as:
$ for filename in *.dat
> do
> $filename
> head -n 25 $filename | tail -n 20
> done
because then the first time through the loop,
when $filename expanded to a-file.dat, the shell would try to run a-file.dat as
a program.
Finally,
the head and tail combination selects lines 6-25
from whatever file is being processed
(assuming the file has at least 25 lines).
Spaces in Names
Spaces are used to separate the elements of the list that we are going to loop over. If one of those elements contains a space character, we need to surround it with quotes, and do the same thing to our loop variable. Suppose our data files are named:
red d-file.dat purple c-file.datTo loop over these files, we would need to add double quotes like so:
$ for filename in "red d-file.dat" "purple c-file.dat" > do > head -n 25 "$filename" | tail -n 20 > doneIt is simpler to avoid using spaces (or other special characters) in filenames.
The files above don’t exist, so if we run the above code, the
headcommand will be unable to find them, however the error message returned will show the name of the files it is expecting:head: cannot open ‘red d-file.dat’ for reading: No such file or directory head: cannot open ‘purple c-file.dat’ for reading: No such file or directoryTry removing the quotes around
$filenamein the loop above to see the effect of the quote marks on spaces. Note that we get a result from the loop command for c-file.dat when we run this code in thegenericdirectory:head: cannot open ‘red’ for reading: No such file or directory head: cannot open d-file.dat’ for reading: No such file or directory head: cannot open ‘purple’ for reading: No such file or directory file c, line 6 file c, line 7 file c, line 8 ...
We would like to modify each of the files in shell-lesson-data/ex-data/creatures,
but also save a version
of the original files, naming the copies original-a-file.dat and original-c-file.dat.
We can’t use:
$ cp *.dat original-*.dat
because that would expand to:
$ cp a-file.dat b-file.dat c-file.dat original-*.dat
This wouldn’t back up our files, instead we get an error:
cp: target `original-*.dat' is not a directory
This problem arises when cp receives more than two inputs. When this happens, it
expects the last input to be a directory where it can copy all the files it was passed.
Since there is no directory named original-*.dat in the generic directory we get an
error.
Instead, we can use a loop:
$ for filename in *.dat
> do
> cp $filename original-$filename
> done
This loop runs the cp command once for each filename.
The first time,
when $filename expands to a-file.dat,
the shell executes:
cp a-file.dat original-a-file.dat
The second time, the command is:
cp b-file.dat original-b-file.dat
The third and last time, the command is:
cp c-file.dat original-c-file.dat
Since the cp command does not normally produce any output, it’s hard to check
that the loop is doing the correct thing.
However, we learned earlier how to print strings using echo, and we can modify the loop
to use echo to print our commands without actually executing them.
As such we can check what commands would be run in the unmodified loop.
The following diagram
shows what happens when the modified loop is executed, and demonstrates how the
judicious use of echo is a good debugging technique.
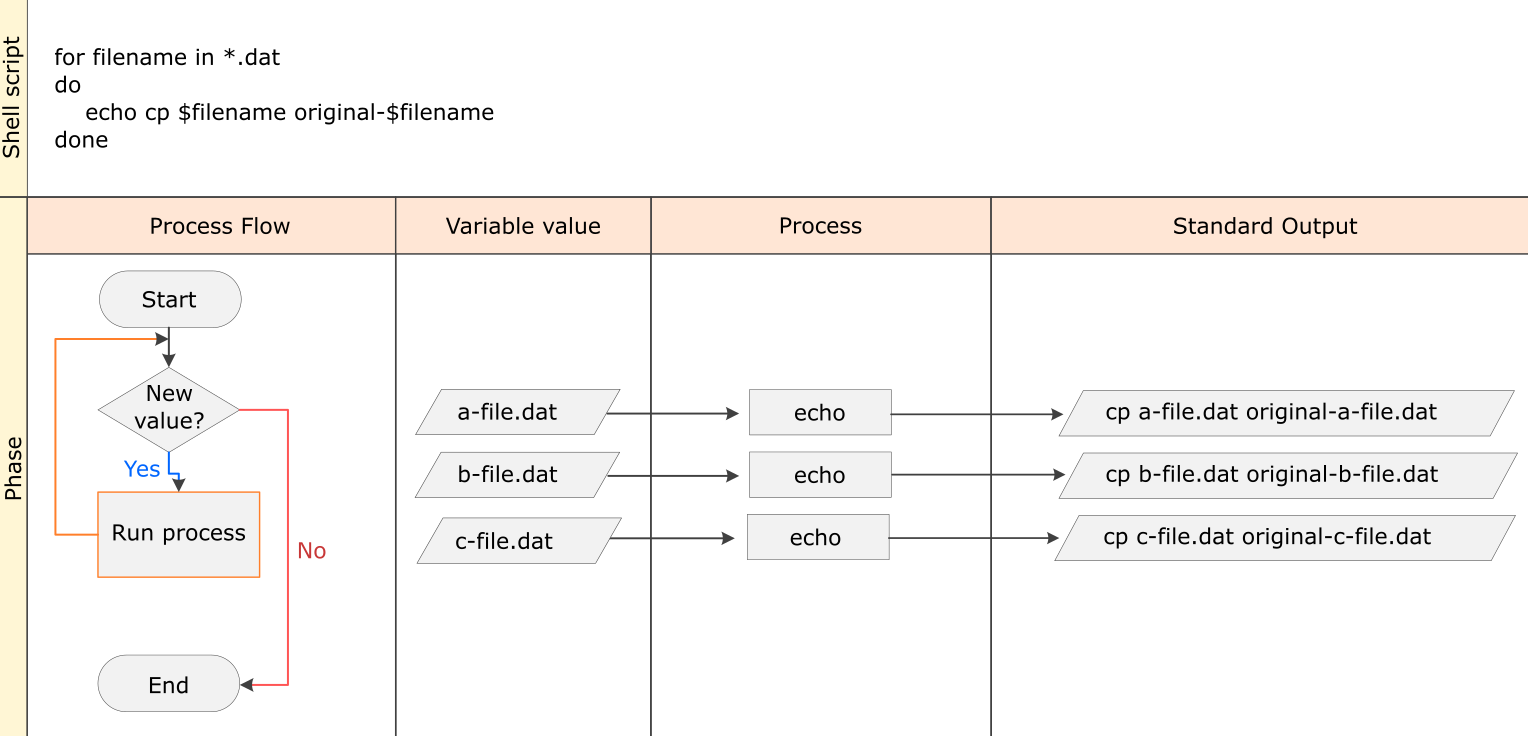
Example Pipeline: Processing Files
We are now ready to process the data files using goostats.sh —
a shell script.
This calculates some statistics from a protein sample file, and takes two arguments:
- an input file (containing the raw data)
- an output file (to store the calculated statistics)
Since we’re still learning how to use the shell, we want to build up the required commands in stages. Our first step is to make sure that we can select the right input files — remember, these are ones whose names end in ‘A’ or ‘B’, rather than ‘Z’. Starting from the home directory:
$ cd ex-files
$ for datafile in NENE*A.txt NENE*B.txt
> do
> echo $datafile
> done
NENE01729A.txt
NENE01729B.txt
NENE01736A.txt
...
NENE02043A.txt
NENE02043B.txt
Our next step is to decide
what to call the files that the goostats.sh analysis program will create.
Prefixing each input file’s name with ‘stats’ seems simple,
so lets modify the loop to do that:
$ for datafile in NENE*A.txt NENE*B.txt
> do
> echo $datafile stats-$datafile
> done
NENE01729A.txt stats-NENE01729A.txt
NENE01729B.txt stats-NENE01729B.txt
NENE01736A.txt stats-NENE01736A.txt
...
NENE02043A.txt stats-NENE02043A.txt
NENE02043B.txt stats-NENE02043B.txt
We hasn’t actually run goostats.sh yet,
but now we can be sure we select the right files and generate the right output filenames.
Typing in commands over and over again is becoming tedious, though, and we should br worried about making mistakes, so instead of re-entering this loop, we can press ↑. In response, the shell redisplays the whole loop on one line (using semi-colons to separate the pieces):
$ for datafile in NENE*A.txt NENE*B.txt; do echo $datafile stats-$datafile; done
Using the left arrow key,
we backs up and change the command echo to bash goostats.sh:
$ for datafile in NENE*A.txt NENE*B.txt; do bash goostats.sh $datafile stats-$datafile; done
When we presses Enter, the shell runs the modified command. However, nothing appears to happen — there is no output. After a moment, we realizes that since her script doesn’t print anything to the screen any longer, we has no idea whether it is running, much less how quickly. We can kill the running command by typing Ctrl+C, uses ↑ to repeat the command, and edits it to read:
$ for datafile in NENE*A.txt NENE*B.txt; do echo $datafile;
bash goostats.sh $datafile stats-$datafile; done
Beginning and End
We can move to the beginning of a line in the shell by typing Ctrl+A and to the end using Ctrl+E.
When we runs her program now, it produces one line of output every five seconds or so:
NENE01729A.txt
NENE01729B.txt
NENE01736A.txt
...
1518 times 5 seconds,
divided by 60,
tells us that the script will take about two hours to run.
As a final check,
we open another terminal window,
go into ex-fles,
and use cat stats-NENE01729B.txt
to examine one of the output files.
It looks good,
so we can leave this running.
Those Who Know History Can Choose to Repeat It
Another way to repeat previous work is to use the
historycommand to get a list of the last few hundred commands that have been executed, and then to use!123(where ‘123’ is replaced by the command number) to repeat one of those commands. For example, if we type this:$ history | tail -n 5456 ls -l NENE0*.txt 457 rm stats-NENE01729B.txt.txt 458 bash goostats.sh NENE01729B.txt stats-NENE01729B.txt 459 ls -l NENE0*.txt 460 historythen we can re-run
goostats.shonNENE01729B.txtsimply by typing!458.
Other History Commands
There are a number of other shortcut commands for getting at the history.
- Ctrl+R enters a history search mode ‘reverse-i-search’ and finds the most recent command in your history that matches the text you enter next. Press Ctrl+R one or more additional times to search for earlier matches. You can then use the left and right arrow keys to choose that line and edit it then hit Return to run the command.
!!retrieves the immediately preceding command (you may or may not find this more convenient than using ↑)!$retrieves the last word of the last command. That’s useful more often than you might expect: afterbash goostats.sh NENE01729B.txt stats-NENE01729B.txt, you can typeless !$to look at the filestats-NENE01729B.txt, which is quicker than doing ↑ and editing the command-line.
Doing a Dry Run
A loop is a way to do many things at once — or to make many mistakes at once if it does the wrong thing. One way to check what a loop would do is to
echothe commands it would run instead of actually running them.Suppose we want to preview the commands the following loop will execute without actually running those commands:
$ for datafile in *.pdb > do > cat $datafile >> all.pdb > doneWhat is the difference between the two loops below, and which one would we want to run?
# Version 1 $ for datafile in *.pdb > do > echo cat $datafile >> all.pdb > done# Version 2 $ for datafile in *.pdb > do > echo "cat $datafile >> all.pdb" > doneSolution
The second version is the one we want to run. This prints to screen everything enclosed in the quote marks, expanding the loop variable name because we have prefixed it with a dollar sign. It also does not modify nor create the file
all.pdb, as the>>is treated literally as part of a string rather than as a redirection instruction.The first version appends the output from the command
echo cat $datafileto the file,all.pdb. This file will just contain the list;cat cubane.pdb,cat ethane.pdb,cat methane.pdbetc.Try both versions for yourself to see the output! Be sure to open the
all.pdbfile to view its contents.
Nested Loops
Suppose we want to set up a directory structure to organize some experiments measuring reaction rate constants with different compounds and different temperatures. What would be the result of the following code:
$ for species in cubane ethane methane > do > for temperature in 25 30 37 40 > do > mkdir $species-$temperature > done > doneSolution
We have a nested loop, i.e. contained within another loop, so for each species in the outer loop, the inner loop (the nested loop) iterates over the list of temperatures, and creates a new directory for each combination.
Try running the code for yourself to see which directories are created!
Key Points
A
forloop repeats commands once for every thing in a list.Every
forloop needs a variable to refer to the thing it is currently operating on.Use
$nameto expand a variable (i.e., get its value).${name}can also be used.Do not use spaces, quotes, or wildcard characters such as ‘*’ or ‘?’ in filenames, as it complicates variable expansion.
Give files consistent names that are easy to match with wildcard patterns to make it easy to select them for looping.
Use the up-arrow key to scroll up through previous commands to edit and repeat them.
Use Ctrl+R to search through the previously entered commands.
Use
historyto display recent commands, and![number]to repeat a command by number.
Shell Scripts
Overview
Teaching: 30 min
Exercises: 10 minQuestions
How can I save and re-use commands?
Objectives
Write a shell script that runs a command or series of commands for a fixed set of files.
Run a shell script from the command line.
Write a shell script that operates on a set of files defined by the user on the command line.
Create pipelines that include shell scripts you, and others, have written.
We are finally ready to see what makes the shell such a powerful programming environment. We are going to take the commands we repeat frequently and save them in files so that we can re-run all those operations again later by typing a single command. For historical reasons, a bunch of commands saved in a file is usually called a shell script, but make no mistake: these are actually small programs.
Not only will writing shell scripts make your work faster — you won’t have to retype the same commands over and over again — it will also make it more accurate (fewer chances for typos) and more reproducible. If you come back to your work later (or if someone else finds your work and wants to build on it) you will be able to reproduce the same results simply by running your script, rather than having to remember or retype a long list of commands.
Let’s start by going back to protein/ and creating a new file, middle.sh which will
become our shell script:
$ cd protein
$ nano middle.sh
The command nano middle.sh opens the file middle.sh within the text editor ‘nano’
(which runs within the shell).
If the file does not exist, it will be created.
We can use the text editor to directly edit the file – we’ll simply insert the following line:
head -n 15 octane.pdb | tail -n 5
This is a variation on the pipe we constructed earlier:
it selects lines 11-15 of the file octane.pdb.
Remember, we are not running it as a command just yet:
we are putting the commands in a file.
Then we save the file (Ctrl-O in nano),
and exit the text editor (Ctrl-X in nano).
Check that the directory protein now contains a file called middle.sh.
Once we have saved the file,
we can ask the shell to execute the commands it contains.
Our shell is called bash, so we run the following command:
$ bash middle.sh
ATOM 9 H 1 -4.502 0.681 0.785 1.00 0.00
ATOM 10 H 1 -5.254 -0.243 -0.537 1.00 0.00
ATOM 11 H 1 -4.357 1.252 -0.895 1.00 0.00
ATOM 12 H 1 -3.009 -0.741 -1.467 1.00 0.00
ATOM 13 H 1 -3.172 -1.337 0.206 1.00 0.00
Sure enough, our script’s output is exactly what we would get if we ran that pipeline directly.
Text vs. Whatever
We usually call programs like Microsoft Word or LibreOffice Writer “text editors”, but we need to be a bit more careful when it comes to programming. By default, Microsoft Word uses
.docxfiles to store not only text, but also formatting information about fonts, headings, and so on. This extra information isn’t stored as characters and doesn’t mean anything to tools likehead: they expect input files to contain nothing but the letters, digits, and punctuation on a standard computer keyboard. When editing programs, therefore, you must either use a plain text editor, or be careful to save files as plain text.
What if we want to select lines from an arbitrary file?
We could edit middle.sh each time to change the filename,
but that would probably take longer than typing the command out again
in the shell and executing it with a new file name.
Instead, let’s edit middle.sh and make it more versatile:
$ nano middle.sh
Now, within “nano”, replace the text octane.pdb with the special variable called $1:
head -n 15 "$1" | tail -n 5
Inside a shell script,
$1 means ‘the first filename (or other argument) on the command line’.
We can now run our script like this:
$ bash middle.sh octane.pdb
ATOM 9 H 1 -4.502 0.681 0.785 1.00 0.00
ATOM 10 H 1 -5.254 -0.243 -0.537 1.00 0.00
ATOM 11 H 1 -4.357 1.252 -0.895 1.00 0.00
ATOM 12 H 1 -3.009 -0.741 -1.467 1.00 0.00
ATOM 13 H 1 -3.172 -1.337 0.206 1.00 0.00
or on a different file like this:
$ bash middle.sh pentane.pdb
ATOM 9 H 1 1.324 0.350 -1.332 1.00 0.00
ATOM 10 H 1 1.271 1.378 0.122 1.00 0.00
ATOM 11 H 1 -0.074 -0.384 1.288 1.00 0.00
ATOM 12 H 1 -0.048 -1.362 -0.205 1.00 0.00
ATOM 13 H 1 -1.183 0.500 -1.412 1.00 0.00
Double-Quotes Around Arguments
For the same reason that we put the loop variable inside double-quotes, in case the filename happens to contain any spaces, we surround
$1with double-quotes.
Currently, we need to edit middle.sh each time we want to adjust the range of
lines that is returned.
Let’s fix that by configuring our script to instead use three command-line arguments.
After the first command-line argument ($1), each additional argument that we
provide will be accessible via the special variables $1, $2, $3,
which refer to the first, second, third command-line arguments, respectively.
Knowing this, we can use additional arguments to define the range of lines to
be passed to head and tail respectively:
$ nano middle.sh
head -n "$2" "$1" | tail -n "$3"
We can now run:
$ bash middle.sh pentane.pdb 15 5
ATOM 9 H 1 1.324 0.350 -1.332 1.00 0.00
ATOM 10 H 1 1.271 1.378 0.122 1.00 0.00
ATOM 11 H 1 -0.074 -0.384 1.288 1.00 0.00
ATOM 12 H 1 -0.048 -1.362 -0.205 1.00 0.00
ATOM 13 H 1 -1.183 0.500 -1.412 1.00 0.00
By changing the arguments to our command we can change our script’s behaviour:
$ bash middle.sh pentane.pdb 20 5
ATOM 14 H 1 -1.259 1.420 0.112 1.00 0.00
ATOM 15 H 1 -2.608 -0.407 1.130 1.00 0.00
ATOM 16 H 1 -2.540 -1.303 -0.404 1.00 0.00
ATOM 17 H 1 -3.393 0.254 -0.321 1.00 0.00
TER 18 1
This works,
but it may take the next person who reads middle.sh a moment to figure out what it does.
We can improve our script by adding some comments at the top:
$ nano middle.sh
# Select lines from the middle of a file.
# Usage: bash middle.sh filename end_line num_lines
head -n "$2" "$1" | tail -n "$3"
A comment starts with a # character and runs to the end of the line.
The computer ignores comments,
but they’re invaluable for helping people (including your future self) understand and use scripts.
The only caveat is that each time you modify the script,
you should check that the comment is still accurate:
an explanation that sends the reader in the wrong direction is worse than none at all.
What if we want to process many files in a single pipeline?
For example, if we want to sort our .pdb files by length, we would type:
$ wc -l *.pdb | sort -n
because wc -l lists the number of lines in the files
(recall that wc stands for ‘word count’, adding the -l option means ‘count lines’ instead)
and sort -n sorts things numerically.
We could put this in a file,
but then it would only ever sort a list of .pdb files in the current directory.
If we want to be able to get a sorted list of other kinds of files,
we need a way to get all those names into the script.
We can’t use $1, $2, and so on
because we don’t know how many files there are.
Instead, we use the special variable $@,
which means,
‘All of the command-line arguments to the shell script’.
We also should put $@ inside double-quotes
to handle the case of arguments containing spaces
("$@" is special syntax and is equivalent to "$1" "$2" …).
Here’s an example:
$ nano sorted.sh
# Sort files by their length.
# Usage: bash sorted.sh one_or_more_filenames
wc -l "$@" | sort -n
$ bash sorted.sh *.pdb ../generic/*.dat
9 methane.pdb
12 ethane.pdb
15 propane.pdb
20 cubane.pdb
21 pentane.pdb
30 octane.pdb
163 ../generic/a-file.dat
163 ../generic/b-file.dat
163 ../generic/c-file.dat
596 total
List Unique Species
Leah has several hundred data files, each of which is formatted like our “counts.csv”:
2013-11-05,deer,5 2013-11-05,rabbit,22 2013-11-05,raccoon,7 2013-11-06,rabbit,19 2013-11-06,deer,2 2013-11-06,fox,1 2013-11-07,rabbit,18 2013-11-07,bear,1This file is given in
shell-lesson-data/ex-data/csv/counts.csv.We can use the command
cut -d , -f 2 counts.txt | sort | uniqto produce the unique species incounts.txt. In order to avoid having to type out this series of commands every time, a scientist may choose to write a shell script instead.Write a shell script called
species.shthat takes any number of filenames as command-line arguments, and uses a variation of the above command to print a list of the unique species appearing in each of those files separately.Solution
# Script to find unique species in csv files where species is the second data field # This script accepts any number of file names as command line arguments # Loop over all files for file in $@ do echo "Unique species in $file:" # Extract species names cut -d , -f 2 $file | sort | uniq done
Suppose we have just run a series of commands that did something useful — for example, that created a graph we’d like to use in a paper. We’d like to be able to re-create the graph later if we need to, so we want to save the commands in a file. Instead of typing them in again (and potentially getting them wrong) we can do this:
$ history | tail -n 5 > redo-figure-3.sh
The file redo-figure-3.sh now contains:
297 bash goostats.sh NENE01729B.txt stats-NENE01729B.txt
298 bash goodiff.sh stats-NENE01729B.txt /data/validated/01729.txt > 01729-differences.txt
299 cut -d ',' -f 2-3 01729-differences.txt > 01729-time-series.txt
300 ygraph --format scatter --color bw --borders none 01729-time-series.txt figure-3.png
301 history | tail -n 5 > redo-figure-3.sh
After a moment’s work in an editor to remove the serial numbers on the commands,
and to remove the final line where we called the history command,
we have a completely accurate record of how we created that figure.
Why Record Commands in the History Before Running Them?
If you run the command:
$ history | tail -n 5 > recent.shthe last command in the file is the
historycommand itself, i.e., the shell has addedhistoryto the command log before actually running it. In fact, the shell always adds commands to the log before running them. Why do you think it does this?Solution
If a command causes something to crash or hang, it might be useful to know what that command was, in order to investigate the problem. Were the command only be recorded after running it, we would not have a record of the last command run in the event of a crash.
In practice, most people develop shell scripts by running commands at the shell prompt a few times
to make sure they’re doing the right thing,
then saving them in a file for re-use.
This style of work allows people to recycle
what they discover about their data and their workflow with one call to history
and a bit of editing to clean up the output
and save it as a shell script.
Example Pipeline: Creating a Script
If we want to make our analytics must be reproducible, the easiest way to capture all the steps is in a script.
First we return to the project directory:
$ cd ../../ex-files/
We creates a file using nano …
$ nano do-stats.sh
…which contains the following:
# Calculate stats for data files.
for datafile in "$@"
do
echo $datafile
bash goostats.sh $datafile stats-$datafile
done
We save this in a file called do-stats.sh
so that we can now re-do the first stage of the analysis by typing:
$ bash do-stats.sh NENE*A.txt NENE*B.txt
We can also do this:
$ bash do-stats.sh NENE*A.txt NENE*B.txt | wc -l
so that the output is just the number of files processed rather than the names of the files that were processed.
One thing to note about the script is that it lets the person running it decide what files to process. We could have written it as:
# Calculate stats for Site A and Site B data files.
for datafile in NENE*A.txt NENE*B.txt
do
echo $datafile
bash goostats.sh $datafile stats-$datafile
done
The advantage is that this always selects the right files:
we doesn’t have to remember to exclude the ‘Z’ files.
The disadvantage is that it always selects just those files — we can’t run it on all files
(including the ‘Z’ files),
or on the ‘G’ or ‘H’ files
without editing the script.
If we wanted to be more adventurous,
we could modify the script to check for command-line arguments,
and use NENE*A.txt NENE*B.txt if none were provided.
Of course, this introduces another tradeoff between flexibility and complexity.
Variables in Shell Scripts
In the
proteindirectory, imagine you have a shell script calledscript.shcontaining the following commands:head -n $2 $1 tail -n $3 $1While you are in the
proteindirectory, you type the following command:$ bash script.sh '*.pdb' 1 1Which of the following outputs would you expect to see?
- All of the lines between the first and the last lines of each file ending in
.pdbin theproteindirectory- The first and the last line of each file ending in
.pdbin theproteindirectory- The first and the last line of each file in the
proteindirectory- An error because of the quotes around
*.pdbSolution
The correct answer is 2.
The special variables $1, $2 and $3 represent the command line arguments given to the script, such that the commands run are:
$ head -n 1 cubane.pdb ethane.pdb octane.pdb pentane.pdb propane.pdb $ tail -n 1 cubane.pdb ethane.pdb octane.pdb pentane.pdb propane.pdbThe shell does not expand
'*.pdb'because it is enclosed by quote marks. As such, the first argument to the script is'*.pdb'which gets expanded within the script byheadandtail.
Find the Longest File With a Given Extension
Write a shell script called
longest.shthat takes the name of a directory and a filename extension as its arguments, and prints out the name of the file with the most lines in that directory with that extension. For example:$ bash longest.sh shell-lesson-data/data/pdb pdbwould print the name of the
.pdbfile inshell-lesson-data/data/pdbthat has the most lines.Feel free to test your script on another directory e.g.
$ bash longest.sh shell-lesson-data/writing/data txtSolution
# Shell script which takes two arguments: # 1. a directory name # 2. a file extension # and prints the name of the file in that directory # with the most lines which matches the file extension. wc -l $1/*.$2 | sort -n | tail -n 2 | head -n 1The first part of the pipeline,
wc -l $1/*.$2 | sort -n, counts the lines in each file and sorts them numerically (largest last). When there’s more than one file,wcalso outputs a final summary line, giving the total number of lines across all files. We usetail -n 2 | head -n 1to throw away this last line.With
wc -l $1/*.$2 | sort -n | tail -n 1we’ll see the final summary line: we can build our pipeline up in pieces to be sure we understand the output.
Script Reading Comprehension
For this question, consider the
shell-lesson-data/ex-data/proteindirectory once again. This contains a number of.pdbfiles in addition to any other files you may have created. Explain what each of the following three scripts would do when run asbash script1.sh *.pdb,bash script2.sh *.pdb, andbash script3.sh *.pdbrespectively.# Script 1 echo *.*# Script 2 for filename in $1 $2 $3 do cat $filename done# Script 3 echo $@.pdbSolutions
In each case, the shell expands the wildcard in
*.pdbbefore passing the resulting list of file names as arguments to the script.Script 1 would print out a list of all files containing a dot in their name. The arguments passed to the script are not actually used anywhere in the script.
Script 2 would print the contents of the first 3 files with a
.pdbfile extension.$1,$2, and$3refer to the first, second, and third argument respectively.Script 3 would print all the arguments to the script (i.e. all the
.pdbfiles), followed by.pdb.$@refers to all the arguments given to a shell script.cubane.pdb ethane.pdb methane.pdb octane.pdb pentane.pdb propane.pdb.pdb
Debugging Scripts
Suppose you have saved the following script in a file called
do-errors.shin threx-files/scriptsdirectory:# Calculate stats for data files. for datafile in "$@" do echo $datfile bash goostats.sh $datafile stats-$datafile doneWhen you run it from the
ex-filesdirectory:$ bash do-errors.sh NENE*A.txt NENE*B.txtthe output is blank. To figure out why, re-run the script using the
-xoption:$ bash -x do-errors.sh NENE*A.txt NENE*B.txtWhat is the output showing you? Which line is responsible for the error?
Solution
The
-xoption causesbashto run in debug mode. This prints out each command as it is run, which will help you to locate errors. In this example, we can see thatechoisn’t printing anything. We have made a typo in the loop variable name, and the variabledatfiledoesn’t exist, hence returning an empty string.
Key Points
Save commands in files (usually called shell scripts) for re-use.
bash [filename]runs the commands saved in a file.
$@refers to all of a shell script’s command-line arguments.
$1,$2, etc., refer to the first command-line argument, the second command-line argument, etc.Place variables in quotes if the values might have spaces in them.
Letting users decide what files to process is more flexible and more consistent with built-in Unix commands.
Finding Things
Overview
Teaching: 20 min
Exercises: 20 minQuestions
How can I find files?
How can I find things in files?
Objectives
Use
grepto select lines from text files that match simple patterns.Use
findto find files and directories whose names match simple patterns.Use the output of one command as the command-line argument(s) to another command.
Explain what is meant by ‘text’ and ‘binary’ files, and why many common tools don’t handle the latter well.
In the same way that many of us now use ‘Google’ as a verb meaning ‘to find’, Unix programmers often use the word ‘grep’. ‘grep’ is a contraction of ‘global/regular expression/print’, a common sequence of operations in early Unix text editors. It is also the name of a very useful command-line program.
grep finds and prints lines in files that match a pattern.
For our examples,
we will use a file that contains three haiku taken from a
1998 competition in Salon magazine. For this set of examples,
we’re going to be working in the writing subdirectory:
$ cd
$ cd Desktop/shell-lesson-data/ex-data/text
$ cat haiku.txt
The Tao that is seen
Is not the true Tao, until
You bring fresh toner.
With searching comes loss
and the presence of absence:
"My Thesis" not found.
Yesterday it worked
Today it is not working
Software is like that.
Forever, or Five Years
We haven’t linked to the original haiku because they don’t appear to be on Salon’s site any longer. As Jeff Rothenberg said, ‘Digital information lasts forever — or five years, whichever comes first.’ Luckily, popular content often has backups.
Let’s find lines that contain the word ‘Tao’:
$ grep Tao haiku.txt
The Tao that is seen
Is not the true Tao, until
Here, Tao is the pattern we’re searching for.
The grep command searches through the file, looking for matches to the pattern specified.
To use it type grep, then the pattern we’re searching for and finally
the name of the file (or files) we’re searching in.
The output is the two lines in the file that contain the letters ‘Tao’.
By default, grep searches for a pattern in a case-sensitive way. In addition, the search pattern we have selected does not have to form a complete word, as we will see in the next example.
Let’s search for the pattern: ‘The’.
$ grep The haiku.txt
The Tao that is seen
"My Thesis" not found.
This time, two lines that include the letters ‘The’ are outputted, one of which contained our search pattern within a larger word, ‘Thesis’.
To restrict matches to lines containing the word ‘The’ on its own,
we can give grep with the -w option.
This will limit matches to word boundaries.
Later in this lesson, we will also see how we can change the search behavior of grep with respect to its case sensitivity.
$ grep -w The haiku.txt
The Tao that is seen
Note that a ‘word boundary’ includes the start and end of a line, so not
just letters surrounded by spaces.
Sometimes we don’t
want to search for a single word, but a phrase. This is also easy to do with
grep by putting the phrase in quotes.
$ grep -w "is like" haiku.txt
Software is like that.
We’ve now seen that you don’t have to have quotes around single words, but it is useful to use quotes when searching for multiple words. It also helps to make it easier to distinguish between the search term or phrase and the file being searched. We will use quotes in the remaining examples.
Another useful option is -n, which numbers the lines that match:
$ grep -n "it" haiku.txt
5:With searching comes loss
9:Yesterday it worked
10:Today it is not working
Here, we can see that lines 5, 9, and 10 contain the letters ‘it’.
We can combine options (i.e. flags) as we do with other Unix commands.
For example, let’s find the lines that contain the word ‘the’.
We can combine the option -w to find the lines that contain the word ‘the’
and -n to number the lines that match:
$ grep -n -w "the" haiku.txt
2:Is not the true Tao, until
6:and the presence of absence:
Now we want to use the option -i to make our search case-insensitive:
$ grep -n -w -i "the" haiku.txt
1:The Tao that is seen
2:Is not the true Tao, until
6:and the presence of absence:
Now, we want to use the option -v to invert our search, i.e., we want to output
the lines that do not contain the word ‘the’.
$ grep -n -w -v "the" haiku.txt
1:The Tao that is seen
3:You bring fresh toner.
4:
5:With searching comes loss
7:"My Thesis" not found.
8:
9:Yesterday it worked
10:Today it is not working
11:Software is like that.
If we use the -r (recursive) option,
grep can search for a pattern recursively through a set of files in subdirectories.
Let’s search recursively for Yesterday in the shell-lesson-data/ex-data/text directory:
$ grep -r Yesterday .
./LittleWomen.txt:"Yesterday, when Aunt was asleep and I was trying to be as still as a
./LittleWomen.txt:Yesterday at dinner, when an Austrian officer stared at us and then
./LittleWomen.txt:Yesterday was a quiet day spent in teaching, sewing, and writing in my
./haiku.txt:Yesterday it worked
grep has lots of other options. To find out what they are, we can type:
$ grep --help
Usage: grep [OPTION]... PATTERN [FILE]...
Search for PATTERN in each FILE or standard input.
PATTERN is, by default, a basic regular expression (BRE).
Example: grep -i 'hello world' menu.h main.c
Regexp selection and interpretation:
-E, --extended-regexp PATTERN is an extended regular expression (ERE)
-F, --fixed-strings PATTERN is a set of newline-separated fixed strings
-G, --basic-regexp PATTERN is a basic regular expression (BRE)
-P, --perl-regexp PATTERN is a Perl regular expression
-e, --regexp=PATTERN use PATTERN for matching
-f, --file=FILE obtain PATTERN from FILE
-i, --ignore-case ignore case distinctions
-w, --word-regexp force PATTERN to match only whole words
-x, --line-regexp force PATTERN to match only whole lines
-z, --null-data a data line ends in 0 byte, not newline
Miscellaneous:
... ... ...
Using
grepWhich command would result in the following output:
and the presence of absence:
grep "of" haiku.txtgrep -E "of" haiku.txtgrep -w "of" haiku.txtgrep -i "of" haiku.txtSolution
The correct answer is 3, because the
-woption looks only for whole-word matches. The other options will also match ‘of’ when part of another word.
Wildcards
grep’s real power doesn’t come from its options, though; it comes from the fact that patterns can include wildcards. (The technical name for these is regular expressions, which is what the ‘re’ in ‘grep’ stands for.) Regular expressions are both complex and powerful; if you want to do complex searches, please look at the lesson on our website. As a taster, we can find lines that have an ‘o’ in the second position like this:$ grep -E "^.o" haiku.txtYou bring fresh toner. Today it is not working Software is like that.We use the
-Eoption and put the pattern in quotes to prevent the shell from trying to interpret it. (If the pattern contained a*, for example, the shell would try to expand it before runninggrep.) The^in the pattern anchors the match to the start of the line. The.matches a single character (just like?in the shell), while theomatches an actual ‘o’.
Tracking a Species
Leah has several hundred data files saved in one directory, each of which is formatted like this:
2012-11-05,deer,5 2012-11-05,rabbit,22 2012-11-05,raccoon,7 2012-11-06,rabbit,19 2012-11-06,deer,2 2012-11-06,fox,4 2012-11-07,rabbit,16 2012-11-07,bear,1She wants to write a shell script that takes a species as the first command-line argument and a directory as the second argument. The script should return one file called
<species>.txtcontaining a list of dates and the number of that species seen on each date. For example using the data shown above,rabbit.txtwould contain:2012-11-05,22 2012-11-06,19 2012-11-07,16Below, each line contains an individual command, or pipe. Arrange their sequence in one command in order to achieve Leah’s goal:
cut -d : -f 2
>
|
grep -w $1 -r $2
|
$1.txt
cut -d , -f 1,3
Hint: use
man grepto look for how to grep text recursively in a directory andman cutto select more than one field in a line.An example of such a file is provided in
shell-lesson-data/ex-data/csv/counts.csvSolution
grep -w $1 -r $2 | cut -d : -f 2 | cut -d , -f 1,3 > $1.txtActually, you can swap the order of the two cut commands and it still works. At the command line, try changing the order of the cut commands, and have a look at the output from each step to see why this is the case.
You would call the script above like this:
$ bash count-species.sh bear .
Little Women
You and your friend, having just finished reading Little Women by Louisa May Alcott, are in an argument. Of the four sisters in the book, Jo, Meg, Beth, and Amy, your friend thinks that Jo was the most mentioned. You, however, are certain it was Amy. Luckily, you have a file
LittleWomen.txtcontaining the full text of the novel (shell-lesson-data/ex-data/text/LittleWomen.txt). Using aforloop, how would you tabulate the number of times each of the four sisters is mentioned?Hint: one solution might employ the commands
grepandwcand a|, while another might utilizegrepoptions. There is often more than one way to solve a programming task, so a particular solution is usually chosen based on a combination of yielding the correct result, elegance, readability, and speed.Solutions
for sis in Jo Meg Beth Amy
do
    echo $sis:
    grep -ow $sis LittleWomen.txt | wc -l
done
Alternative, slightly inferior solution:
for sis in Jo Meg Beth Amy
do
    echo $sis:
    grep -ocw $sis LittleWomen.txt
done
This solution is inferior because
grep -conly reports the number of lines matched. The total number of matches reported by this method will be lower if there is more than one match per line.Perceptive observers may have noticed that character names sometimes appear in all-uppercase in chapter titles (e.g. ‘MEG GOES TO VANITY FAIR’). If you wanted to count these as well, you could add the
-ioption for case-insensitivity (though in this case, it doesn’t affect the answer to which sister is mentioned most frequently).
While grep finds lines in files,
the find command finds files themselves.
Again,
it has a lot of options;
to show how the simplest ones work, we’ll use the shell-lesson-data/ex-data
directory tree shown below.
.
├── csv/
│   └── counts.csv
├── generic/
│   ├── a-file.dat
│   ├── b-file.dat
│   └── c-file.dat
├── numbers.txt
├── protein/
│   ├── cubane.pdb
│   ├── ethane.pdb
│   ├── methane.pdb
│   ├── octane.pdb
│   ├── pentane.pdb
│   └── propane.pdb
└── text/
    ├── haiku.txt
    └── LittleWomen.txt
The ex-data directory contains one file, numbers.txt and four directories that are filled with different file types:
csv, generic, proteins and text containing various files.
For our first command,
let’s run find . (remember to run this command from the shell-lesson-data/ex-data folder).
$ find .
.
./text
./text/LittleWomen.txt
./text/haiku.txt
./generic
./generic/a-file.dat
./generic/b-file.dat
./generic/c-file.dat
./csv
./csv/counts.csv
./numbers.txt
./protein
./protein/ethane.pdb
./protein/propane.pdb
./protein/octane.pdb
./protein/pentane.pdb
./protein/methane.pdb
./protein/cubane.pdb
As always, the . on its own means the current working directory,
which is where we want our search to start.
find’s output is the names of every file and directory
under the current working directory.
This can seem useless at first but find has many options
to filter the output and in this lesson we will discover some
of them.
The first option in our list is
-type d that means ‘things that are directories’.
Sure enough, find’s output is the names of the five directories (including .):
$ find . -type d
.
./text
./generic
./csv
./protein
Notice that the objects find finds are not listed in any particular order.
If we change -type d to -type f,
we get a listing of all the files instead:
$ find . -type f
./text/LittleWomen.txt
./text/haiku.txt
./generic/a-file.dat
./generic/b-file.dat
./generic/c-file.dat
./csv/counts.csv
./numbers.txt
./protein/ethane.pdb
./protein/propane.pdb
./protein/octane.pdb
./protein/pentane.pdb
./protein/methane.pdb
./protein/cubane.pdb
Now let’s try matching by name:
$ find . -name *.txt
./numbers.txt
We expected it to find all the text files,
but it only prints out ./numbers.txt.
The problem is that the shell expands wildcard characters like * before commands run.
Since *.txt in the current directory expands to ./numbers.txt,
the command we actually ran was:
$ find . -name numbers.txt
find did what we asked; we just asked for the wrong thing.
To get what we want,
let’s do what we did with grep:
put *.txt in quotes to prevent the shell from expanding the * wildcard.
This way,
find actually gets the pattern *.txt, not the expanded filename numbers.txt:
$ find . -name "*.txt"
./text/LittleWomen.txt
./text/haiku.txt
./numbers.txt
Listing vs. Finding
lsandfindcan be made to do similar things given the right options, but under normal circumstances,lslists everything it can, whilefindsearches for things with certain properties and shows them.
As we said earlier,
the command line’s power lies in combining tools.
We’ve seen how to do that with pipes;
let’s look at another technique.
As we just saw,
find . -name "*.txt" gives us a list of all text files in or below the current directory.
How can we combine that with wc -l to count the lines in all those files?
The simplest way is to put the find command inside $():
$ wc -l $(find . -name "*.txt")
  21022 ./text/LittleWomen.txt
     11 ./text/haiku.txt
      5 ./numbers.txt
  21038 total
When the shell executes this command,
the first thing it does is run whatever is inside the $().
It then replaces the $() expression with that command’s output.
Since the output of find is the three filenames ./text/LittleWomen.txt,
./text/haiku.txt, and ./numbers.txt, the shell constructs the command:
$ wc -l ./text/LittleWomen.txt ./text/haiku.txt ./numbers.txt
which is what we wanted.
This expansion is exactly what the shell does when it expands wildcards like * and ?,
but lets us use any command we want as our own ‘wildcard’.
It’s very common to use find and grep together.
The first finds files that match a pattern;
the second looks for lines inside those files that match another pattern.
Here, for example, we can find txt files that contain the word “searching”
by looking for the string ‘searching’ in all the .txt files in the current directory:
$ grep "searching" $(find . -name "*.txt")
./text/LittleWomen.txt:sitting on the top step, affected to be searching for her book, but was
./text/haiku.txt:With searching comes loss
Matching and Subtracting
The
-voption togrepinverts pattern matching, so that only lines which do not match the pattern are printed. Given that, which of the following commands will find all .dat files ingenericexceptc-file.dat? Once you have thought about your answer, you can test the commands in theshell-lesson-data/ex-datadirectory.
find generic -name "*.dat" | grep -v c-filefind generic -name *.dat | grep -v c-filegrep -v "c-file" $(find generic -name "*.dat")- None of the above.
Solution
Option 1. is correct. Putting the match expression in quotes prevents the shell expanding it, so it gets passed to the
findcommand.Option 2 is also works in this instance because the shell tries to expand
*.datbut there are no*.datfiles in the current directory, so the wildcard expression gets passed tofind. We first encountered this in episode 3.Option 3 is incorrect because it searches the contents of the files for lines which do not match ‘c-file’, rather than searching the file names.
Binary Files
We have focused exclusively on finding patterns in text files. What if your data is stored as images, in databases, or in some other format?
A handful of tools extend
grepto handle a few non text formats. But a more generalizable approach is to convert the data to text, or extract the text-like elements from the data. On the one hand, it makes simple things easy to do. On the other hand, complex things are usually impossible. For example, it’s easy enough to write a program that will extract X and Y dimensions from image files forgrepto play with, but how would you write something to find values in a spreadsheet whose cells contained formulas?A last option is to recognize that the shell and text processing have their limits, and to use another programming language. When the time comes to do this, don’t be too hard on the shell: many modern programming languages have borrowed a lot of ideas from it, and imitation is also the sincerest form of praise.
The Unix shell is older than most of the people who use it. It has survived so long because it is one of the most productive programming environments ever created — maybe even the most productive. Its syntax may be cryptic, but people who have mastered it can experiment with different commands interactively, then use what they have learned to automate their work. Graphical user interfaces may be easier to use at first, but once learned, the productivity in the shell is unbeatable. And as Alfred North Whitehead wrote in 1911, ‘Civilization advances by extending the number of important operations which we can perform without thinking about them.’
findPipeline Reading ComprehensionWrite a short explanatory comment for the following shell script:
wc -l $(find . -name "*.dat") | sort -nSolution
- Find all files with a
.datextension recursively from the current directory- Count the number of lines each of these files contains
- Sort the output from step 2. numerically
Key Points
findfinds files with specific properties that match patterns.
grepselects lines in files that match patterns.
--helpis an option supported by many bash commands, and programs that can be run from within Bash, to display more information on how to use these commands or programs.
man [command]displays the manual page for a given command.
$([command])inserts a command’s output in place.
Automated Version Control
Overview
Teaching: 5 min
Exercises: 0 minQuestions
What is version control and why should I use it?
Objectives
Understand the benefits of an automated version control system.
Understand the basics of how automated version control systems work.
We’ll start by exploring how version control can be used to keep track of what one person did and when. Even if you aren’t collaborating with other people, automated version control is much better than this situation:

“Piled Higher and Deeper” by Jorge Cham, http://www.phdcomics.com
We’ve all been in this situation before: it seems ridiculous to have multiple nearly-identical versions of the same document. Some word processors let us deal with this a little better, such as Microsoft Word’s Track Changes, Google Docs’ version history, or LibreOffice’s Recording and Displaying Changes.
Version control systems start with a base version of the document and then record changes you make each step of the way. You can think of it as a recording of your progress: you can rewind to start at the base document and play back each change you made, eventually arriving at your more recent version.

Once you think of changes as separate from the document itself, you can then think about “playing back” different sets of changes on the base document, ultimately resulting in different versions of that document. For example, two users can make independent sets of changes on the same document.

Unless multiple users make changes to the same section of the document - a conflict - you can incorporate two sets of changes into the same base document.

A version control system is a tool that keeps track of these changes for us, effectively creating different versions of our files. It allows us to decide which changes will be made to the next version (each record of these changes is called a commit), and keeps useful metadata about them. The complete history of commits for a particular project and their metadata make up a repository. Repositories can be kept in sync across different computers, facilitating collaboration among different people.
To build this workshop’s website, we often have multiple people working on the site independantly. Here is a snapshot of the history of changes, or commits, which we have implemented on this website. You will notice multiple people are involved, and they each include a comment on what changes are being made.
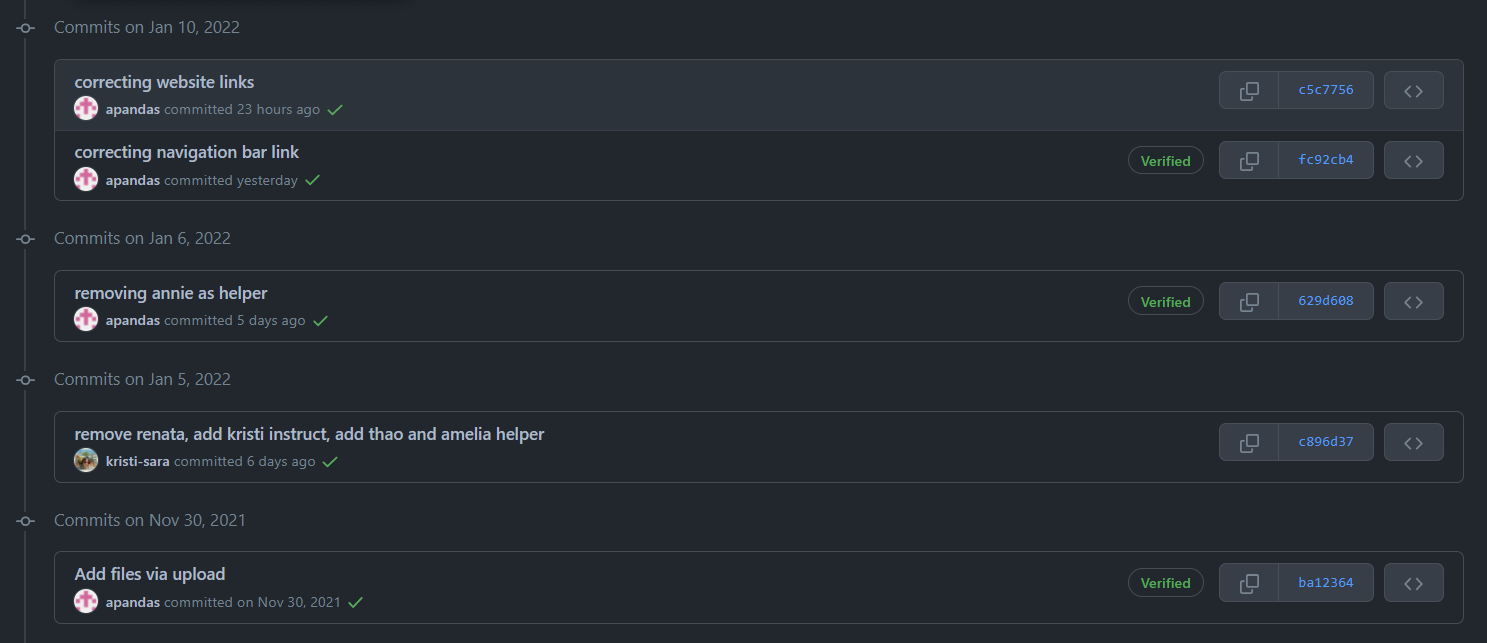
Taking a closer look at one of these commits, we can see what exactly has been edited. The line of content which has been changed is marked in red, and the new line of content is marked in green.
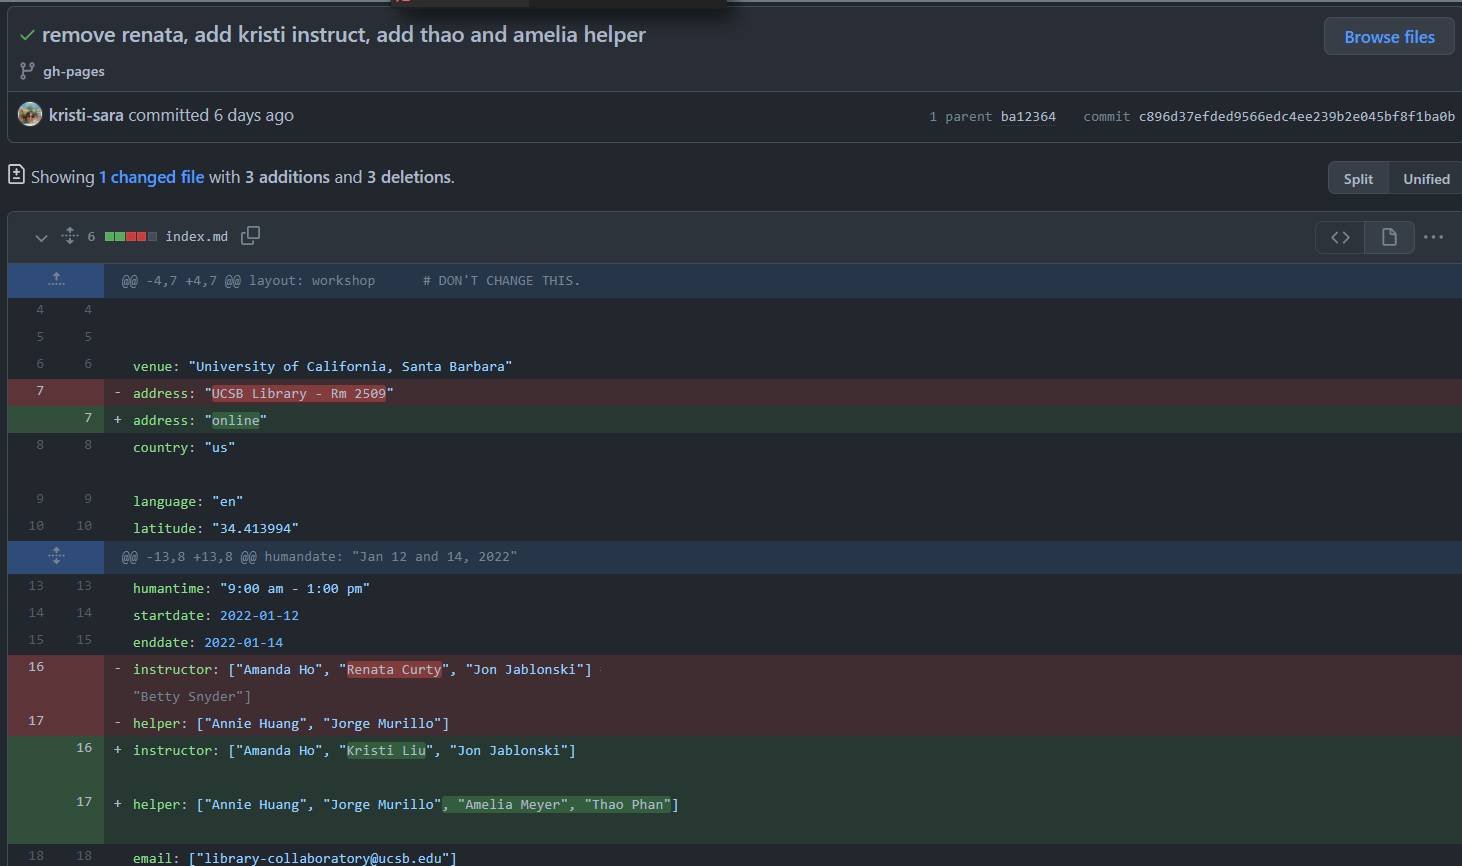
The Long History of Version Control Systems
Automated version control systems are nothing new. Tools like RCS, CVS, or Subversion have been around since the early 1980s and are used by many large companies. However, many of these are now considered legacy systems (i.e., outdated) due to various limitations in their capabilities. More modern systems, such as Git and Mercurial, are distributed, meaning that they do not need a centralized server to host the repository. These modern systems also include powerful merging tools that make it possible for multiple authors to work on the same files concurrently.
Paper Writing
Imagine you drafted an excellent paragraph for a paper you are writing, but later ruin it. How would you retrieve the excellent version of your conclusion? Is it even possible?
Imagine you have 5 co-authors. How would you manage the changes and comments they make to your paper? If you use LibreOffice Writer or Microsoft Word, what happens if you accept changes made using the
Track Changesoption? Do you have a history of those changes?Solution
Recovering the excellent version is only possible if you created a copy of the old version of the paper. The danger of losing good versions often leads to the problematic workflow illustrated in the PhD Comics cartoon at the top of this page.
Collaborative writing with traditional word processors is cumbersome. Either every collaborator has to work on a document sequentially (slowing down the process of writing), or you have to send out a version to all collaborators and manually merge their comments into your document. The ‘track changes’ or ‘record changes’ option can highlight changes for you and simplifies merging, but as soon as you accept changes you will lose their history. You will then no longer know who suggested that change, why it was suggested, or when it was merged into the rest of the document. Even online word processors like Google Docs or Microsoft Office Online do not fully resolve these problems.
Key Points
Version control is like an unlimited ‘undo’.
Version control also allows many people to work in parallel.
Setting Up Git
Overview
Teaching: 15 min
Exercises: 0 minQuestions
How do I get set up to use Git?
Objectives
Configure
gitthe first time it is used on a computer.Understand the meaning of the
--globalconfiguration flag.
When we use Git on a new computer for the first time, we need to configure a few things. Below are a few examples of configurations we will set as we get started with Git:
- our name and email address,
- what our preferred text editor is,
- and that we want to use these settings globally (i.e. for every project).
On a command line, Git commands are written as git verb options,
where verb is what we actually want to do and options is additional optional information which may be needed for the verb. So here is how
Dracula sets up his new laptop:
$ git config --global user.name "Your Name"
$ git config --global user.email "your.email@ucsb.edu"
Please use your own name and email address instead. This user name and email will be associated with your subsequent Git activity, which means that any changes pushed to GitHub, BitBucket, GitLab or another Git host server after this lesson will include this information.
For this lesson, we will be interacting with GitHub and so the email address used should be the same as the one used when setting up your GitHub account. If you are concerned about privacy, please review GitHub’s instructions for keeping your email address private.
Keeping your email private
If you elect to use a private email address with GitHub, then use that same email address for the
user.emailvalue, e.g.username@users.noreply.github.comreplacingusernamewith your GitHub one.
Line Endings
As with other keys, when you hit Return on your keyboard, your computer encodes this input as a character. Different operating systems use different character(s) to represent the end of a line. (You may also hear these referred to as newlines or line breaks.) Because Git uses these characters to compare files, it may cause unexpected issues when editing a file on different machines. Though it is beyond the scope of this lesson, you can read more about this issue in the Pro Git book.
You can change the way Git recognizes and encodes line endings using the
core.autocrlfcommand togit config. The following settings are recommended:On macOS and Linux:
$ git config --global core.autocrlf inputAnd on Windows:
$ git config --global core.autocrlf true
Dracula also has to set his favorite text editor, following this table:
| Editor | Configuration command |
|---|---|
| Atom | $ git config --global core.editor "atom --wait" |
| nano | $ git config --global core.editor "nano -w" |
| BBEdit (Mac, with command line tools) | $ git config --global core.editor "bbedit -w" |
| Sublime Text (Mac) | $ git config --global core.editor "/Applications/Sublime\ Text.app/Contents/SharedSupport/bin/subl -n -w" |
| Sublime Text (Win, 32-bit install) | $ git config --global core.editor "'c:/program files (x86)/sublime text 3/sublime_text.exe' -w" |
| Sublime Text (Win, 64-bit install) | $ git config --global core.editor "'c:/program files/sublime text 3/sublime_text.exe' -w" |
| Notepad (Win) | $ git config --global core.editor "c:/Windows/System32/notepad.exe" |
| Notepad++ (Win, 32-bit install) | $ git config --global core.editor "'c:/program files (x86)/Notepad++/notepad++.exe' -multiInst -notabbar -nosession -noPlugin" |
| Notepad++ (Win, 64-bit install) | $ git config --global core.editor "'c:/program files/Notepad++/notepad++.exe' -multiInst -notabbar -nosession -noPlugin" |
| Kate (Linux) | $ git config --global core.editor "kate" |
| Gedit (Linux) | $ git config --global core.editor "gedit --wait --new-window" |
| Scratch (Linux) | $ git config --global core.editor "scratch-text-editor" |
| Emacs | $ git config --global core.editor "emacs" |
| Vim | $ git config --global core.editor "vim" |
| VS Code | $ git config --global core.editor "code --wait" |
It is possible to reconfigure the text editor for Git whenever you want to change it.
Exiting Vim
Note that Vim is the default editor for many programs. If you haven’t used Vim before and wish to exit a session without saving your changes, press Esc then type
:q!and hit Return. If you want to save your changes and quit, press Esc then type:wqand hit Return.
Git (2.28+) allows configuration of the name of the branch created when you
initialize any new repository. Dracula decides to use that feature to set it to main so
it matches the cloud service he will eventually use.
$ git config --global init.defaultBranch main
Default Git branch naming
Source file changes are associated with a “branch.” For new learners in this lesson, it’s enough to know that branches exist, and this lesson uses one branch.
By default, Git will create a branch calledmasterwhen you create a new repository withgit init(as explained in the next Episode). This term evokes the racist practice of human slavery and the software development community has moved to adopt more inclusive language.In 2020, most Git code hosting services transitioned to using
mainas the default branch. As an example, any new repository that is opened in GitHub and GitLab default tomain. However, Git has not yet made the same change. As a result, local repositories must be manually configured have the same main branch name as most cloud services.For versions of Git prior to 2.28, the change can be made on an individual repository level. The command for this is in the next episode. Note that if this value is unset in your local Git configuration, the
init.defaultBranchvalue defaults tomaster.
The five commands we just ran above only need to be run once: the flag --global tells Git
to use the settings for every project, in your user account, on this computer.
You can check your settings at any time:
$ git config --list
You can change your configuration as many times as you want: use the same commands to choose another editor or update your email address.
Proxy
In some networks you need to use a proxy. If this is the case, you may also need to tell Git about the proxy:
$ git config --global http.proxy proxy-url
$ git config --global https.proxy proxy-url
To disable the proxy, use
$ git config --global --unset http.proxy
$ git config --global --unset https.proxy
Git Help and Manual
Always remember that if you forget the subcommands or options of a
gitcommand, you can access the relevant list of options typinggit <command> -hor access the corresponding Git manual by typinggit <command> --help, e.g.:$ git config -h $ git config --helpWhile viewing the manual, remember the
:is a prompt waiting for commands and you can press Q to exit the manual.More generally, you can get the list of available
gitcommands and further resources of the Git manual typing:$ git help
Key Points
Use
git configwith the--globaloption to configure a user name, email address, editor, and other preferences once per machine.
09a Break
Overview
Teaching: min
Exercises: minQuestions
Objectives
Key Points
Creating a Repository
Overview
Teaching: 10 min
Exercises: 0 minQuestions
Where does Git store information?
Objectives
Create a local Git repository.
Describe the purpose of the
.gitdirectory.
Once Git is configured, we can start using it.
The usage we will demonstrate is making a repository of shell scripts</a>.
First, let’s create a directory in Desktop folder for our work and then move into that directory:
$ cd ~/Desktop
$ mkdir shell-scripts
$ cd shell-scripts
Then we tell Git to make shell-scripts a repository
– a place where Git can store versions of our files:
$ git init
It is important to note that git init will create a repository that
includes subdirectories and their files—there is no need to create
separate repositories nested within the shell-scripts repository, whether
subdirectories are present from the beginning or added later. Also, note
that the creation of the shell-scripts directory and its initialization as a
repository are completely separate processes.
If we use ls to show the directory’s contents,
it appears that nothing has changed:
$ ls
But if we add the -a flag to show everything,
we can see that Git has created a hidden directory within shell-scripts called .git:
$ ls -a
. .. .git
Git uses this special subdirectory to store all the information about the project,
including all files and sub-directories located within the project’s directory.
If we ever delete the .git subdirectory,
we will lose the project’s history.
Next, we will change the default branch to be called main.
This might be the default branch depending on your settings and version
of git.
See the setup episode for more information on this change.
git checkout -b main
Switched to a new branch 'main'
We can check that everything is set up correctly by asking Git to tell us the status of our project:
$ git status
On branch main

No commits yet

nothing to commit (create/copy files and use "git add" to track)
If you are using a different version of git, the exact
wording of the output might be slightly different.
Places to Create Git Repositories
To track different types of scripts, we will first create a
user-inputproject inside ofshell-scriptsproject with the following sequence of commands:$ cd ~/Desktop # return to Desktop directory $ cd shell-scripts # go into shell-scripts directory, which is already a Git repository $ ls -a # ensure the .git subdirectory is still present in the shell-scripts directory $ mkdir user-input # make a subdirectory shell-scripts/user-input $ cd user-input # go into user-input subdirectory $ git init # make the user-input subdirectory a Git repository $ ls -a # ensure the .git subdirectory is present indicating we have created a new Git repositoryIs the
git initcommand, run inside theuser-inputsubdirectory, required for tracking files stored in theuser-inputsubdirectory?Solution
No. we do not need to make the
user-inputsubdirectory a Git repository because theshell-scriptsrepository will track all files, sub-directories, and subdirectory files under theshell-scriptsdirectory. Thus, in order to track all information about user-input, we only needed to add theuser-inputsubdirectory to theshell-scriptsdirectory.Additionally, Git repositories can interfere with each other if they are “nested”: the outer repository will try to version-control the inner repository. Therefore, it’s best to create each new Git repository in a separate directory. To be sure that there is no conflicting repository in the directory, check the output of
git status. If it looks like the following, you are good to go to create a new repository as shown above:$ git statusfatal: Not a git repository (or any of the parent directories): .git
Correcting
git initMistakesNow we know how a nested repository is redundant and may cause confusion down the road. Say we would like to remove the nested repository. How can we undo our last
git initin theuser-inputsubdirectory?Solution – USE WITH CAUTION!
Background
Removing files from a Git repository needs to be done with caution. But we have not learned yet how to tell Git to track a particular file; we will learn this in the next episode. Files that are not tracked by Git can easily be removed like any other “ordinary” files with
$ rm filenameSimilarly a directory can be removed using
rm -r dirnameorrm -rf dirname. If the files or folder being removed in this fashion are tracked by Git, then their removal becomes another change that we will need to track, as we will see in the next episode.Solution
Git keeps all of its files in the
.gitdirectory. To recover from this little mistake, we can just remove the.gitfolder in the user-input subdirectory by running the following command from inside theshell-scriptsdirectory:$ rm -rf user-input/.gitBut be careful! Running this command in the wrong directory will remove the entire Git history of a project you might want to keep. Therefore, always check your current directory using the command
pwd.
Key Points
git initinitializes a repository.Git stores all of its repository data in the
.gitdirectory.
Tracking Changes
Overview
Teaching: 20 min
Exercises: 0 minQuestions
How do I record changes in Git?
How do I check the status of my version control repository?
How do I record notes about what changes I made and why?
Objectives
Go through the modify-add-commit cycle for one or more files.
Explain where information is stored at each stage of that cycle.
Distinguish between descriptive and non-descriptive commit messages.
Recall Bash Commands
First let’s make sure we’re still in the right directory. The first type of shell script we are using is called user input.
So, we still need a subdirectory, user-input, inside of shell-scripts.
Confirm you have ~/Desktop/shell-scripts/user-input and that it’s your working directory.
If you are not inside ~/Desktop/shell-scripts/user-input, recall how to move to through directories and how to make a subdirectory.
Recall Bash Commands
Try to create an empty directory inside of shell-scripts called user-input.
Commands
To see what your working directory is:
$ pwd
To change directories:
$ cd ~/Desktop/shell-scripts
To create a directory, and then move to that directory:
$ mkdir user-input # user-input is a chosen name for our subdirectory
$ cd user-input
Let’s create a shell script file inside of ~desktop/shell-scripts/user-input that is called ui-example.sh that contains shell scripts using user input.
We’ll use nano to edit the file;
you can use whatever editor you like.
In particular, this does not have to be the core.editor you set globally earlier. But remember, the bash command to create or edit a new file will depend on the editor you choose (it might not be nano). For a refresher on text editors, check out “Which Editor?” in The Unix Shell lesson.
$ nano ui-example.sh
Type the text below into the ui-example.sh file. Save the script; recall or discuss what each command does.
echo "What is your name?"
read name
echo "Hello $name."
Let’s first verify that the file was properly created by running the list command (ls):
$ ls
ui-example.sh
ui-example.sh contains some lines of code, which we can see by running:
$ cat ui-example.sh
echo "What is your name?"
read name
echo "Hello $name."
Run ui-example.sh using the bash command. What do you think the read command does?
If we check the status of our project again, Git tells us that it’s noticed the new file:
$ git status
On branch main

No commits yet

Untracked files:
   (use "git add <file>..." to include in what will be committed)

	ui-example.sh

nothing added to commit but untracked files present (use "git add" to track)
The “untracked files” message means that there’s a file in the directory
that Git isn’t keeping track of.
We can tell Git to track a file using git add:
$ git add ui-example.sh
and then check that the right thing happened:
$ git status
On branch main

No commits yet

Changes to be committed:
  (use "git rm --cached <file>..." to unstage)

	new file:   ui-example.sh
Git now knows that it’s supposed to keep track of ui-example.sh,
but it hasn’t recorded these changes as a commit yet.
To get it to do that,
we need to run one more command:
$ git commit -m "Adding in an example script on user input (commit #1)"
[main (root-commit) f22b25e] Adding in an example script on user input (commit #1)
 1 file changed, 3 insertions(+)
 create mode 100644 ui-example.sh
When we run git commit,
Git takes everything we have told it to save by using git add
and stores a copy permanently inside the special .git directory.
This permanent copy is called a commit
(or revision) and its short identifier is f22b25e. Your commit may have another identifier.
We use the -m flag (for “message”)
to record a short, descriptive, and specific comment that will help us remember later on what we did and why.
If we just run git commit without the -m option,
Git will launch nano (or whatever other editor we configured as core.editor)
so that we can write a longer message.
Good commit messages start with a brief (<50 characters) statement about the
changes made in the commit. Generally, the message should complete the sentence “If applied, this commit will”
If we run git status now:
$ git status
On branch main
nothing to commit, working directory clean
it tells us everything is up to date.
If we want to know what we’ve done recently,
we can ask Git to show us the project’s history using git log:
$ git log
commit 8d4f409759ab29069329922c15d51ebf856aa065
Author: user <user@ucsb.edu>
Date:   Thu Aug 22 09:51:46 2013 -0400

    Adding in an example script on user input (commit #1)
git log lists all commits made to a repository in reverse chronological order.
The listing for each commit includes
the commit’s full identifier
(which starts with the same characters as
the short identifier printed by the git commit command earlier),
the commit’s author,
when it was created,
and the log message Git was given when the commit was created.
Where Are My Changes?
If we run
lsat this point, we will still see just one file calledui-example.sh. That’s because Git saves information about files’ history in the special.gitdirectory mentioned earlier so that our filesystem doesn’t become cluttered (and so that we can’t accidentally edit or delete an old version).
Now suppose let’s add a comment to ui-example.sh.
(Again, we’ll edit with nano and then cat the file to show its contents;
you may use a different editor, and don’t need to cat.)
$ nano ui-example.sh
$ cat ui-example.sh
# 'read' command requests user to input text
echo "What is your name?"
read name
echo "Hello $name."
When we run git status now,
it tells us that a file it already knows about has been modified:
$ git status
On branch main
Changes not staged for commit:
  (use "git add <file>..." to update what will be committed)
  (use "git checkout -- <file>..." to discard changes in working directory)

	modified:   ui-example.sh

no changes added to commit (use "git add" and/or "git commit -a")
The last line is the key phrase:
“no changes added to commit”.
We have changed this file,
but we haven’t told Git we will want to save those changes
(which we do with git add)
nor have we saved them (which we do with git commit).
So let’s do that now. It is good practice to always review
our changes before saving them. We do this using git diff.
This shows us the differences between the current state
of the file and the most recently saved version:
$ git diff
diff --git a/user-input/ui-example.sh b/user-input/ui-example.sh
index b5c9f2a..6db94fd 100644
--- a/user-input/ui-example.sh
+++ b/user-input/ui-example.sh
@@ -1,3 +1,4 @@
+#'read' command requests user to input text
 echo "What is your name?"
 read name
 echo "Hello $name."
The output is cryptic because
it is actually a series of commands for tools like editors and patch
telling them how to reconstruct one file given the other.
If we break it down into pieces:
- The first line tells us that Git is producing output similar to the Unix
diffcommand comparing the old and new versions of the file. - The second line tells exactly which versions of the file
Git is comparing;
df0654aand315bf3aare unique computer-generated labels for those versions. - The third and fourth lines once again show the name of the file being changed.
- The remaining lines are the most interesting, they show us the actual differences
and the lines on which they occur.
In particular,
the
+marker in the first column shows where we added a line.
After reviewing our change, it’s time to commit it:
$ git commit -m "Add comment on what read command does (commit #2)"
On branch main
Changes not staged for commit:
  (use "git add <file>..." to update what will be committed)
  (use "git checkout -- <file>..." to discard changes in working directory)

	modified:   ui-example.sh

no changes added to commit (use "git add" and/or "git commit -a")
Whoops:
Git won’t commit because we didn’t use git add first.
Let’s fix that:
$ git add ui-example.sh
$ git commit -m "Add comment on what read command does (commit #2)"
[main 34961b1] Add comment on what `read` command does (commit #2)
 1 file changed, 1 insertion(+)
Git insists that we add files to the set we want to commit before actually committing anything. This allows us to commit our changes in stages and capture changes in logical portions rather than only large batches. For example, suppose we’re adding a few citations to relevant research to our thesis. We might want to commit those additions, and the corresponding bibliography entries, but not commit some of our work drafting the conclusion (which we haven’t finished yet).
To allow for this, Git has a special staging area where it keeps track of things that have been added to the current changeset but not yet committed.
Staging Area
If you think of Git as taking snapshots of changes over the life of a project,
git addspecifies what will go in a snapshot (putting things in the staging area), andgit committhen actually takes the snapshot, and makes a permanent record of it (as a commit). If you don’t have anything staged when you typegit commit, Git will prompt you to usegit commit -aorgit commit --all, which is kind of like gathering everyone to take a group photo! However, it’s almost always better to explicitly add things to the staging area, because you might commit changes you forgot you made. (Going back to the group photo simile, you might get an extra with incomplete makeup walking on the stage for the picture because you used-a!) Try to stage things manually, or you might find yourself searching for “git undo commit” more than you would like!

Let’s watch as our changes to a file move from our editor
to the staging area
and into long-term storage.
First, move the comment to be placed below Hello $name. Add in more content to the comment.:
$ nano ui-example.sh
$ cat ui-example.sh
echo "What is your name?"
read name
echo "Hello $name."
#the read command requests user input, we use `$` to recall the variable established by `read`
$ git diff
diff --git a/user-input/ui-example.sh b/user-input/ui-example.sh
index 6db94fd..d586f12 100644
--- a/user-input/ui-example.sh
+++ b/user-input/ui-example.sh
@@ -1,4 +1,4 @@
-#'read' command requests user to input text
 echo "What is your name?"
 read name
 echo "Hello $name."
+#`read` command requests user input, we use `$` to recall the variable established by `read`
So far, so good:
we’ve added one line to the end of the file
(shown with a + in the first column).
Now let’s put that change in the staging area
and see what git diff reports:
$ git add ui-example.sh
$ git diff
There is no output: as far as Git can tell, there’s no difference between what it’s been asked to save permanently and what’s currently in the directory. However, if we do this:
$ git diff --staged
diff --git a/user-input/ui-example.sh b/user-input/ui-example.sh
index 6db94fd..d586f12 100644
--- a/user-input/ui-example.sh
+++ b/user-input/ui-example.sh
@@ -1,4 +1,4 @@
-#'read' command requests user to input text
 echo "What is your name?"
 read name
 echo "Hello $name."
it shows us the difference between the last committed change and what’s in the staging area. Let’s save our changes:
$ git commit -m "Adding more notes about read (commit #3)"
[main 005937f] "Adding more notes about read command (commit #3)"
 1 file changed, 1 insertion(+), 1 deletion(-)
check our status:
$ git status
On branch main
nothing to commit, working directory clean
and look at the history of what we’ve done so far:
$ git log
commit d2f536d6198f12ebba1849af49405a4f54845dd6 (HEAD -> main)
Author: user <user@ucsb.edu>
Date:   Thu Aug 22 10:14:07 2013 -0400

    Adding more notes about read command (commit #3)

commit b798ee602bd76b92c39d8c62c6637d36109365e4
Author: user <user@ucsb.edu>
Date:   Thu Aug 22 10:07:21 2013 -0400

    Add comment on what read command does (commit #2)

commit 8d4f409759ab29069329922c15d51ebf856aa065
Author: user <user@ucsb.edu>
Date:   Thu Aug 22 09:51:46 2013 -0400

    Adding in an example script on user input (commit #1)
Word-based diffing
Sometimes, e.g. in the case of the text documents a line-wise diff is too coarse. That is where the
--color-wordsoption ofgit diffcomes in very useful as it highlights the changed words using colors.
Paging the Log
When the output of
git logis too long to fit in your screen,gituses a program to split it into pages of the size of your screen. When this “pager” is called, you will notice that the last line in your screen is a:, instead of your usual prompt.
- To get out of the pager, press Q.
- To move to the next page, press Spacebar.
- To search for
some_wordin all pages, press / and typesome_word. Navigate through matches pressing N.
Limit Log Size
To avoid having
git logcover your entire terminal screen, you can limit the number of commits that Git lists by using-N, whereNis the number of commits that you want to view. For example, if you only want information from the last commit you can use:$ git log -1commit 005937fbe2a98fb83f0ade869025dc2636b4dad5 (HEAD -> main) Author: user <user@ucsb.edu> Date: Thu Aug 22 10:14:07 2013 -0400 Adding more notes about read command (commit #3)You can also reduce the quantity of information using the
--onelineoption:$ git log --oneline005937f (HEAD -> main) Adding more notes about read command (commit #3) 34961b1 Add comment on what `read` command does (commit #2) f22b25e Adding in an example script on user input (commit #1)You can also combine the
--onelineoption with others. One useful combination adds--graphto display the commit history as a text-based graph and to indicate which commits are associated with the currentHEAD, the current branchmain, or other Git references:$ git log --oneline --graph* 005937f (HEAD -> main) Adding more notes about read command (commit #3) * 34961b1 Add comment on what `read` command does (commit #2) * f22b25e Adding in an example script on user input (commit #1)
Directories in Git
Two important facts you should know about directories in Git:
- Git does not track directories on their own, only files within them.
- If you can create a directory in your Git repository and populate it with files, you can add all the files in the directory at once.
Create a new directory named ‘loops’ We will be using this directory in the following lessons so please follow along.
$ cd ..
$ mkdir loops
$ git status
$ git add loops
$ git status
Note, our newly created empty directory loops does not appear in
the list of untracked files even if we explicitly add it (via git add) to our
repository. This is the reason why you will sometimes see .gitkeep files
in otherwise empty directories. Unlike .gitignore, these files are not special
and their sole purpose is to populate a directory so that Git adds it to
the repository. In fact, you can name such files anything you like.
Add multiple files to a directory at once.
Try adding a new for-loop.sh file into your new subdirectory
git add <directory-with-files>
Try it for yourself:
$ touch loops/for-loop.sh
$ git status
$ git add loops
$ git status
Before moving on, we will commit these changes.
$ git commit -m "Add in subdir for loops"
$ cd loops
To recap, when we want to add changes to our repository,
we first need to add the changed files to the staging area
(git add) and then commit the staged changes to the
repository (git commit):

Committing Changes to Git
Which command(s) below would save the changes of
myfile.txtto my local Git repository?
$ git commit -m "my recent changes"$ git init myfile.txt $ git commit -m "my recent changes"$ git add myfile.txt $ git commit -m "my recent changes"$ git commit -m myfile.txt "my recent changes"Solution
- Would only create a commit if files have already been staged.
- Would try to create a new repository.
- Is correct: first add the file to the staging area, then commit.
- Would try to commit a file “my recent changes” with the message myfile.txt.
Committing Multiple Files
The staging area can hold changes from any number of files that you want to commit as a single snapshot. The goals for the rest of this lesson are:
- Add some text to
for-loop.sh - Create a new file
notes-for-loop.txt - Add changes from both files to the staging area, and commit those changes.
First we make our changes to the for-loop.sh` files:
$ nano for-loop.sh
$ cat for-loop.sh
# for-loop example
# this for loop outputs numbers
$ nano notes-for-loop.txt
$ cat notes-for-loop.txt
For loops start with `for` and ends with `done`.
Now you can add both files to the staging area. We can do that in one line:
$ git add for-loop.sh notes-for-loop.txt
Or with multiple commands:
$ git add for-loop.sh
$ git add notes-for-loop.txt
Now the files are ready to commit. You can check that using git status. If you are ready to commit use:
$ git commit -m "Add in for loop example"
[main 7f9e498] add in for loop example
2 files changed, 3 insertions(+)
create mode 100644 for-loop.sh
create mode 100644 notes-for-loop.txt
Add in and commit the script of the for-loop example. Think about how the structure of this for loop works.
# for-loop example
# this for loop outputs numbers

for variable in 1 2 3 4 5
do
  echo "output number $variable"
done
bioRepository
- Create a new Git repository on your computer called
bio.- Write a three-line biography for yourself in a file called
me.txt, commit your changes- Modify one line, add a fourth line
- Display the differences between its updated state and its original state.
Solution
If needed, move out of the
shell-scriptsfolder:$ cd ..Create a new folder called
bioand ‘move’ into it:$ mkdir bio $ cd bioInitialise git:
$ git initCreate your biography file
me.txtusingnanoor another text editor. Once in place, add and commit it to the repository:$ git add me.txt $ git commit -m "Add biography file"Modify the file as described (modify one line, add a fourth line). To display the differences between its updated state and its original state, use
git diff:$ git diff me.txt
Key Points
git statusshows the status of a repository.Files can be stored in a project’s working directory (which users see), the staging area (where the next commit is being built up) and the local repository (where commits are permanently recorded).
git addputs files in the staging area.
git commitsaves the staged content as a new commit in the local repository.Write a commit message that accurately describes your changes.
Exploring History
Overview
Teaching: 25 min
Exercises: 0 minQuestions
How can I identify old versions of files?
How do I review my changes?
How can I recover old versions of files?
Objectives
Explain what the HEAD of a repository is and how to use it.
Identify and use Git commit numbers.
Compare various versions of tracked files.
Restore old versions of files.
As we saw in the previous episode, we can refer to commits by their
identifiers. You can refer to the most recent commit of the working
directory by using the identifier HEAD.
We can track our progress by looking, so let’s do that using our HEADs. Before we start,
let’s make a change to for-loop.sh: change “number” to “no.”.
$ nano for-loop.sh
$ cat for-loop.sh
# for-loop example
# this for loop outputs numbers
for variable in 1 2 3 4 5
do
  echo "output no. $variable"
done
Now, let’s see what we get.
$ git diff HEAD for-loop.sh
diff --git a/loops/for-loop.sh b/loops/for-loop.sh
index 3045607..848cd2f 100644
--- a/loops/for-loop.sh
+++ b/loops/for-loop.sh
@@ -1,4 +1,4 @@
# for-loop example
# this for loop outputs numbers
 for variable in 1 2 3 4 5
 do
-  echo "output number $variable"
+  echo "output no. $variable"
 done
which is the same as what you would get if you leave out HEAD (try it). The
real goodness in all this is when you can refer to previous commits. We do
that by adding ~1
(where “~” is “tilde”, pronounced [til-duh])
to refer to the commit one before HEAD.
$ git diff HEAD~1 for-loop.sh
If we want to see the differences between older commits we can use git diff
again, but with the notation HEAD~1, HEAD~2, and so on, to refer to them:
$ git diff HEAD~2 for-loop.sh
diff --git a/for-loop.sh b/for-loop.sh
index de9b2a4..8006c63 100644
--- a/for-loop.sh
+++ b/for-loop.sh
@@ -1,4 +1,4 @@
# for-loop example
# this for loop outputs numbers
+ for variable in 1 2 3 4 5
+ do
+  echo "output number $variable"
+ done
We could also use git show which shows us what changes we made at an older commit as
well as the commit message, rather than the differences between a commit and our
working directory that we see by using git diff.
$ git show HEAD~2 for-loop.sh
commit 94456da74c0fd245cadf7b5e35eef29580f53ee5
Author: User <user@ucsb.edu>
Date:   Tue Dec 7 15:18:58 2021 -0800

    Add in subdir for loops

diff --git a/loops/for-loops.sh b/loops/for-loops.sh
new file mode 100644
index 0000000..e69de29
In this way,
we can build up a chain of commits.
The most recent end of the chain is referred to as HEAD;
we can refer to previous commits using the ~ notation,
so HEAD~1
means “the previous commit”,
while HEAD~123 goes back 123 commits from where we are now.
We can also refer to commits using
those long strings of digits and letters
that git log displays.
These are unique IDs for the changes,
and “unique” really does mean unique:
every change to any set of files on any computer
has a unique 40-character identifier.
Our HEAD~2 comment addition was given the ID
7f9e4987af8d390eac5205e9a760e3f72204041c,
so let’s try this:
$ git diff 94456da74c0fd245cadf7b5e35eef29580f53ee5 for-loop.sh
diff --git a/for-loop.sh b/for-loop.sh
index de9b2a4..8006c63 100644
--- a/for-loop.sh
+++ b/for-loop.sh
@@ -1,4 +1,4 @@
# for-loop example
# this for loop outputs numbers
+ for variable in 1 2 3 4 5
+ do
+  echo "output number $variable"
+ done
That’s the right answer, but typing out random 40-character strings is annoying, so Git lets us use just the first few characters (typically seven for normal size projects):
$ git diff 94456da for-loop.sh
diff --git a/for-loop.sh b/for-loop.sh
index de9b2a4..8006c63 100644
--- a/for-loop.sh
+++ b/for-loop.sh
@@ -1,4 +1,4 @@
# for-loop example
# this for loop outputs numbers
+ for variable in 1 2 3 4 5
+ do
+  echo "output number $variable"
+ done
All right! So
we can save changes to files and see what we’ve changed. Now, how
can we restore older versions of things?
Let’s suppose we change our mind about the last update to
for-loop.sh (the “ill-considered change”).
git status now tells us that the file has been changed,
but those changes haven’t been staged:
$ git status
On branch main
Changes not staged for commit:
  (use "git add <file>..." to update what will be committed)
  (use "git checkout -- <file>..." to discard changes in working directory)

    modified:   for-loop.sh

no changes added to commit (use "git add" and/or "git commit -a")
We can put things back the way they were
by using git checkout:
$ git checkout HEAD for-loop.sh
$ cat for-loop.sh
# for-loop example
# this for loop outputs numbers
for variable in 1 2 3 4 5
do
  echo "output number $variable"
done
As you might guess from its name,
git checkout checks out (i.e., restores) an old version of a file.
In this case,
we’re telling Git that we want to recover the version of the file recorded in HEAD,
which is the last saved commit.
If we want to go back even further,
we can use a commit identifier instead:
$ git checkout 94456da for-loops.sh
$ cat for-loop.sh
$ git status
On branch main
Changes to be committed:
  (use "git reset HEAD <file>..." to unstage)

    modified:   for-loop.sh
Notice that the changes are currently in the staging area.
Again, we can put things back the way they were
by using git checkout:
$ git checkout HEAD for-loop.sh
Don’t Lose Your HEAD
Above we used
$ git checkout 94456da for-loops.shto revert
for-loop.shto its state after the commit94456da. But be careful! The commandcheckouthas other important functionalities and Git will misunderstand your intentions if you are not accurate with the typing. For example, if you forgetfor-loop.shin the previous command.$ git checkout 94456daNote: checking out '94456da'. You are in 'detached HEAD' state. You can look around, make experimental changes and commit them, and you can discard any commits you make in this state without impacting any branches by performing another checkout. If you want to create a new branch to retain commits you create, you may do so (now or later) by using -b with the checkout command again. Example: git checkout -b <new-branch-name> HEAD is now at 94456daThe “detached HEAD” is like “look, but don’t touch” here, so you shouldn’t make any changes in this state. After investigating your repo’s past state, reattach your
HEADwithgit checkout main.
It’s important to remember that
we must use the commit number that identifies the state of the repository
before the change we’re trying to undo.
A common mistake is to use the number of
the commit in which we made the change we’re trying to discard.
In the example below, we want to retrieve the state from before the most
recent commit (HEAD~1), which is commit 94456da:

So, to put it all together, here’s how Git works in cartoon form:

Simplifying the Common Case
If you read the output of
git statuscarefully, you’ll see that it includes this hint:(use "git checkout -- <file>..." to discard changes in working directory)As it says,
git checkoutwithout a version identifier restores files to the state saved inHEAD. The double dash--is needed to separate the names of the files being recovered from the command itself: without it, Git would try to use the name of the file as the commit identifier.
The fact that files can be reverted one by one tends to change the way people organize their work. If everything is in one large document, it’s hard (but not impossible) to undo changes to the introduction without also undoing changes made later to the conclusion. If the introduction and conclusion are stored in separate files, on the other hand, moving backward and forward in time becomes much easier.
Recovering Older Versions of a File
Jennifer has made changes to the Python script that she has been working on for weeks, and the modifications she made this morning “broke” the script and it no longer runs. She has spent ~ 1hr trying to fix it, with no luck…
Luckily, she has been keeping track of her project’s versions using Git! Which commands below will let her recover the last committed version of her Python script called
data_cruncher.py?
$ git checkout HEAD
$ git checkout HEAD data_cruncher.py
$ git checkout HEAD~1 data_cruncher.py
$ git checkout <unique ID of last commit> data_cruncher.pyBoth 2 and 4
Solution
The answer is (5)-Both 2 and 4.
The
checkoutcommand restores files from the repository, overwriting the files in your working directory. Answers 2 and 4 both restore the latest version in the repository of the filedata_cruncher.py. Answer 2 usesHEADto indicate the latest, whereas answer 4 uses the unique ID of the last commit, which is whatHEADmeans.Answer 3 gets the version of
data_cruncher.pyfrom the commit beforeHEAD, which is NOT what we wanted.Answer 1 can be dangerous! Without a filename,
git checkoutwill restore all files in the current directory (and all directories below it) to their state at the commit specified. This command will restoredata_cruncher.pyto the latest commit version, but it will also restore any other files that are changed to that version, erasing any changes you may have made to those files! As discussed above, you are left in a detachedHEADstate, and you don’t want to be there.
Reverting a Commit
Jennifer is collaborating with colleagues on her Python script. She realizes her last commit to the project’s repository contained an error, and wants to undo it. Jennifer wants to undo correctly so everyone in the project’s repository gets the correct change. The command
git revert [erroneous commit ID]will create a new commit that reverses the erroneous commit.The command
git revertis different fromgit checkout [commit ID]becausegit checkoutreturns the files not yet committed within the local repository to a previous state, whereasgit revertreverses changes committed to the local and project repositories.Below are the right steps and explanations for Jennifer to use
git revert, what is the missing command?
________ # Look at the git history of the project to find the commit IDCopy the ID (the first few characters of the ID, e.g. 0b1d055).
git revert [commit ID]Type in the new commit message.
Save and close
Solution
The command
git loglists project history with commit IDs.The command
git show HEADshows changes made at the latest commit, and lists the commit ID; however, Jennifer should double-check it is the correct commit, and no one else has committed changes to the repository.
Understanding Workflow and History
What is the output of the last command in
$ cd loops
$ echo "you can loop through lists and sequences" > notes-for-loop.txt
$ git add notes-for-loop.txt
$ echo "You can also nest loops inside another." >> notes-for-loop.txt
$ git commit -m "More notes on loops"
$ git checkout HEAD notes-for-loop.txt
$ cat notes-for-loop.txt #this will print the contents
For loops start with `for` and ends with `done`.you can loop through lists and sequencesFor loops start with `for` and ends with `done`. You can loop through lists and sequences.Error because you have changed notes-for-loop.txt without committing the changesSolution
The answer is 2.
The command
git add notes-for-loop.txtplaces the current version ofnotes-for-loop.txtinto the staging area. The changes to the file from the secondechocommand are only applied to the working copy, not the version in the staging area.So, when
git commit -m "More notes on loops"is executed, the version ofnotes-for-loop.txtcommitted to the repository is the one from the staging area and has only one line.At this time, the working copy still has the second line (and
git statuswill show that the file is modified). However,git checkout HEAD notes-for-loop.txtreplaces the working copy with the most recently committed version ofnotes-for-loop.txt.So,
notes-for-loop.txtwill outputFor loops start with `for` and ends with `done`.
Checking Understanding of
git diffConsider this command:
git diff HEAD~9 for-loop.sh. What do you predict this command will do if you execute it? What happens when you do execute it? Why?Try another command,
git diff [ID] for-loop.sh, where [ID] is replaced with the unique identifier for your most recent commit. What do you think will happen, and what does happen?
Getting Rid of Staged Changes
git checkoutcan be used to restore a previous commit when unstaged changes have been made, but will it also work for changes that have been staged but not committed? Make a change tofor-loop.sh, add that change, and usegit checkoutto see if you can remove your change.
Explore and Summarize Histories
Exploring history is an important part of Git, and often it is a challenge to find the right commit ID, especially if the commit is from several months ago.
Imagine the
shell-scriptsproject has more than 50 files. You would like to find a commit that modifies some specific text infor-loop.sh. When you typegit log, a very long list appeared. How can you narrow down the search?Recall that the
git diffcommand allows us to explore one specific file, e.g.,git diff for-loop.sh. We can apply a similar idea here.$ git log for-loop.shUnfortunately some of these commit messages are very ambiguous, e.g.,
update files. How can you search through these files?Both
git diffandgit logare very useful and they summarize a different part of the history for you. Is it possible to combine both? Let’s try the following:$ git log --patch for-loop.shYou should get a long list of output, and you should be able to see both commit messages and the difference between each commit.
Question: What does the following command do?
$ git log --patch HEAD~9 *.txt
Key Points
git diffdisplays differences between commits.
git checkoutrecovers old versions of files.
Ignoring Things
Overview
Teaching: 5 min
Exercises: 0 minQuestions
How can I tell Git to ignore files I don’t want to track?
Objectives
Configure Git to ignore specific files.
Explain why ignoring files can be useful.
What if we have files that we do not want Git to track for us, like backup files created by our editor or intermediate files created during data analysis? Let’s create a few dummy files:
$ mkdir results
$ touch a.dat b.dat c.dat results/a.out results/b.out
and see what Git says:
$ git status
On branch main
Untracked files:
  (use "git add <file>..." to include in what will be committed)

	a.dat
	b.dat
	c.dat
	results/

nothing added to commit but untracked files present (use "git add" to track)
Putting these files under version control would be a waste of disk space. What’s worse, having them all listed could distract us from changes that actually matter, so let’s tell Git to ignore them.
We do this by creating a file in the root directory of our project called .gitignore:
$ nano .gitignore
$ cat .gitignore
*.dat
results/
These patterns tell Git to ignore any file whose name ends in .dat
and everything in the results directory.
(If any of these files were already being tracked,
Git would continue to track them.)
Once we have created this file,
the output of git status is much cleaner:
$ git status
On branch main
Untracked files:
  (use "git add <file>..." to include in what will be committed)

	.gitignore

nothing added to commit but untracked files present (use "git add" to track)
The only thing Git notices now is the newly-created .gitignore file.
You might think we wouldn’t want to track it,
but everyone we’re sharing our repository with will probably want to ignore
the same things that we’re ignoring.
Let’s add and commit .gitignore:
$ git add .gitignore
$ git commit -m "Ignore data files and the results folder."
$ git status
On branch main
nothing to commit, working directory clean
As a bonus, using .gitignore helps us avoid accidentally adding to the repository files that we don’t want to track:
$ git add a.dat
The following paths are ignored by one of your .gitignore files:
a.dat
Use -f if you really want to add them.
If we really want to override our ignore settings,
we can use git add -f to force Git to add something. For example,
git add -f a.dat.
We can also always see the status of ignored files if we want:
$ git status --ignored
On branch main
Ignored files:
 (use "git add -f <file>..." to include in what will be committed)

        a.dat
        b.dat
        c.dat
        results/

nothing to commit, working directory clean
Ignoring Nested Files
Given a directory structure that looks like:
results/data
results/plots
How would you ignore only
results/plotsand notresults/data?Solution
If you only want to ignore the contents of
results/plots, you can change your.gitignoreto ignore only the/plots/subfolder by adding the following line to your .gitignore:results/plots/This line will ensure only the contents of
results/plotsis ignored, and not the contents ofresults/data.As with most programming issues, there are a few alternative ways that one may ensure this ignore rule is followed. The “Ignoring Nested Files: Variation” exercise has a slightly different directory structure that presents an alternative solution. Further, the discussion page has more detail on ignore rules.
Including Specific Files
How would you ignore all
.datfiles in your root directory except forfinal.dat? Hint: Find out what!(the exclamation point operator) doesSolution
You would add the following two lines to your .gitignore:
*.dat           # ignore all data files
!final.dat      # except final.data
The exclamation point operator will include a previously excluded entry.
Note also that because you’ve previously committed
.datfiles in this lesson they will not be ignored with this new rule. Only future additions of.datfiles added to the root directory will be ignored.
Ignoring Nested Files: Variation
Given a directory structure that looks similar to the earlier Nested Files exercise, but with a slightly different directory structure:
results/data
results/images
results/plots
results/analysis
How would you ignore all of the contents in the results folder, but not
results/data?Hint: think a bit about how you created an exception with the
!operator before.Solution
If you want to ignore the contents of
results/but not those ofresults/data/, you can change your.gitignoreto ignore the contents of results folder, but create an exception for the contents of theresults/datasubfolder. Your .gitignore would look like this:results/* # ignore everything in results folder !results/data/ # do not ignore results/data/ contents
Ignoring all data Files in a Directory
Assuming you have an empty .gitignore file, and given a directory structure that looks like:
results/data/position/gps/a.dat results/data/position/gps/b.dat results/data/position/gps/c.dat results/data/position/gps/info.txt results/plotsWhat’s the shortest
.gitignorerule you could write to ignore all.datfiles inresult/data/position/gps? Do not ignore theinfo.txt.Solution
Appending
results/data/position/gps/*.datwill match every file inresults/data/position/gpsthat ends with.dat. The fileresults/data/position/gps/info.txtwill not be ignored.
Ignoring all data Files in the repository
Let us assume you have many
.datfiles in different subdirectories of your repository. For example, you might have:results/a.dat data/experiment_1/b.dat data/experiment_2/c.dat data/experiment_2/variation_1/d.datHow do you ignore all the
.datfiles, without explicitly listing the names of the corresponding folders?Solution
In the
.gitignorefile, write:**/*.datThis will ignore all the
.datfiles, regardless of their position in the directory tree. You can still include some specific exception with the exclamation point operator.
The Order of Rules
Given a
.gitignorefile with the following contents:*.dat !*.datWhat will be the result?
Solution
The
!modifier will negate an entry from a previously defined ignore pattern. Because the!*.datentry negates all of the previous.datfiles in the.gitignore, none of them will be ignored, and all.datfiles will be tracked.
Log Files
You wrote a script that creates many intermediate log-files of the form
log_01,log_02,log_03, etc. You want to keep them but you do not want to track them throughgit.
Write one
.gitignoreentry that excludes files of the formlog_01,log_02, etc.Test your “ignore pattern” by creating some dummy files of the form
log_01, etc.You find that the file
log_01is very important after all, add it to the tracked files without changing the.gitignoreagain.Discuss with your neighbor what other types of files could reside in your directory that you do not want to track and thus would exclude via
.gitignore.Solution
- append either
log_*orlog*as a new entry in your .gitignore- track
log_01usinggit add -f log_01
Key Points
The
.gitignorefile tells Git what files to ignore.
Remotes in GitHub
Overview
Teaching: 30 min
Exercises: 0 minQuestions
How do I share my changes with others on the web?
Objectives
Explain what remote repositories are and why they are useful.
Push to or pull from a remote repository.
Version control really comes into its own when we begin to collaborate with other people. We already have most of the machinery we need to do this; the only thing missing is to copy changes from one repository to another.
Systems like Git allow us to move work between any two repositories. In practice, though, it’s easiest to use one copy as a central hub, and to keep it on the web rather than on someone’s laptop. Most programmers use hosting services like GitHub, Bitbucket or GitLab to hold those main copies; we’ll explore the pros and cons of this in a later episode.
Let’s start by sharing the changes we’ve made to our current project with the
world. Log in to GitHub, then click on the icon in the top right corner to
create a new repository called workshop-shell-scripts:

Name your repository “workshop-shell-scripts” and then click “Create Repository”.
Note: Since this repository will be connected to a local repository, it needs to be empty. Leave “Initialize this repository with a README” unchecked, and keep “None” as options for both “Add .gitignore” and “Add a license.” See the “GitHub License and README files” exercise below for a full explanation of why the repository needs to be empty.

As soon as the repository is created, GitHub displays a page with a URL and some information on how to configure your local repository:
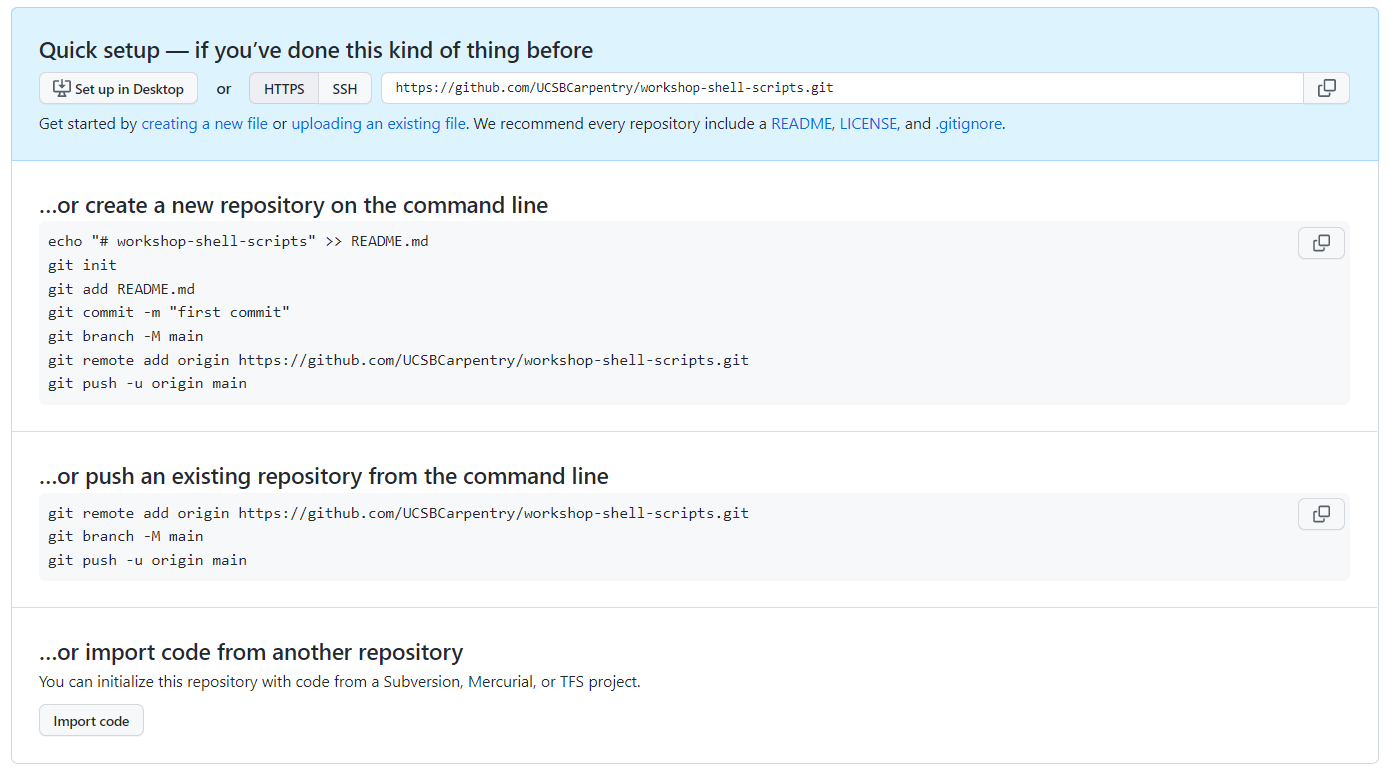
This effectively does the following on GitHub’s servers:
$ mkdir workshop-shell-scripts
$ cd workshop-shell-scripts
$ git init
If you remember back to the earlier episode where we added and
committed our earlier work on user-input.sh, we had a diagram of the local repository
which looked like this:
Now that we have two repositories, we need a diagram like this:

Note that our local repository still contains our earlier work on user-input.sh, but the
remote repository on GitHub appears empty as it doesn’t contain any files yet.
The next step is to connect the two repositories. We do this by making the GitHub repository a remote for the local repository. The home page of the repository on GitHub includes the string we need to identify it:

Click on the ‘SSH’ link to change the protocol from HTTPS to SSH.
HTTPS vs. SSH
We use SSH here because, while it requires some additional configuration, it is a security protocol widely used by many applications. The steps below describe SSH at a minimum level for GitHub. A supplemental episode to this lesson discusses advanced setup and concepts of SSH and key pairs, and other material supplemental to git related SSH.
Copy that URL from the browser, go into the local workshop-shell-scripts repository, and run
this command:
$ git remote add origin git@github.com:user.name/workshop-shell-scripts.git
Make sure to use the URL for your repository rather than user.name: the only
difference should be your username instead of user.name.
origin is a local name used to refer to the remote repository. It could be called
anything, but origin is a convention that is often used by default in git
and GitHub, so it’s helpful to stick with this unless there’s a reason not to.
We can check that the command has worked by running git remote -v:
$ git remote -v
origin git@github.com:user.name/workshop-shell-scripts.git (fetch)
origin git@github.com:user.name/workshop-shell-scripts.git (push)
We’ll discuss remotes in more detail in the next episode, while talking about how they might be used for collaboration.
SSH Background and Setup
Before we can connect to a remote repository, we needs to set up a way for the computer to authenticate with GitHub so it knows it’s us trying to connect to the remote repository.
We are going to set up the method that is commonly used by many different services to authenticate access on the command line. This method is called Secure Shell Protocol (SSH). SSH is a cryptographic network protocol that allows secure communication between computers using an otherwise insecure network.
SSH uses what is called a key pair. This is two keys that work together to validate access. One key is publicly known and called the public key, and the other key called the private key is kept private. Very descriptive names.
You can think of the public key as a padlock, and only you have the key (the private key) to open it. You use the public key where you want a secure method of communication, such as your GitHub account. You give this padlock, or public key, to GitHub and say “lock the communications to my account with this so that only computers that have my private key can unlock communications and send git commands as my GitHub account.”
What we will do now is the minimum required to set up the SSH keys and add the public key to a GitHub account.
Advanced SSH
A supplemental episode in this lesson discusses SSH and key pairs in more depth and detail.
The first thing we are going to do is check if this has already been done on the computer you’re on. Because generally speaking, this setup only needs to happen once and then you can forget about it.
Keeping your keys secure
You shouldn’t really forget about your SSH keys, since they keep your account secure. It’s good practice to audit your secure shell keys every so often. Especially if you are using multiple computers to access your account.
We will run the list command to check what key pairs already exist on your computer.
ls -al ~/.ssh
Your output is going to look a little different depending on whether or not SSH has ever been set up on the computer you are using.
In this example, we have not set up SSH on this computer, so the output is
ls: cannot access '/c/Users/user.name/.ssh': No such file or directory
If SSH has been set up on the computer you’re using, the public and private key pairs will be listed. The file names are either id_ed25519/id_ed25519.pub or id_rsa/id_rsa.pub depending on how the key pairs were set up.
Since they don’t exist on this computer, we can use this command to create them:
$ ssh-keygen -t ed25519 -C "user@ucsb.edu"
If you are using a legacy system that doesn’t support the Ed25519 algorithm, use:
$ ssh-keygen -t rsa -b 4096 -C "your_email@example.com"
Generating public/private ed25519 key pair.
Enter file in which to save the key (/c/Users/user.name/.ssh/id_ed25519):
We want to use the default file, so just press Enter.
Created directory '/c/Users/user.name We/.ssh'.
Enter passphrase (empty for no passphrase):
Now, it is prompting us for a passphrase. Since we is using this lab’s laptop that other people sometimes have access to, we want to create a passphrase. Be sure to use something memorable or save your passphrase somewhere, as there is no “reset my password” option.
Enter same passphrase again:
After entering the same passphrase a second time, we receive the confirmation
Your identification has been saved in /c/Users/user.name/.ssh/id_ed25519
Your public key has been saved in /c/Users/user.name/.ssh/id_ed25519.pub
The key fingerprint is:
SHA256:SMSPIStNyA00KPxuYu94KpZgRAYjgt9g4BA4kFy3g1o user@ucsb.edu
The key's randomart image is:
+--[ED25519 256]--+
|^B== o. |
|%*=.*.+ |
|+=.E =.+ |
| .=.+.o.. |
|.... . S |
|.+ o |
|+ = |
|.o.o |
|oo+. |
+----[SHA256]-----+
The “identification” is actually the private key. You should never share it. The public key is appropriately named. The “key fingerprint” is a shorter version of a public key.
Now that we have generated the SSH keys, we will find the SSH files when we check.
ls -al ~/.ssh
drwxr-xr-x 1 user.name 197121 0 Jul 16 14:48 ./
drwxr-xr-x 1 user.name 197121 0 Jul 16 14:48 ../
-rw-r--r-- 1 user.name 197121 419 Jul 16 14:48 id_ed25519
-rw-r--r-- 1 user.name 197121 106 Jul 16 14:48 id_ed25519.pub
Now we run the command to check if GitHub can read our authentication.
ssh -T git@github.com
The authenticity of host 'github.com (192.30.255.112)' can't be established.
RSA key fingerprint is SHA256:nThbg6kXUpJWGl7E1IGOCspRomTxdCARLviKw6E5SY8.
This key is not known by any other names
Are you sure you want to continue connecting (yes/no/[fingerprint])? y
Please type 'yes', 'no' or the fingerprint: yes
Warning: Permanently added 'github.com' (RSA) to the list of known hosts.
git@github.com: Permission denied (publickey).
Right, we forgot that we need to give GitHub our public key!
First, we need to copy the public key. Be sure to include the .pub at the end, otherwise you’re looking at the private key.
cat ~/.ssh/id_ed25519.pub
ssh-ed25519 AAAAC3NzaC1lZDI1NTE5AAAAIDmRA3d51X0uu9wXek559gfn6UFNF69yZjChyBIU2qKI user@ucsb.edu
Now, going to GitHub.com, click on your profile icon in the top right corner to get the drop-down menu. Click “Settings,” then on the settings page, click “SSH and GPG keys,” on the left side “Account settings” menu. Click the “New SSH key” button on the right side. Now, you can add the title (here, we use the title “User’s Lab Laptop” so we can remember where the original key pair files are located), paste your SSH key into the field, and click the “Add SSH key” to complete the setup.
Now that we’ve set that up, let’s check our authentication again from the command line.
$ ssh -T git@github.com
Hi User.name! You've successfully authenticated, but GitHub does not provide shell access.
Push local changes to a remote
Now that authentication is setup, we can return to the remote. This command will push the changes from our local repository to the repository on GitHub:
$ git push origin main
Since we set up a passphrase, it will prompt us for it. If you completed advanced settings for your authentication, it will not prompt for a passphrase.
Enumerating objects: 16, done.
Counting objects: 100% (16/16), done.
Delta compression using up to 8 threads.
Compressing objects: 100% (11/11), done.
Writing objects: 100% (16/16), 1.45 KiB | 372.00 KiB/s, done.
Total 16 (delta 2), reused 0 (delta 0)
remote: Resolving deltas: 100% (2/2), done.
To https://github.com/user.name/workshop-shell-scripts.git
* [new branch] main -> main
Proxy
If the network you are connected to uses a proxy, there is a chance that your last command failed with “Could not resolve hostname” as the error message. To solve this issue, you need to tell Git about the proxy:
$ git config --global http.proxy http://user:password@proxy.url $ git config --global https.proxy https://user:password@proxy.urlWhen you connect to another network that doesn’t use a proxy, you will need to tell Git to disable the proxy using:
$ git config --global --unset http.proxy $ git config --global --unset https.proxy
Password Managers
If your operating system has a password manager configured,
git pushwill try to use it when it needs your username and password. For example, this is the default behavior for Git Bash on Windows. If you want to type your username and password at the terminal instead of using a password manager, type:$ unset SSH_ASKPASSin the terminal, before you run
git push. Despite the name, Git usesSSH_ASKPASSfor all credential entry, so you may want to unsetSSH_ASKPASSwhether you are using Git via SSH or https.You may also want to add
unset SSH_ASKPASSat the end of your~/.bashrcto make Git default to using the terminal for usernames and passwords.
Our local and remote repositories are now in this state:

The ‘-u’ Flag
You may see a
-uoption used withgit pushin some documentation. This option is synonymous with the--set-upstream-tooption for thegit branchcommand, and is used to associate the current branch with a remote branch so that thegit pullcommand can be used without any arguments. To do this, simply usegit push -u origin mainonce the remote has been set up.
We can pull changes from the remote repository to the local one as well:
$ git pull origin main
From https://github.com/user.name/workshop-shell-scripts
* branch main -> FETCH_HEAD
Already up-to-date.
Pulling has no effect in this case because the two repositories are already synchronized. If someone else had pushed some changes to the repository on GitHub, though, this command would download them to our local repository.
GitHub GUI
Browse to your
workshop-shell-scriptsrepository on GitHub. Under the Code tab, find and click on the text that says “XX commits” (where “XX” is some number). Hover over, and click on, the three buttons to the right of each commit. What information can you gather/explore from these buttons? How would you get that same information in the shell?Solution
The left-most button (with the picture of a clipboard) copies the full identifier of the commit to the clipboard. In the shell,
git logwill show you the full commit identifier for each commit.When you click on the middle button, you’ll see all of the changes that were made in that particular commit. Green shaded lines indicate additions and red ones removals. In the shell we can do the same thing with
git diff. In particular,git diff ID1..ID2where ID1 and ID2 are commit identifiers (e.g.git diff a3bf1e5..041e637) will show the differences between those two commits.The right-most button lets you view all of the files in the repository at the time of that commit. To do this in the shell, we’d need to checkout the repository at that particular time. We can do this with
git checkout IDwhere ID is the identifier of the commit we want to look at. If we do this, we need to remember to put the repository back to the right state afterwards!
Uploading files directly in GitHub browser
Github also allows you to skip the command line and upload files directly to your repository without having to leave the browser. There are two options. First you can click the “Upload files” button in the toolbar at the top of the file tree. Or, you can drag and drop files from your desktop onto the file tree. You can read more about this on this GitHub page
GitHub Timestamp
Create a remote repository on GitHub. Push the contents of your local repository to the remote. Make changes to your local repository and push these changes. Go to the repo you just created on GitHub and check the timestamps of the files. How does GitHub record times, and why?
Solution
GitHub displays timestamps in a human readable relative format (i.e. “22 hours ago” or “three weeks ago”). However, if you hover over the timestamp, you can see the exact time at which the last change to the file occurred.
Push vs. Commit
In this episode, we introduced the “git push” command. How is “git push” different from “git commit”?
Solution
When we push changes, we’re interacting with a remote repository to update it with the changes we’ve made locally (often this corresponds to sharing the changes we’ve made with others). Commit only updates your local repository.
GitHub License and README files
In this episode we learned about creating a remote repository on GitHub, but when you initialized your GitHub repo, you didn’t add a README.md or a license file. If you had, what do you think would have happened when you tried to link your local and remote repositories?
Solution
In this case, we’d see a merge conflict due to unrelated histories. When GitHub creates a README.md file, it performs a commit in the remote repository. When you try to pull the remote repository to your local repository, Git detects that they have histories that do not share a common origin and refuses to merge.
$ git pull origin mainwarning: no common commits remote: Enumerating objects: 3, done. remote: Counting objects: 100% (3/3), done. remote: Total 3 (delta 0), reused 0 (delta 0), pack-reused 0 Unpacking objects: 100% (3/3), done. From https://github.com/user.name/workshop-shell-scripts * branch main -> FETCH_HEAD * [new branch] main -> origin/main fatal: refusing to merge unrelated historiesYou can force git to merge the two repositories with the option
--allow-unrelated-histories. Be careful when you use this option and carefully examine the contents of local and remote repositories before merging.$ git pull --allow-unrelated-histories origin mainFrom https://github.com/user.name/workshop-shell-scripts * branch main -> FETCH_HEAD Merge made by the 'recursive' strategy. README.md | 1 + 1 file changed, 1 insertion(+) create mode 100644 README.md
Key Points
A local Git repository can be connected to one or more remote repositories.
Use the SSH protocol to connect to remote repositories.
git pushcopies changes from a local repository to a remote repository.
git pullcopies changes from a remote repository to a local repository.
14a Break
Overview
Teaching: min
Exercises: minQuestions
Objectives
Key Points
Collaborating
Overview
Teaching: 40 min
Exercises: 0 minQuestions
How can I use version control to collaborate with other people?
Objectives
Clone a remote repository.
Collaborate by pushing to a common repository.
Describe the basic collaborative workflow.
For the next step, get into pairs. One person will be the “Owner” and the other will be the “Collaborator”. The goal is that the Collaborator add changes into the Owner’s repository. We will switch roles at the end, so both persons will play Owner and Collaborator.
Practicing By Yourself
If you’re working through this lesson on your own, you can carry on by opening a second terminal window. This window will represent your partner, working on another computer. You won’t need to give anyone access on GitHub, because both ‘partners’ are you.
The Owner needs to give the Collaborator access. On GitHub, click the settings button on the right, select Manage access, click Invite a collaborator, and then enter your partner’s username.
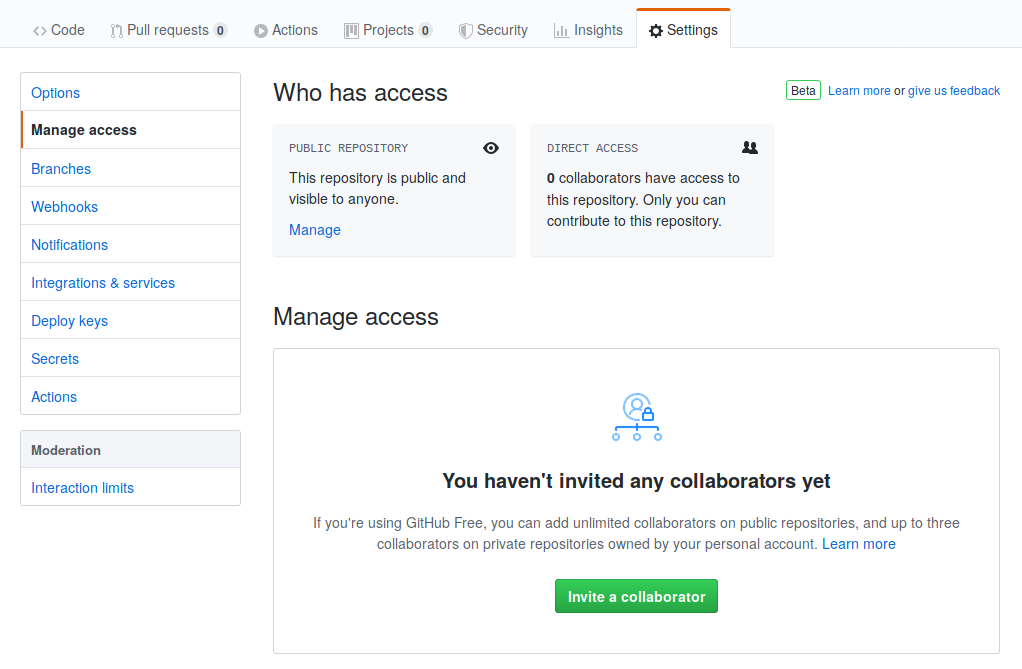
To accept access to the Owner’s repo, the Collaborator needs to go to https://github.com/notifications. Once there she can accept access to the Owner’s repo.
Next, the Collaborator needs to download a copy of the Owner’s repository to her machine. This is called “cloning a repo”.
To clone the Owner’s repo into
her Desktop folder, the Collaborator enters:
$ git clone https://github.com/User/shell-scripts.git ~/Desktop/user.name-shell-scripts
Replace ‘user name’ with the Owner’s username or name.
If you choose to clone without the clone path
(~/Desktop/user.name-shell-scripts) specified at the end,
you will clone inside your own shell-scripts folder!
Make sure to navigate to the Desktop folder first.

The Collaborator can now make a change in her clone of the Owner’s repository, exactly the same way as we’ve been doing before:
$ cd ~/Desktop/user.name-shell-scripts/loops
$ nano for-loop.sh
$ cat for-loop.sh
for variable in 1 2 3 4 5 6
do
echo "output no. $variable"
done
$ git add for-loop.sh
$ git commit -m "expand list of numbers"
1 file changed, 1 insertions(+)
Then push the change to the Owner’s repository on GitHub:
$ git push origin main
Enumerating objects: 4, done.
Counting objects: 4, done.
Delta compression using up to 4 threads.
Compressing objects: 100% (2/2), done.
Writing objects: 100% (3/3), 306 bytes, done.
Total 3 (delta 0), reused 0 (delta 0)
To https://github.com/user/shell-scripts.git
9272da5..29aba7c main -> main
Note that we didn’t have to create a remote called origin: Git uses this
name by default when we clone a repository. (This is why origin was a
sensible choice earlier when we were setting up remotes by hand.)
Take a look at the Owner’s repository on GitHub again, and you should be able to see the new commit made by the Collaborator. You may need to refresh your browser to see the new commit.
Some more about remotes
In this episode and the previous one, our local repository has had a single “remote”, called
origin. A remote is a copy of the repository that is hosted somewhere else, that we can push to and pull from, and there’s no reason that you have to work with only one. For example, on some large projects you might have your own copy in your own GitHub account (you’d probably call thisorigin) and also the main “upstream” project repository (let’s call thisupstreamfor the sake of examples). You would pull fromupstreamfrom time to time to get the latest updates that other people have committed.Remember that the name you give to a remote only exists locally. It’s an alias that you choose - whether
origin, orupstream, orfred- and not something intrinstic to the remote repository.The
git remotefamily of commands is used to set up and alter the remotes associated with a repository. Here are some of the most useful ones:
git remote -vlists all the remotes that are configured (we already used this in the last episode)git remote add [name] [url]is used to add a new remotegit remote remove [name]removes a remote. Note that it doesn’t affect the remote repository at all - it just removes the link to it from the local repo.git remote set-url [name] [newurl]changes the URL that is associated with the remote. This is useful if it has moved, e.g. to a different GitHub account, or from GitHub to a different hosting service. Or, if we made a typo when adding it!git remote rename [oldname] [newname]changes the local alias by which a remote is known - its name. For example, one could use this to changeupstreamtofred.
To download the Collaborator’s changes from GitHub, the Owner now enters:
$ git pull origin main
remote: Enumerating objects: 4, done.
remote: Counting objects: 100% (4/4), done.
remote: Compressing objects: 100% (2/2), done.
remote: Total 3 (delta 0), reused 3 (delta 0), pack-reused 0
Unpacking objects: 100% (3/3), done.
From https://github.com/User/shell-scripts
* branch main -> FETCH_HEAD
9272da5..29aba7c main -> origin/main
Updating 9272da5..29aba7c
Fast-forward
for-loop.sh | 1 +
1 file changed, 1 insertion(+)
create mode 100644 for-loop.sh
Now the three repositories (Owner’s local, Collaborator’s local, and Owner’s on GitHub) are back in sync.
A Basic Collaborative Workflow
In practice, it is good to be sure that you have an updated version of the repository you are collaborating on, so you should
git pullbefore making our changes. The basic collaborative workflow would be:
- update your local repo with
git pull origin main,- make your changes and stage them with
git add,- commit your changes with
git commit -m, and- upload the changes to GitHub with
git push origin mainIt is better to make many commits with smaller changes rather than of one commit with massive changes: small commits are easier to read and review.
Switch Roles and Repeat
Switch roles and repeat the whole process.
Suggested changes to make on the script:
- expand the list of numbers
- add an informative comment
- reword the output of echo command
Review Changes
The Owner pushed commits to the repository without giving any information to the Collaborator. How can the Collaborator find out what has changed with command line? And on GitHub?
Solution
On the command line, the Collaborator can use
git fetch origin mainto get the remote changes into the local repository, but without merging them. Then by runninggit diff main origin/mainthe Collaborator will see the changes output in the terminal.On GitHub, the Collaborator can go to the repository and click on “commits” to view the most recent commits pushed to the repository.
Comment Changes in GitHub
The Collaborator has some questions about one line change made by the Owner and has some suggestions to propose.
With GitHub, it is possible to comment the diff of a commit. Over the line of code to comment, a blue comment icon appears to open a comment window.
The Collaborator posts its comments and suggestions using GitHub interface.
Version History, Backup, and Version Control
Some backup software can keep a history of the versions of your files. They also allows you to recover specific versions. How is this functionality different from version control? What are some of the benefits of using version control, Git and GitHub?
Key Points
git clonecopies a remote repository to create a local repository with a remote calledoriginautomatically set up.
Conflicts
Overview
Teaching: 45 min
Exercises: 0 minQuestions
What do I do when my changes conflict with someone else’s?
Objectives
Explain what conflicts are and when they can occur.
Resolve conflicts resulting from a merge.
As soon as people can work in parallel, they’ll likely step on each other’s toes. This will even happen with a single person: if we are working on a piece of software on both our laptop and a server in the lab, we could make different changes to each copy. Version control helps us manage these conflicts by giving us tools to resolve overlapping changes.
To see how we can resolve conflicts, we must first create one. The file
user-input.sh currently looks like this in both partners’ copies of our shell-script
repository:
$ cat user-input.sh
echo "What is your name?"
read name
echo "Hello $name."
Let’s add a line to the collaborator’s copy only:
$ nano user-input.sh
$ cat user-input.sh
echo "What is your name?"
read name
echo "Hello $name."
#the read command requests user input, we use `$` to recall the variable established by `read`
#this line is added by collaborator
and then push the change to GitHub:
$ git add user-input.sh
$ git commit -m "Add a line in our home copy"
[main 5ae9631] Add a line in our home copy
1 file changed, 1 insertion(+)
$ git push origin main
Enumerating objects: 5, done.
Counting objects: 100% (5/5), done.
Delta compression using up to 8 threads
Compressing objects: 100% (3/3), done.
Writing objects: 100% (3/3), 331 bytes | 331.00 KiB/s, done.
Total 3 (delta 2), reused 0 (delta 0)
remote: Resolving deltas: 100% (2/2), completed with 2 local objects.
To https://github.com/user/shell-script.git
29aba7c..dabb4c8 main -> main
Now let’s have the owner make a different change to their copy without updating from GitHub:
$ nano user-input.sh
$ cat user-input.sh
echo "What is your name?"
read name
echo "Hello $name."
#the read command requests user input, we use `$` to recall the variable established by `read`
#this line is added by Owner
We can commit the change locally:
$ git add user-input.sh
$ git commit -m "Add a line in my copy"
[main 07ebc69] Add a line in my copy
1 file changed, 1 insertion(+)
but Git won’t let us push it to GitHub:
$ git push origin main
To https://github.com/user/shell-script.git
! [rejected] main -> main (fetch first)
error: failed to push some refs to 'https://github.com/user/shell-script.git'
hint: Updates were rejected because the remote contains work that you do
hint: not have locally. This is usually caused by another repository pushing
hint: to the same ref. You may want to first integrate the remote changes
hint: (e.g., 'git pull ...') before pushing again.
hint: See the 'Note about fast-forwards' in 'git push --help' for details.

Git rejects the push because it detects that the remote repository has new updates that have not been incorporated into the local branch. What we have to do is pull the changes from GitHub, merge them into the copy we’re currently working in, and then push that. Let’s start by pulling:
$ git pull origin main
remote: Enumerating objects: 5, done.
remote: Counting objects: 100% (5/5), done.
remote: Compressing objects: 100% (1/1), done.
remote: Total 3 (delta 2), reused 3 (delta 2), pack-reused 0
Unpacking objects: 100% (3/3), done.
From https://github.com/user/shell-script
* branch main -> FETCH_HEAD
29aba7c..dabb4c8 main -> origin/main
Auto-merging user-input.sh
CONFLICT (content): Merge conflict in user-input.sh
Automatic merge failed; fix conflicts and then commit the result.
The git pull command updates the local repository to include those
changes already included in the remote repository.
After the changes from remote branch have been fetched, Git detects that changes made to the local copy
overlap with those made to the remote repository, and therefore refuses to merge the two versions to
stop us from trampling on our previous work. The conflict is marked in
in the affected file:
$ cat user-input.sh
echo "What is your name?"
read name
echo "Hello $name."
#the read command requests user input, we use `$` to recall the variable established by `read`
<<<<<<< HEAD
We added a different line in the other copy
=======
This line added to their copy
>>>>>>> dabb4c8c450e8475aee9b14b4383acc99f42af1d
Our change is preceded by <<<<<<< HEAD.
Git has then inserted ======= as a separator between the conflicting changes
and marked the end of the content downloaded from GitHub with >>>>>>>.
(The string of letters and digits after that marker
identifies the commit we’ve just downloaded.)
It is now up to us to edit this file to remove these markers and reconcile the changes. We can do anything we want: keep the change made in the local repository, keep the change made in the remote repository, write something new to replace both, or get rid of the change entirely. Let’s replace both so that the file looks like this:
$ cat user-input.sh
echo "What is your name?"
read name
echo "Hello $name."
#the read command requests user input, we use `$` to recall the variable established by `read`
#We removed the conflict on this line
To finish merging,
we add user-input.sh to the changes being made by the merge
and then commit:
$ git add user-input.sh
$ git status
On branch main
All conflicts fixed but you are still merging.
(use "git commit" to conclude merge)
Changes to be committed:
modified: user-input.sh
$ git commit -m "Merge changes from GitHub"
[main 2abf2b1] Merge changes from GitHub
Now we can push our changes to GitHub:
$ git push origin main
Enumerating objects: 10, done.
Counting objects: 100% (10/10), done.
Delta compression using up to 8 threads
Compressing objects: 100% (6/6), done.
Writing objects: 100% (6/6), 645 bytes | 645.00 KiB/s, done.
Total 6 (delta 4), reused 0 (delta 0)
remote: Resolving deltas: 100% (4/4), completed with 2 local objects.
To https://github.com/user/shell-script.git
dabb4c8..2abf2b1 main -> main
Git keeps track of what we’ve merged with what, so we don’t have to fix things by hand again when the collaborator who made the first change pulls again:
$ git pull origin main
remote: Enumerating objects: 10, done.
remote: Counting objects: 100% (10/10), done.
remote: Compressing objects: 100% (2/2), done.
remote: Total 6 (delta 4), reused 6 (delta 4), pack-reused 0
Unpacking objects: 100% (6/6), done.
From https://github.com/user/shell-script
* branch main -> FETCH_HEAD
dabb4c8..2abf2b1 main -> origin/main
Updating dabb4c8..2abf2b1
Fast-forward
user-input.sh | 2 +-
1 file changed, 1 insertion(+), 1 deletion(-)
We get the merged file:
$ cat user-input.sh
echo "What is your name?"
read name
echo "Hello $name."
#the read command requests user input, we use `$` to recall the variable established by `read`
#We removed the conflict on this line
We don’t need to merge again because Git knows someone has already done that.
Git’s ability to resolve conflicts is very useful, but conflict resolution costs time and effort, and can introduce errors if conflicts are not resolved correctly. If you find yourself resolving a lot of conflicts in a project, consider these technical approaches to reducing them:
- Pull from upstream more frequently, especially before starting new work
- Use topic branches to segregate work, merging to main when complete
- Make smaller more atomic commits
- Where logically appropriate, break large files into smaller ones so that it is less likely that two authors will alter the same file simultaneously
Conflicts can also be minimized with project management strategies:
- Clarify who is responsible for what areas with your collaborators
- Discuss what order tasks should be carried out in with your collaborators so that tasks expected to change the same lines won’t be worked on simultaneously
- If the conflicts are stylistic churn (e.g. tabs vs. spaces), establish a
project convention that is governing and use code style tools (e.g.
htmltidy,perltidy,rubocop, etc.) to enforce, if necessary
Advanced Git: Resolving without a merge commit
Use
git pull --rebaseinstead ofgit pull. If the remote has diverged from local and automerge doesn’t work, git rebase will ask you to resolve the conflict (same as git pull); you thengit addthe files with resolved conflict andgit rebase --continue(instead ofgit commit). The end result is that your local changes are applied after the commits retrieved from the remote. A tidy sequence of commits, without a merge commit. Aftergit rebase --continue, you push back to the remote.
Solving Conflicts that You Create
Clone the repository created by your instructor. Add a new file to it, and modify an existing file (your instructor will tell you which one). When asked by your instructor, pull her changes from the repository to create a conflict, then resolve it.
Conflicts on Non-textual files
What does Git do when there is a conflict in an image or some other non-textual file that is stored in version control?
Solution
Let’s try it. Suppose We takes a picture and calls it example files,
ex-files.jpg.If you do not have an image file of ex-files available, you can create a dummy binary file like this:
$ head -c 1024 /dev/urandom > ex-files.jpg $ ls -lh ex-files.jpg-rw-r--r-- 1 user 57095 1.0K Mar 8 20:24 ex-files.jpg
lsshows us that this created a 1-kilobyte file. It is full of random bytes read from the special file,/dev/urandom.Now, suppose we add
ex-files.jpgto our repository:$ git add ex-files.jpg $ git commit -m "Add picture of Martian surface"[main 8e4115c] Add picture of Martian surface 1 file changed, 0 insertions(+), 0 deletions(-) create mode 100644 ex-files.jpgSuppose that our collaborator has added a similar picture in the meantime. Theirs is a picture of the Martian sky, but it is also called
ex-files.jpg. When We tried to push, they gets a familiar message:$ git push origin mainTo https://github.com/user/shell-script.git ! [rejected] main -> main (fetch first) error: failed to push some refs to 'https://github.com/user/shell-script.git' hint: Updates were rejected because the remote contains work that you do hint: not have locally. This is usually caused by another repository pushing hint: to the same ref. You may want to first integrate the remote changes hint: (e.g., 'git pull ...') before pushing again. hint: See the 'Note about fast-forwards' in 'git push --help' for details.We’ve learned that we must pull first and resolve any conflicts:
$ git pull origin mainWhen there is a conflict on an image or other binary file, git prints a message like this:
$ git pull origin main remote: Counting objects: 3, done. remote: Compressing objects: 100% (3/3), done. remote: Total 3 (delta 0), reused 0 (delta 0) Unpacking objects: 100% (3/3), done. From https://github.com/user/shell-script.git * branch main -> FETCH_HEAD 6a67967..439dc8c main -> origin/main warning: Cannot merge binary files: ex-files.jpg (HEAD vs. 439dc8c08869c342438f6dc4a2b615b05b93c76e) Auto-merging ex-files.jpg CONFLICT (add/add): Merge conflict in ex-files.jpg Automatic merge failed; fix conflicts and then commit the result.The conflict message here is mostly the same as it was for
user-input.sh, but there is one key additional line:warning: Cannot merge binary files: ex-files.jpg (HEAD vs. 439dc8c08869c342438f6dc4a2b615b05b93c76e)Git cannot automatically insert conflict markers into an image as it does for text files. So, instead of editing the image file, we must check out the version we want to keep. Then we can add and commit this version.
On the key line above, Git has conveniently given us commit identifiers for the two versions of
ex-files.jpg. Our version isHEAD, and their version is439dc8c0.... If we want to use our version, we can usegit checkout:$ git checkout HEAD ex-files.jpg $ git add ex-files.jpg $ git commit -m "Use image of surface instead of sky"[main 21032c3] Use image of surface instead of skyIf instead we want to use their version, we can use
git checkoutwith their commit identifier,439dc8c0:$ git checkout 439dc8c0 ex-files.jpg $ git add ex-files.jpg $ git commit -m "Use image of sky instead of surface"[main da21b34] Use image of sky instead of surfaceWe can also keep both images. The catch is that we cannot keep them under the same name. But, we can check out each version in succession and rename it, then add the renamed versions. First, check out each image and rename it:
$ git checkout HEAD ex-files.jpg $ git mv ex-files.jpg ex-files02.jpg $ git checkout 439dc8c0 ex-files.jpg $ mv ex-files.jpg ex-files01.jpgThen, remove the old
ex-files.jpgand add the two new files:$ git rm ex-files.jpg $ git add ex-files02.jpg $ git add ex-files01.jpg $ git commit -m "Use two images: surface and sky"[main 94ae08c] Use two images: surface and sky 2 files changed, 0 insertions(+), 0 deletions(-) create mode 100644 ex-files01.jpg rename ex-files.jpg => ex-files02.jpg (100%)Now both images of ex-files are checked into the repository, and
ex-files.jpgno longer exists.
A Typical Work Session
You sit down at your computer to work on a shared project that is tracked in a remote Git repository. During your work session, you take the following actions, but not in this order:
- Make changes by appending the number
100to a text filenumbers.txt- Update remote repository to match the local repository
- Celebrate your success with some fancy beverage(s)
- Update local repository to match the remote repository
- Stage changes to be committed
- Commit changes to the local repository
In what order should you perform these actions to minimize the chances of conflicts? Put the commands above in order in the action column of the table below. When you have the order right, see if you can write the corresponding commands in the command column. A few steps are populated to get you started.
order action . . . . . . . . . . command . . . . . . . . . . 1 2 echo 100 >> numbers.txt3 4 5 6 Celebrate! AFKSolution
order action . . . . . . command . . . . . . . . . . . . . . . . . . . 1 Update local git pull origin main2 Make changes echo 100 >> numbers.txt3 Stage changes git add numbers.txt4 Commit changes git commit -m "Add 100 to numbers.txt"5 Update remote git push origin main6 Celebrate! AFK
Key Points
Conflicts occur when two or more people change the same lines of the same file.
The version control system does not allow people to overwrite each other’s changes blindly, but highlights conflicts so that they can be resolved.