Using DB Browser for SQLite
Overview
Teaching: 10 min
Exercises: 0 minQuestions
What does the DB Browser for SQLite allow me to do?
Objectives
Understand the layout of the DB Browser for SQLite and the key facilities that it provides
Connect to databases
Create new databases and tables
Run SQL queries
Export the results of queries
Launching DB Browser
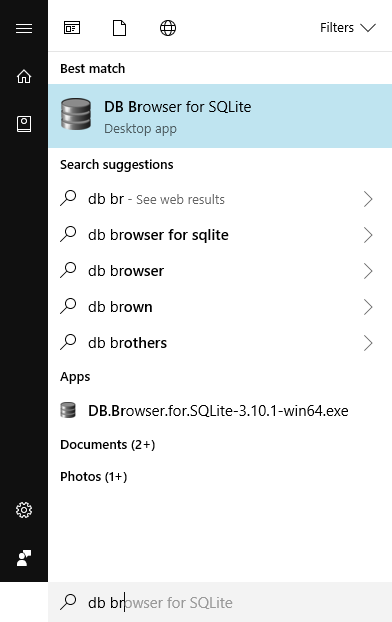
In Windows the installation of DB Browser does not create a desktop icon. To explicitly launch the application after installing it, use the windows button (bottom left of screen) and type in ‘DB Browser’ in the search bar and selecting the application when it appears.
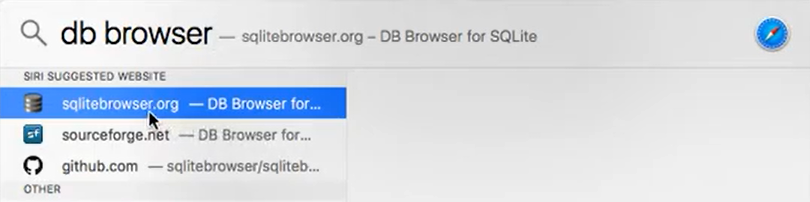
For Mac users, launch the spotlight search bar (press “command” + the space bar on your keyboard) and enter ‘DB Browser.’ Select the application when it appears.
The Initial screen
The initial screen of DB Browser will look something like this, the panes may be in a different configuration;
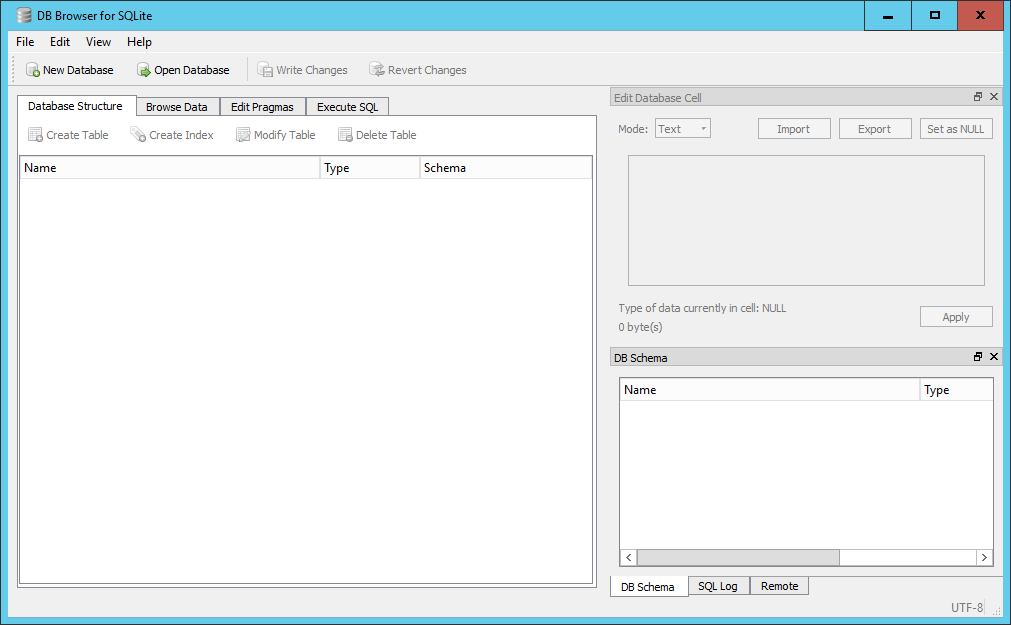
There is;
A small menu system consisting of File, Edit, View and Help. Below the menu system is a toolbar with four options; New Database, Open Database, Write Changes and Revert Changes. Below the toolbar is a 4-tabbed pane for; Database Structure, Browse Data, Edit Pragmas and Execute SQL. Initially these will be quite empty as we haven’t created or opened a database yet. In general we will see how each of these are used as we go through the lesson with the exception of the Edit Pragmas tab which deals with system wide parameters which we won’t want to change.
On the right hand side there are two further panes, at the top is the Edit Database Cell pane which is grayed out. Below it is a 3-tabbed pane for DB Schema, SQL log and Remote. We are only really interested in the DB Schema tab.
Initial changes to the layout.
The overall layout of DB Browser is quite flexible. The panes on the right-hand side can be dragged and dropped into any position, the individual tabs on the bottom pane closed directly from the pane and re-opened from the menu View item.
We will make a couple of initial changes to the layout of the screen. These will be retained across sessions.
- From the View menu item un-select the ‘Edit Database Cell’ icon to the left of the text. This will make the pane close and the bottom pane will be expanded automatically to fill the space.
- a) On Windows, From the ViewEdit menu item select ‘preferences’ and select the Data Browser tab.
- b) On Mac, From the “DB Browser for SQLite” menu item select ‘preferences’ and select the Data Browser tab.
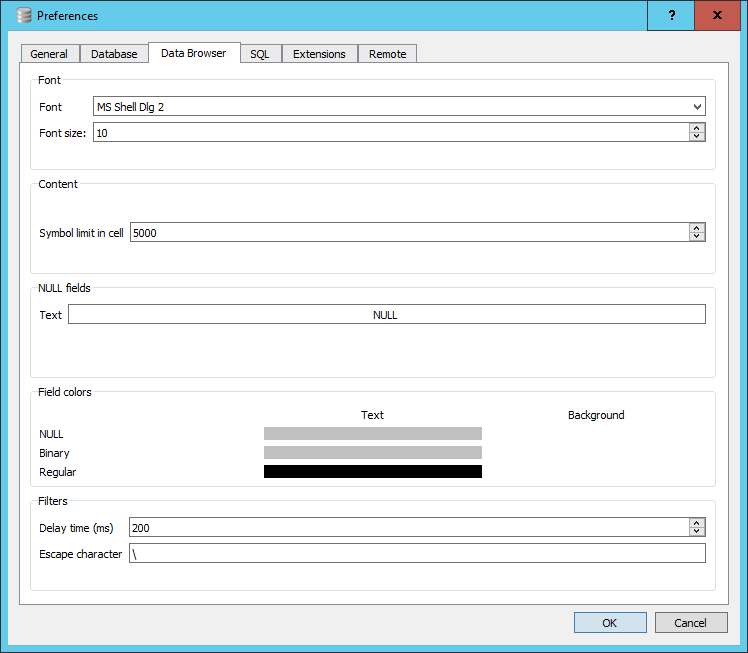
Towards the bottom there is a section dealing with Field colors. You will see three bars below the word Text, to the right there are in fact three invisible bars for the Background. Click in the area for the Background color for NULL. A colour selector window will open, select Red. The bar will turn Red. This is now the default background cell colour that will be used to display NULL values in you tables. We will discuss the meaning of NULL values in a table in a later episode.
You can now close the preference window by clicking OK.
Opening a database
One of the datasets we will be using this lesson is the SQL_SAFI database, a sample of a farm survey. If you do not already have a copy of this database you can download it from here.
To open the database in DB Browser do the following;
- Click on the ‘open database’ button in the toolbar.
- Navigate to where you have stored the database file on your local machine, select it and click open.
When you open the database, the ‘Database Structure’ tab on the left and the ‘DB Schema’ pane on the right will look very similar. However the ‘DB Schema’ pane is only there to allow you to see the details of the schema for the tables. In particular what tables are in the database and the fields and their types which are in each table.
The ‘Database Structure’ tab on the left allows you to initiate actions on the tables. If you right click on a table name in the ‘DB Schema’ pane, nothing happens. However, if you do the same in the ‘Database Structure’ menu you will be given a set of possible actions. These are the same actions that are available from the toolbar at the top of the tab.
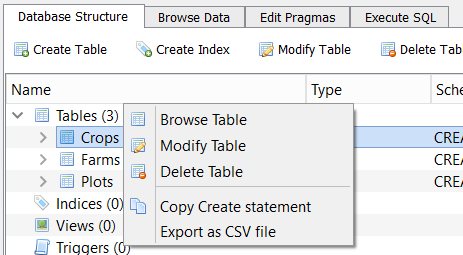
If you select ‘Browse Table’, the data from the table is loaded into the ‘Browse Data’ pane from where it can be examined or filtered. You can also select the table you wish to Browse directly from here.
There are options for ‘New Record’ and ‘Delete Record’. As our interest is in analysing existing data not creating or deleting data, it is unlikely that you will want to use these options.
Running SQL Queries
We will be running queries extensively in future episodes. For now we will just provide an outline of the environment.
In the left hand pane if you select the Execute SQL tab, you will be presented with a three paned window and a small toolbar. The top pane is itself tabbed with the initial tab labeled ‘SQL 1’. This is the SQL editor pane into which you will type your queries.
Below is a simple example query and the results.
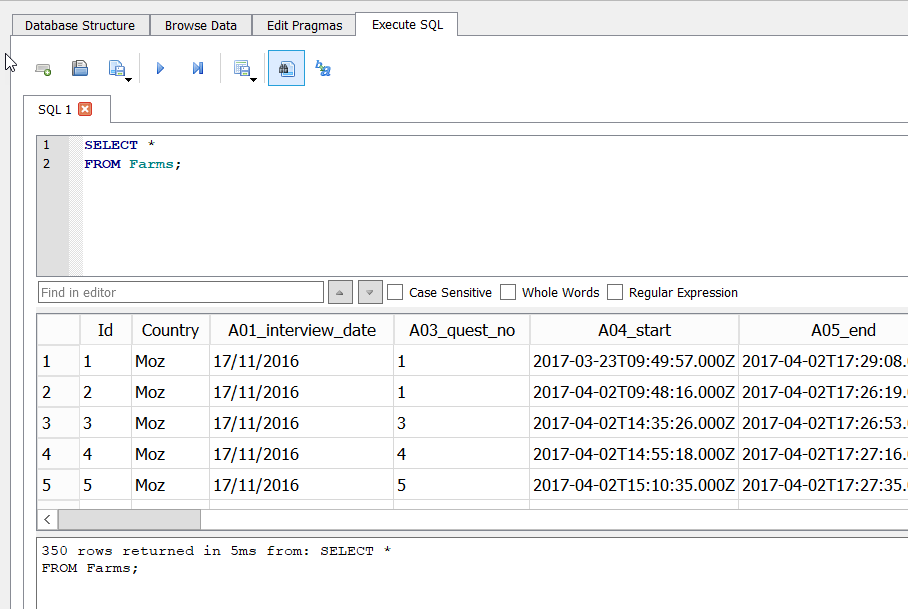
Notice that the query has been written over multiple lines. This is commonly done to aid readability. The second pane has the tabular results, and the bottom pane has a message indicating how many rows were returned, how long it took and a copy of the SQL statement that was executed.
On the toolbar at the top there are eight buttons. Left to right they are:
- Open Tab (creates a new tab in the editor)
- Open SQL file (allows you to load a prepared file of SQL into the editor - the tab takes the name of he file)
- Save SQL file (allows you to save the current contents of the active pane to the local file system)
- Execute SQL (Executes all of the SQL statements in the editor pane)
- Execute current line (Actually executes whatever is selected)
- Save Results (Either to a CSV file or as a database view. We will look at views in a later episode)
- Find (Text in the editor window)
- Find & Replace (Text in the editor window)
Because it is possible to have and execute multiple SQL statements in the same editor pane, each must be terminated with a ‘;’. If you only have a single statement you don’t need it, but it might be considered best practice to always include it.
The pane below the editor is the Results pane. The results of running your query will appear here in a simple tabular format. The bottom pane is for messages about the execution, either an error message or an indication of how many rows were returned by the query.
Explore another Table
1. What would be the SQL query to select all the entries from "crops_rice_old"? 2. How many entries are in the "crops_rice_old" table? 3. What information do you think "Plot_Id" represents?
Solution
169 observations
Select * from crops_rice_old;
Creating a database
As well as opening (connecting) to existing databases it is also possible to create new SQLite databases and tables using DB Browser.
To create a database click the New Database button from the main toolbar (also available from the File menu). You will initially be asked for a name for the database and where you want to save it. It is saved as a single file. You can choose your own extension but ‘sqlite’ is recommended. If you do not provide a default, then a ‘.db’ extension will be used. Although the new database is empty, in that there are no tables in it, the .sqlite file itself is not empty.
Once you have saved the database file the Create Table wizard will open allowing you to create a table. You can cancel this as we will be going through the create table process in a later episode.
Write Changes & Revert Changes
Much of our SQL work involves looking at existing data using SQL queries and possibly writing out the results to a CSV file, in general we will not be changing the contents of the database.
However if, during your DB Browser session, you were to create or delete a table or create a view, then the changes are not automatically written to the database file.
When you try to end the session (i.e. close the application) in which you have made such changes, then you will be asked if you want to save the changes you have made. Alternatively you can explicitly save changes or revert changes during a session by use of the Write Changes and Revert Changes buttons on the toolbar. Once written the changes are permanent (there is no concept of multiple ‘undo’ like you might have in other programs). Revert Changes will take you back to the last Written copy.
Key Points
The DB Browser for SQLite application allows you to connect to an existing database or create a new database
When connected to a database you can create new tables
When connected to a database you can write and run SQL queries and view the results
You can save the results of a query to a file