Introduction to Python
Overview
Teaching: 15 min
Exercises: 0 minQuestions
Why learn Python?
What are Jupyter notebooks?
Objectives
Appreciate the benefits of the Python programming language
Understand the concept and benefits of using notebooks for coding
Introducing the Python programming language
Python is a general purpose programming language. It is an interpreted language, which makes it suitable for rapid development and prototyping of programming segments or complete small programs.
Python’s main advantages:
- Open source software, supported by Python Software Foundation
- Available on all major platforms (Windows, macOS, Linux)
- It is a good language for new programmers to learn due to its straightforward, object-oriented style
- It is well-structured, which aids readability
- It is extensible (i.e. modifiable) and is supported by a large community who provide a comprehensive range of 3rd party packages
Interpreted vs. compiled languages
In any programming language, the code must be translated into “machine code” before running it. It is the machine code which is executed and produces results. In a language like C++ your code is translated into machine code and stored in a separate file, in a process referred to as compiling the code. You then execute the machine code from the file as a separate step. This is efficient if you intend to run the same machine code many times as you only have to compile it once and it is very fast to run the compiled machine code.
On the other hand, if you are experimenting, then your code will change often and you would have to compile it again every time before the machine can execute it. This is where interpreted languages have the advantage. You don’t need a complete compiled program to “run” what has been written so far and see the results. This rapid prototyping is helped further by use of a system called REPL.
REPL
REPL is an acronym which stands for Read, Evaluate, Print and Loop.
REPL allows you to write single statements of code, have them executed, and if there are any results to show, they are displayed and then the interpreter loops back to the beginning and waits for the next program statement.
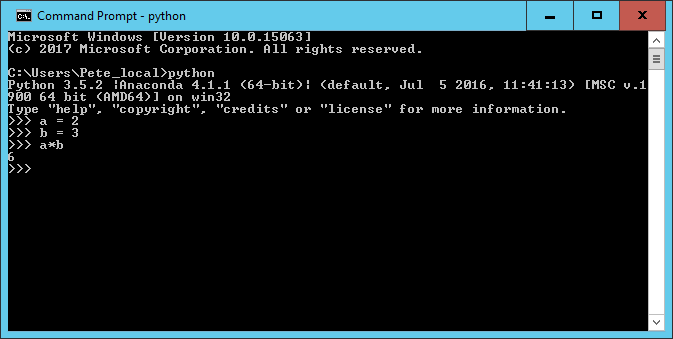
In the example above, two variables a and b have been created, assigned to values
2 and 3, and then multiplied together.
Every time you press Return, the line is interpreted. The assignment statements don’t produce any
output so you get only the standard >>> prompt.
For the a*b statement (it is more of an expression than a statement), because
the result is not being assigned to a variable, the REPL displays the result of
the calculation on screen and then waits for the next input.
The REPL system makes it very easy to try out small chunks of code.
You are not restricted to single line statements. If the Python interpreter
decides that what you have written on a line cannot be a complete statement it
will give you a continuation prompt of ... until you complete the statement.
Introducing Jupyter notebooks
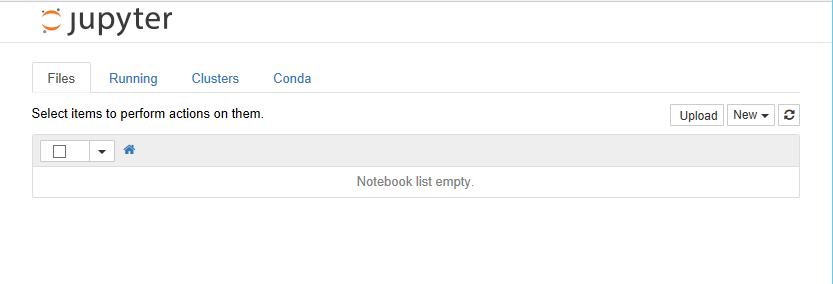
Jupyter originates from IPython, an effort to make Python development more interactive. Since its inception, the scope of the project has expanded to include Julia, Python, and R, so the name was changed to “Jupyter” as a reference to these core languages. Today, Jupyter supports even more languages, but we will be using it only for Python code. Specifically, we will be using Jupyter notebooks, which allows us to easily take notes about our analysis and view plots within the same document where we code. This facilitates sharing and reproducibility of analyses, and the notebook interface is easily accessible through any web browser. Jupyter notebooks are started from the terminal using
$ jupyter notebook
Your browser should start automatically and look something like this:
When you create a notebook from the New option, the new notebook will be displayed in a new browser tab and look like this.
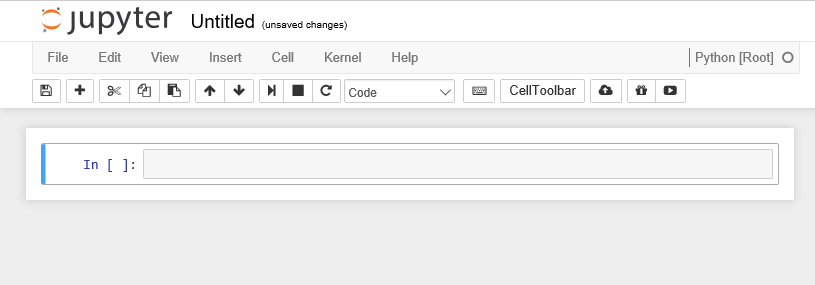
Initially the notebook has no name other than ‘Untitled’. If you click on ‘Untitled’ you will be given the option of changing the name to whatever you want.
The notebook is divided into cells. Initially there will be a single input cell marked by In
[ ]:.
You can type Python code directly into the cell. You can split the code across several lines as needed. Unlike the REPL we looked at before, the code is not interpreted line by line. To interpret the code in a cell, you can click the Run button in the toolbar or from the Cell menu option, or use keyboard shortcuts (e.g., Shift+Return). All of the code in that cell will then be executed.
The results are shown in a separate Out [1]: cell immediately below. A new input
cell (In [ ]:) is created for you automatically.
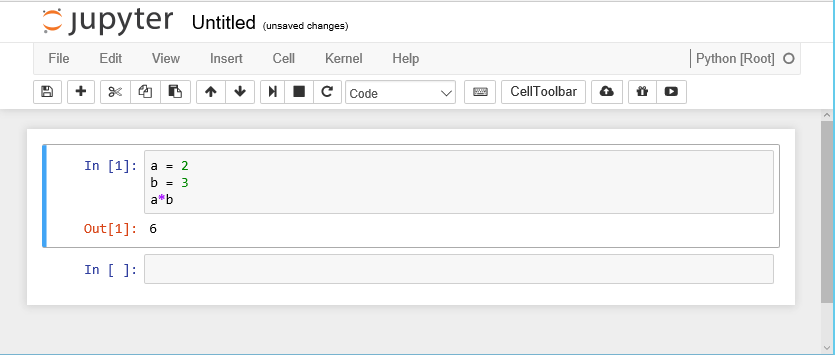
When a cell is run, it is given a number along with the corresponding output
cell. If you have a notebook with many cells in it you can run the cells in any
order and also run the same cell many times. The number on the left hand side of
the input cells increments, so you can always tell the order in which they were
run. For example, a cell marked In [5]: was the fifth cell run in the sequence.
Although there is an option to do so on the toolbar, you do not have to manually save the notebook. This is done automatically by the Jupyter system.
Not only are the contents of the In [ ]: cells saved, but so are the Out [ ]: cells.
This allows you to create complete documents with both your code and the output
of the code in a single place. You can also change the cell type from
Python code to Markdown using the Cell > Cell Type option. Markdown is
a simple formatting system which allows you to create documentation for your
code, again all within the same notebook structure.
The notebook itself is stored as specially-formatted text file with an .ipynb
extension. These files can be opened and run by others with Jupyter installed. This allows you to
share your code inputs, outputs, and
Markdown documentation with others. You can also export the notebook to HTML, PDF, and
many other formats to make sharing even easier.
Key Points
Python is an interpreted language
The REPL (Read-Eval-Print loop) allows rapid development and testing of code segments
Jupyter notebooks builds on the REPL concepts and allow code results and documentation to be maintained together and shared
Jupyter notebooks is a complete IDE (Integrated Development Environment)